|
Things in our life sure do change and grow!
For a current (2026) update on our much expanded AE system go to the
bottom of
this page. But meantime, this is where we started! |
|
1983 - Our first solar electric PV panels! |
1985 - Finally on the finished House |
|
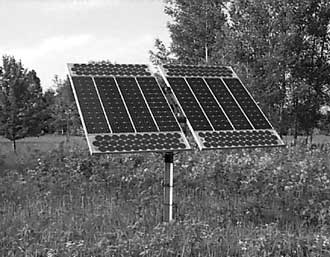
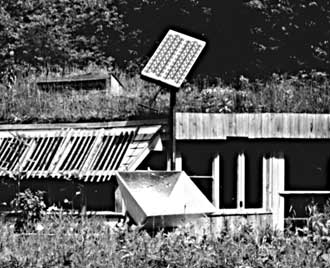 1987
- Homemade Tracker |

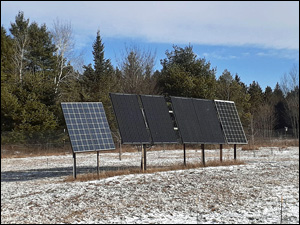
1993 - The Array Grows |
|

1994
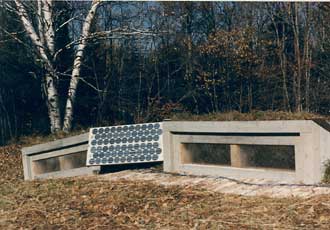
our "new" (used) Solar Heating Panels |
1996 - and Grows |
|
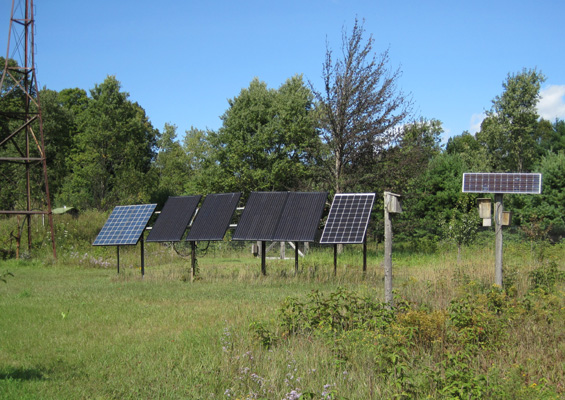
1997 - the trees in front of the house grew
(surprise!) so the array had to move. Might as well add a few more panels while
we're at it. |
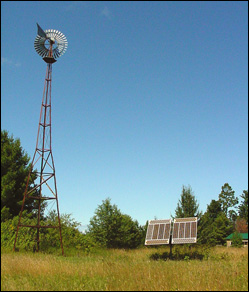
Windmill & Solar Panels - 2000
|

Inverter in Entryway (much quieter!) - 2004 |

System control center - 2006
. |
|
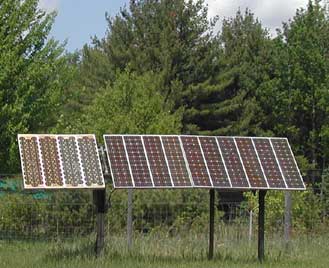
2007 - always room for a few more, especially for
these used, repurposed panels from a large dismantled commercial array in the
Southwest. They had many more years of life in them and we appreciated the
addition to our power. . |
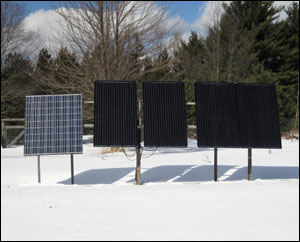
2015 - Time for newer, more powerful panels -- Four 250-watt Solar World panel plus two Kyocera 135-watt
panels for a total of 1,135 watts at 24 volts. (Some of our old
panels were passed on to someone else who was just beginning their
solar adventure! Plus, a few of them have found use here and there
on the homestead). |
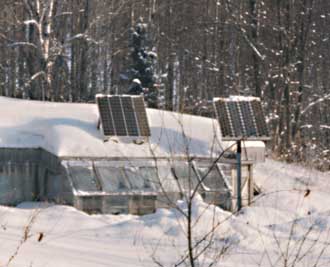
February 27, 2019 - Another upgrade -- New Solar panel finally mounted - in
the snow
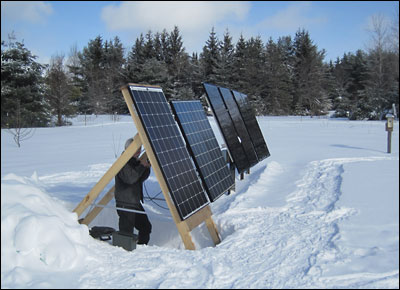
Last fall a friend gave us a good deal on one of the last Solar World
300-watt panels but we didn't get it installed before the snows came. The
other day I (Steve) decided it was time to get it out in the sun where it can help
us out during the coming cloudy days.
The new panel will add about
20% to our charging capacity; up from 1135 to 1435 watts. We'll notice the
increase in power mostly on cloudy days. The temporary mount is made from
poplar 2x4's and four aluminum angle brackets. I had to dig 2-1/2 feet down
to find the ground. I was going to adjust it a little but the bases are
frozen in the snow already so it is there until spring - which may
be some time in April. We had a high temperature near 20 degrees today but
the sun was out and the wind was light so it was a fun project.
|
|
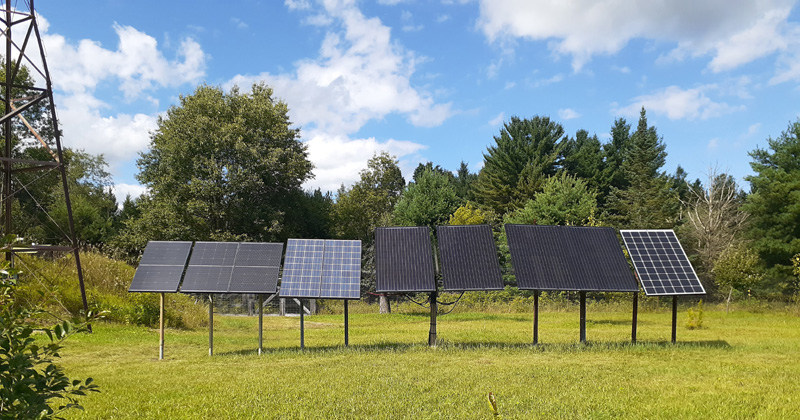
2020 - an abundance of power |
For those cloudy short days of early winter |
Fall/Winter 2019 Update
In the summer 2019 we
noticed that our solar system didn't seem to be fully charging the
batteries as it should. We checked the
batteries periodically throughout the fall and early winter and made
some adjustments to the controller. Over a period of several months
there seemed to be a significant loss of battery capacity so we
decided to install one more 300 watt panel and replace the controller.
The existing controller, a Solar Boost 50 was probably working fine
but the new panel made the array too large for the 50 amp
controller. The new one is an Outback
FlexMax-80. The increase in capacity was welcome and the Outback controller
setup is more user
friendly.
At that time we also hooked up a battery desulfator
with the hope that it might help bring
those tired Lead Acid batteries back to life. The combination
of the additional panel, new controller and modified settings on the
diverson controller worked well and the batteries recovered and
served us well until the fall of 2021.
|
|
Fall 2021 -- A Big Change
As we were approaching winter it became evident that our old lead-acid
deep cycle batteries (the red-topped ones in the photo) weren't going to
have the ability to get us through those long
dark days and nights. Those 12 6-volt batteries were installed in
December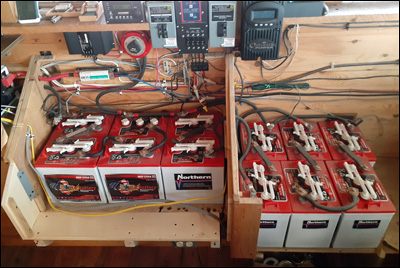 of 2015 so they gave us good service for over five years -
which is about average for that type of battery in a system like ours.
At a cost of about $1,200 that worked out to an 'electric bill' of less
than $20 per month for the last 5+ years. After doing lots of
research we decided it was time to upgrade our system to Lithium Iron
Phospate (LiFePo4) batteries.
of 2015 so they gave us good service for over five years -
which is about average for that type of battery in a system like ours.
At a cost of about $1,200 that worked out to an 'electric bill' of less
than $20 per month for the last 5+ years. After doing lots of
research we decided it was time to upgrade our system to Lithium Iron
Phospate (LiFePo4) batteries.
 Although
the new batteries cost significantly more than our old set they should
have a longer lifespan than the lead-acid batteries and outperform them too. If we take care
of them these new batteries should last at least 15 years and perhaps as
long as 20 years. They will also provide almost three times the usable
storage. Although
the new batteries cost significantly more than our old set they should
have a longer lifespan than the lead-acid batteries and outperform them too. If we take care
of them these new batteries should last at least 15 years and perhaps as
long as 20 years. They will also provide almost three times the usable
storage.
Another advantage of these batteries is that there are
only six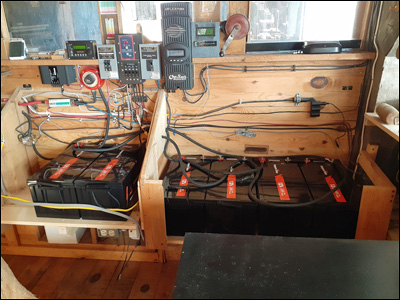 of them and they each weigh noticeably less than the old ones. The
installation went well and the solar charge controller and
inverter/charger settings have been updated. It has been fun watching
the meters which have been confirming that the batteries are performing
as expected.
of them and they each weigh noticeably less than the old ones. The
installation went well and the solar charge controller and
inverter/charger settings have been updated. It has been fun watching
the meters which have been confirming that the batteries are performing
as expected.
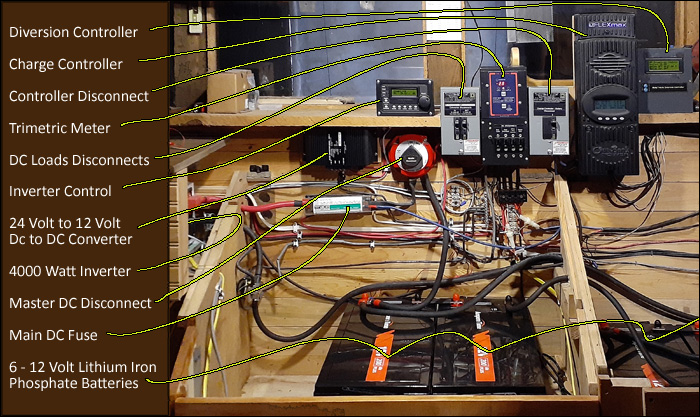
2021 AE System Components
Here
are the current (2021) components in our system:
· 4 -
250-watt Solar World panels
· 1 - 300-watt Solar World
panel
· 2 - 135-wat 12 volt Kyocera panels in series
Total charging capacity = 1435 watts
· Outback
FlexMax-80 charge controller
· Magnum 4000 watt, 24
volt sine wave inverter
· Samlex 20 Amp 24 volt DC
to 12 volt DC converter
· Trimetric Volts/Amps/AmpHrs
Meter
· Homemade Arduino microcontroller-based
diversion controller
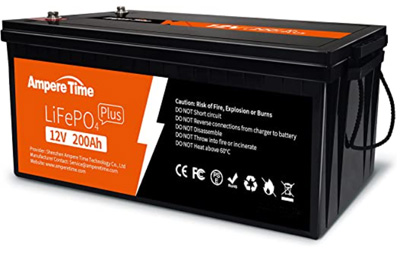
· 6 - Ampere Time 12-volt, 200 AmpHr
Lithium Iron Phosphate batteries
(3 sets of
2 batteries for 660 AmpHrs at 24 volts)
· Appropriate fuses, circuit breakers and disconnects
(updated
12/2021 ss)
|
|
2025 -- So Many Changes in Just the last Four Years
The technology and equipment of solar electric systems keeps changing and
advancing and we have benefitted by those changes, allowing upgrades to our
power system that we had never envisioned several decades ago. We certainly
never thought we would be thinking, planning for, and using such unheard of uses
(in the "old" days) such as electric stove, electric oven, even electric heat on
the small homestead! Our first PV panels were 32 watts 12 volt panels ($400
each) -- our newest 200 watt 24 volts (at $160 each!). I now often cook on a
(small) electric burner, and use a likewise small counter-top electric
convection oven. We
even use small electric heaters when we have enough power. And this year another
very big change when we retired our venerable and much loved water-pumping
windmill and installed an electric deep-well pump. We're enjoying it all.
We still live in the Upper Midwest with low sun in the winter so we do manage
our lives around that. But living with Nature and her many faces of weather is
part of what we love about living here. And the upgrades keep coming, thanks to
Steve's ability to do all the work involved in working them into our 45 years of
ever-changing power system. So for now, more batteries, more panels in the
ever-expanding array, new equipment in the control arena, and new plans and
ideas for next year!
|
|
May 6, 2026 -- Snow is Gone
- Spring Projects Begin!
It doesn't take long to become
immersed in outdoor Spring projects. Steve's "project" is, and has
been, multi-faceted, starting this winter when he realized he could
make a significant expansion to our solar power system with a few
new components, and a whole lot of work. So he spent many hours
designing the changes before hands-on work could begin with the
warmer weather. First was to design and then build a new rack for
the four new solar panels to be added. My only contribution was to
help install the panels, a fun part of the project. [mmm, now
that I think of it, I did get to help haul the new panels down to
the house, on a slightly overloaded sled, when they arrived last
month while we still had a lot of snow on the ground. Putting them
up was a lot easier!]. It's quite a collection of PV
panels now, one we certainly didn't envision when we bought our
first two panels 45 years ago!
.
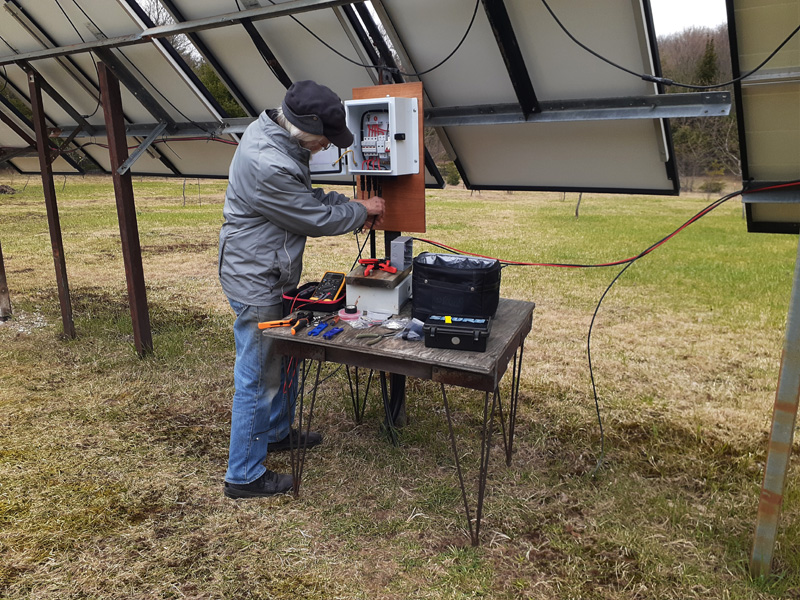
June 9, 2026 --
Steve's report on the Spring, 2026 Upgrade
We may well have made our final
upgrade to our solar array.* We currently have about 2200 Watts of
solar capacity up on the hill. -- Click any
image for larger view --
Here's a summary of the
latest changes to our system:
-
Added 4 BougeRV 200-watt,
24-volt bifacial panels
-
Re-wired the array output
from 24 volts to 110 volts DC
-
Upgraded inside circuit
breakers and wiring.
-
Added a comprehensive
battery/system monitor
-
Added a active battery
balancer
-
Added a custom temperature
control to the charge controller
-
Added a circuit for 24-volt
mini split heat pump
Some details of these changes:
-
One More Rack: I designed and built a rack
to hold these 4 new panels (Group#1 below). Three of them are
wired in series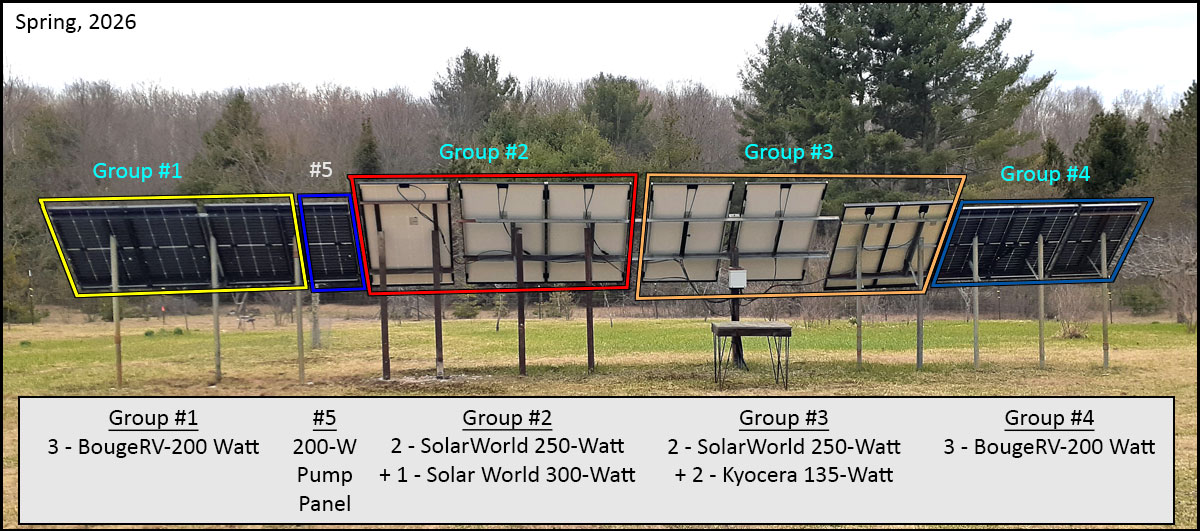 and incorporated into our main array wiring. The
fourth panel is wired into a separate one-panel circuit that
drives the DC submersible pump that supplies all of our water.
and incorporated into our main array wiring. The
fourth panel is wired into a separate one-panel circuit that
drives the DC submersible pump that supplies all of our water.
-
Array Reconfiguration:
Our array was previously
wired with all panels in parallel (except for 2 Kyocera
135-watt, 12-volt panels which were wired in series) which
resulted in a pretty high amperage output (over 60 amps) at around
37 volts DC. This was the easiest way to add panels over the
years but definitely not the most efficient because of voltage
loss over the 400' cable run down to the house.
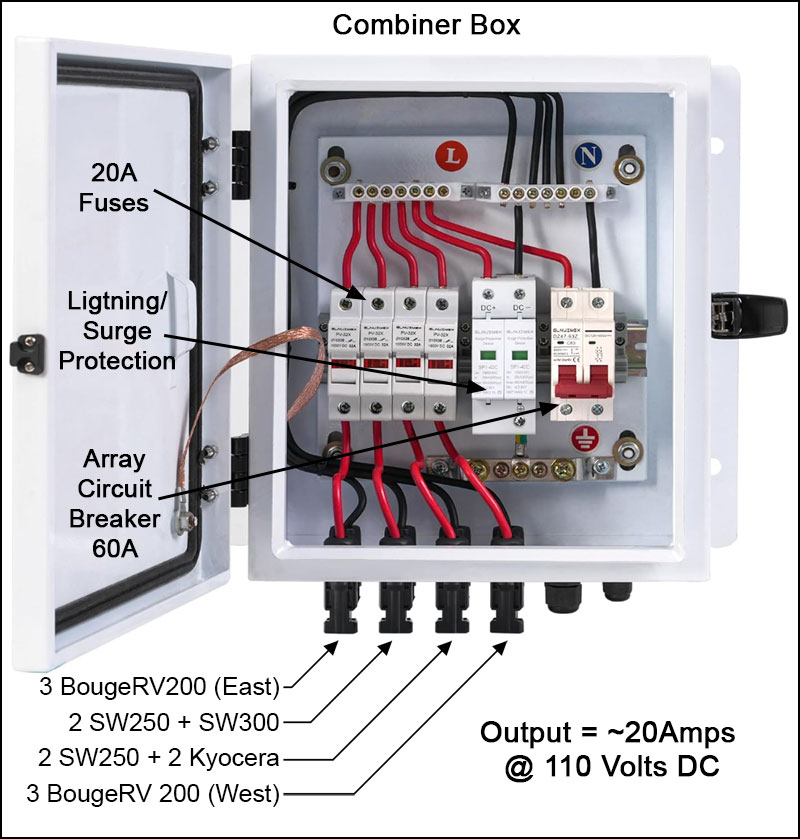
The
array is now configured into four groups of panels each
outputting approximately 110 volts. These four groups are
conveniently wired together in a nice, weatherproof combiner box
that also includes a fuse for each group, lightning/surge
protection and a master circuit breaker/cut-off switch.
The voltage drop at this higher voltage is significantly
less that our prior setup.
-
Inside Wiring:
The 60-amp
input breaker at the house used to get hot on sunny days, a sure sign of
inefficiency. With the new configuration we were able to replace
it with a 30-amp breaker - that doesn't even get warm. The
output from the charge controller now peaks at 80 amps (the
controller's maximum output capacity) so I had to replace the #6 wiring
with #4 copper cable and replace the output breaker with one
rated for 100 amps. Everything is now running cool and
efficient!
Last fall I re-wired the battery bank so that
each of the four pairs of 200 Ah batteries is individually wired
to high-current rated buss bars. The #4 cable from the
controller's output breaker goes directly to those buss bars.
Much cleaner than our previous setup.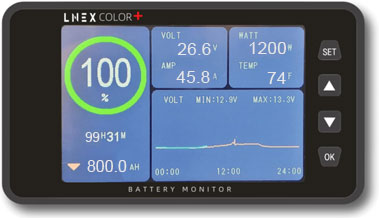
-
Battery Monitor: Our old Tri-Metric battery
monitor is still there to keep us honest but it was time to get
more information on the functioning of our system. This LNEX
monitor has worked flawlessly, is easy to read and understand. I
have been specifying this monitor for all of my off-grid
installations.
-
Battery Balancer: One of the few
vulnerabilities of Lithium Iron Phosphate batteries is that if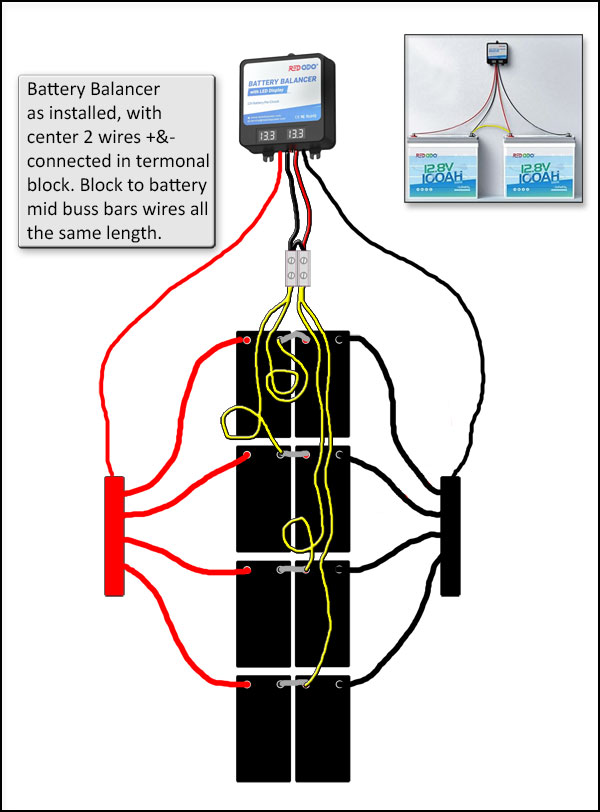 they are wired in series, over time they can become unbalance
(have slightly different voltages). This can cause them to be damaged by the resulting
inconsistent charging - some will become over-charged, some
under-charged. We installed a Redodo active battery balancer
that constantly monitors the batteries voltages and sends out a
correcting charge if it
detects any variations. I'll still monitor the individual
batteries' voltages annually but I suspect that all will be the
same. Click the image to see a larger view.
they are wired in series, over time they can become unbalance
(have slightly different voltages). This can cause them to be damaged by the resulting
inconsistent charging - some will become over-charged, some
under-charged. We installed a Redodo active battery balancer
that constantly monitors the batteries voltages and sends out a
correcting charge if it
detects any variations. I'll still monitor the individual
batteries' voltages annually but I suspect that all will be the
same. Click the image to see a larger view.
-
Controller Temperature
Control: Our Outback FlexMax 80 solar charge controller is
unique in that it is designed to handle being 'over-paneled'. It
is limited to output a maximum of 80 amps which at our charged
battery voltage of about 27 volts is 2200 watts of solar input.
It knows how to limit its input to keep itself safe. I've
configured our array to put out over 2400 watts on a cold, sunny
day. Even with the long-run voltage drop we are often seeing a
full 80 amps of output to the batteries. The excess energy
combined with the normal controller operation produces heat and
the controller's powerful cooling fan cycles on. That fan is
pretty noisy so I installed a second, speed-controlled fan that
is ducted into the bottom of the controller's housing and a
programmable thermostat with a remote sensor. Thee new, quiet fan
comes on early in the heating cycle and can be programmed to
keep the unit cool enough that the loud fan seldom comes on.
Total cost, $26 which includes both a spare fan and thermostat.
My kind of project!
-
Heat Pump Circuit:
As I write this we are in the final phase of installing a
mini-split heat pump to provide a little firewood gathering
relief. This is a 24-volt DC unit so it is more efficient than a
normally powered AC unit since it bypasses the inverter. The
circuit has its own breaker and a voltage controlled disconnect
that prevents the unit from over-draining the battery. To keep
line losses to a minimum I ran about 40' of #6 wire. This has
been a learning adventure for us since HVAC doesn't easily
translate into conventional homestead language.
That's it for
today's report. All's well on the homestead!
. * Ha! Probably not.
|
|
EXTRA!
An alternative energy client and friend hired me to
design a major upgrade to his solar-powered full house, off-grid system. As part
of that project I designed a relatively easy-to-build solar panel rack made from
locally available treated lumber. Each rack is designed to hold 2 BougeRV 200-Watt,
24-Volt panels. His new system uses 10 of these panels so he will be building
five 2-panel racks. A major design requirement was that the panels have an
adjustable tilt from 45° to 0° (vertical) so they would shed snow better. The
original plans included detailed sourcing, mostly from Menards, a local lumber &
hardware supplier; the plans linked here have been cleaned up a bit to make them
easier to read.
[ View wood
solar rack plans ]
* * * * * *
Copyright © by Susan Robishaw & Steve Schmeck
|
Our favorite sources for alternative energy
information are...
Home Power Magazine, POB 520,
Ashland OR 97520, 916-475-0830
http://www.homepower.com
THE print source on alternative energy; it was the first
and is still the best.
Midwest Renewable Energy Association, 7558 Deer Rd, Custer WI 54423,
715-592-6595, info@the-mrea.org,
https://www.midwestrenew.org
MREA is responsible for the largest and oldest renewable energy fair the third weekend
in June (Solstice Weekend). Highly recommended if you are at all interested in
alternative energy or alternative lifestyles and ideas.
Backwoods Solar Electric Systems, 1589
Rapid Lightning Rd, Sandpoint, Idaho 84864, 208-263-4290,
http://backwoodssolar.com/
Good folks, good information, good prices. We've dealt with them for many, many
years and send people to them regularly. Check them out.
|