|
A great quartet of main players is the heart of our homestead - the land, the
house, the solar system, and the all important well, pump, and water pumping windmill. It was the
first big project, starting before we moved when we still lived in the city. It
was, has, and continues to be a big part of our lives, not only for the
practical and much appreciated pumping of our water but for its aesthetics, too.
We love the look of it. For almost 50 years it has been a big part of our lives
so it was a great surprise
to me to find, when I went to add something to the "windmill page" that there
wasn't one. How could that be? Something so important to us! With all the many,
many pages on our website there was not one for our wonderful windmill. Now there
is...
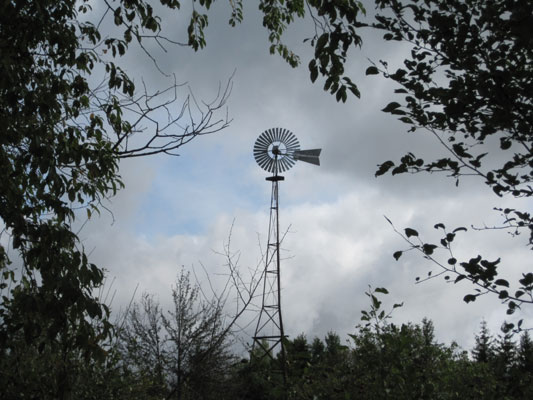
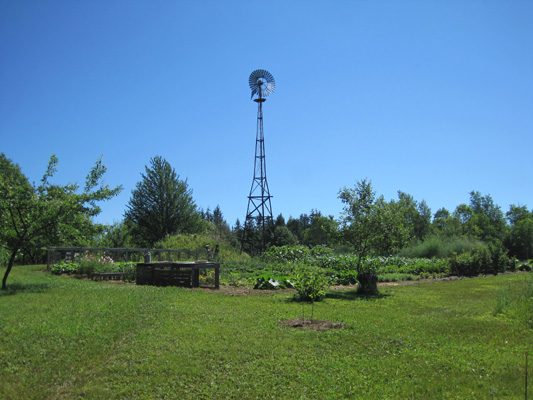
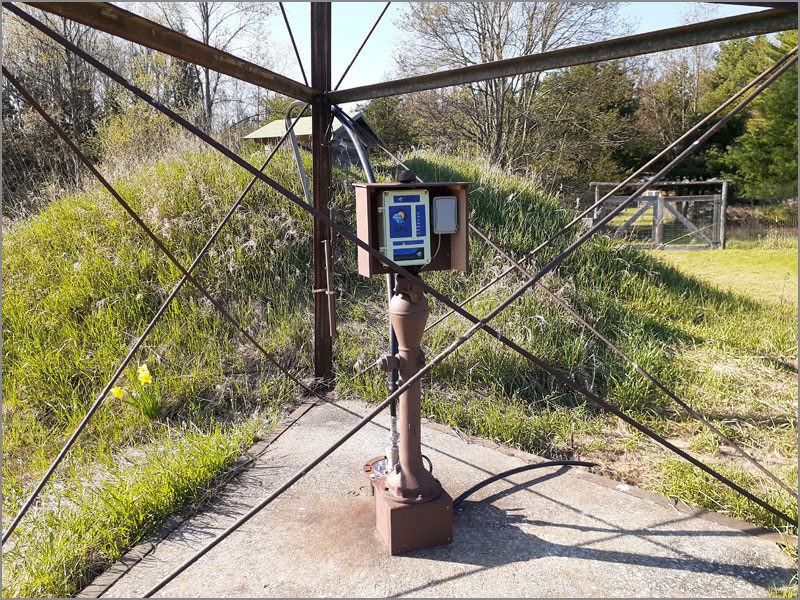
Water Pumping Windmill 1978 - 2025
The full story is in our "Homesteading Adventures" book (we didn't neglect it
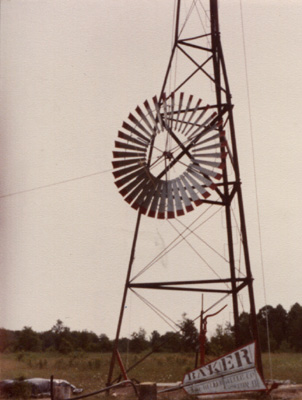
there!) but the basic story is we bought a fresh, new 8 foot Heller-Aller Baker 'Runs in Oil'
windmill and a beautiful red Monitor pump direct and in person from the Heller-Aller Factory in 1976,
after we bought the land and had the well drilled (105 feet deep) but before we
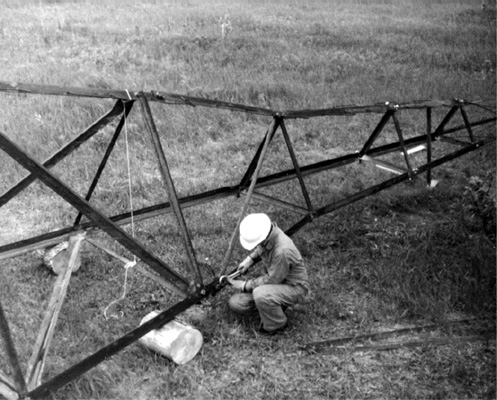
moved. That winter we put together half of the fan and it was an impressive part of
the decor in our living room (well, we liked it). Many adventures are attached
to the whole system, with a re-purposed abandoned power tower bought from a
friend, a 1200 gallon tank for water storage, pump rod and pipe and all that.
Great memories (some are more fun from a distance in time!). But all these many
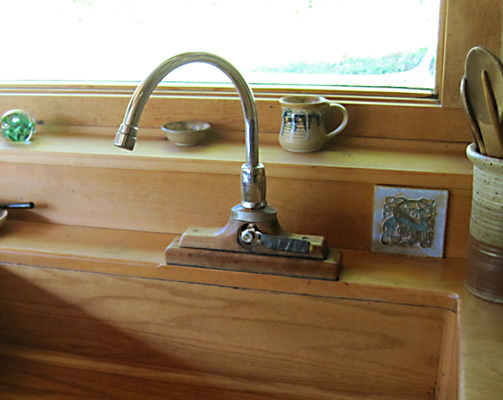
years later the system still works and we daily appreciate that wonderful great
cold well water coming out of the tap in the house, arriving from some 400 feet away
where it is pumped from the ground into the tank by the now faded but still
running Baker Water Pumping Windmill.
Some photos and highlights follow, along with more recent adventures with this
basic, not-so-simple homestead water system.
|
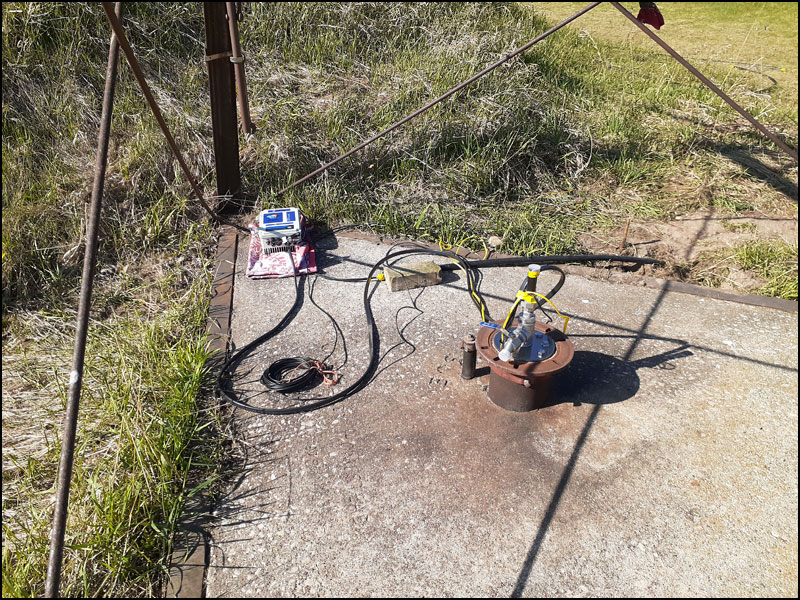
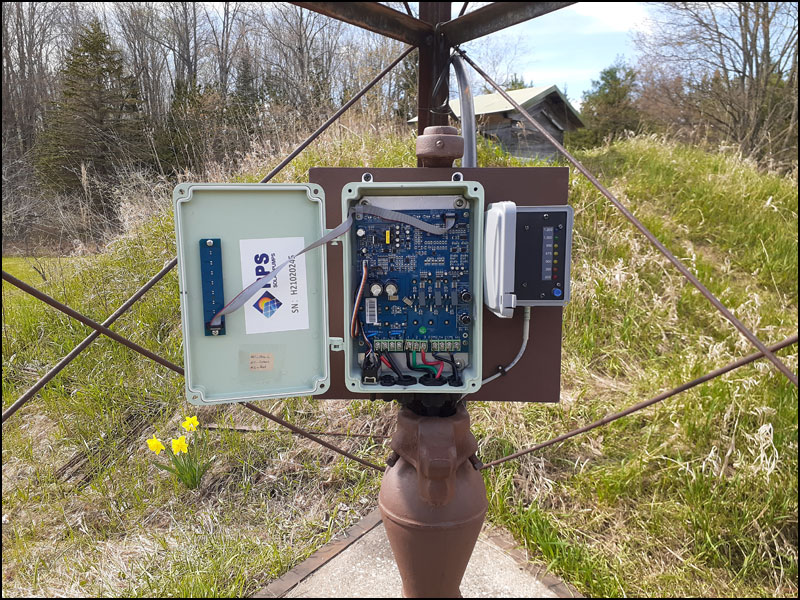
PUMP ADVENTURE (Again) - February 27, 2017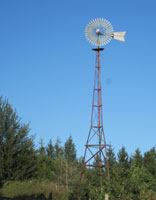
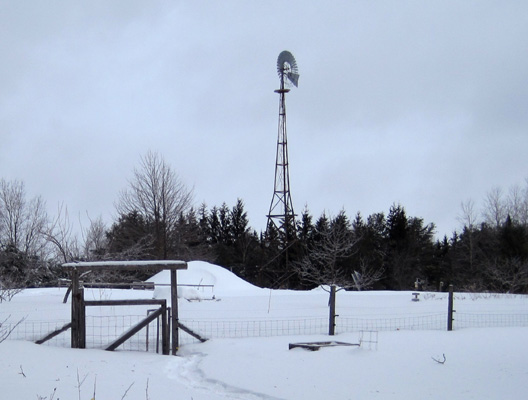
Last week during that extended warm spell we had some days of good wind so we
could pump water with our windmill. The water is pumped into a nearby 1200 gal
tank (earth covered) and in the winter we can only pump when temps are above
freezing, and, of course, when we have a good but not gale force winds. We fill
the tank in late fall/early winter before temperatures drop and then usually a
few days during winter to top it up. This year we had ample opportunity. We
thought. So when it was both warm and windy we turned the windmill on and let it
pump for a few days. The level in the tank was down to less than 400 gals so we
were happy for the pumping weather. When we checked the water level again,
expecting to have pumped at least 200 gals, we found it had added only about 20
gals. Sigh...
 We’d
been here before, many, many times over our 40 years here. We knew what was
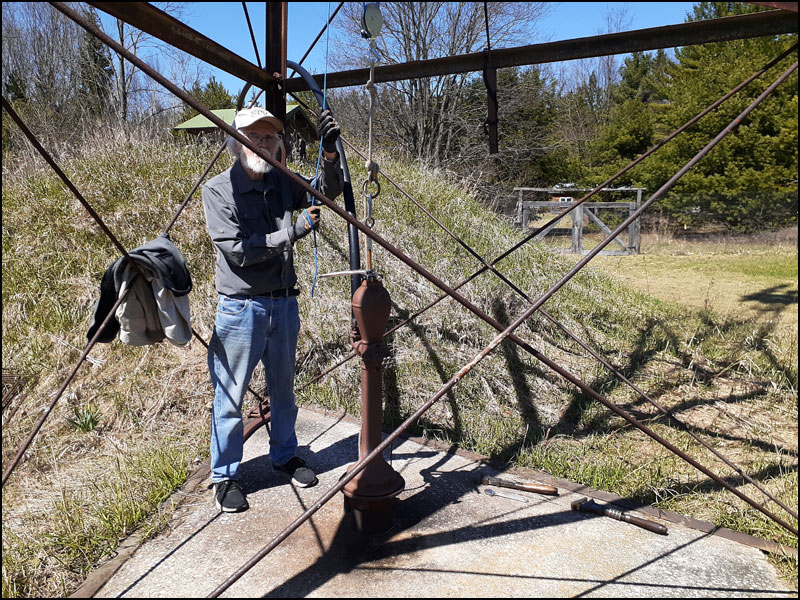
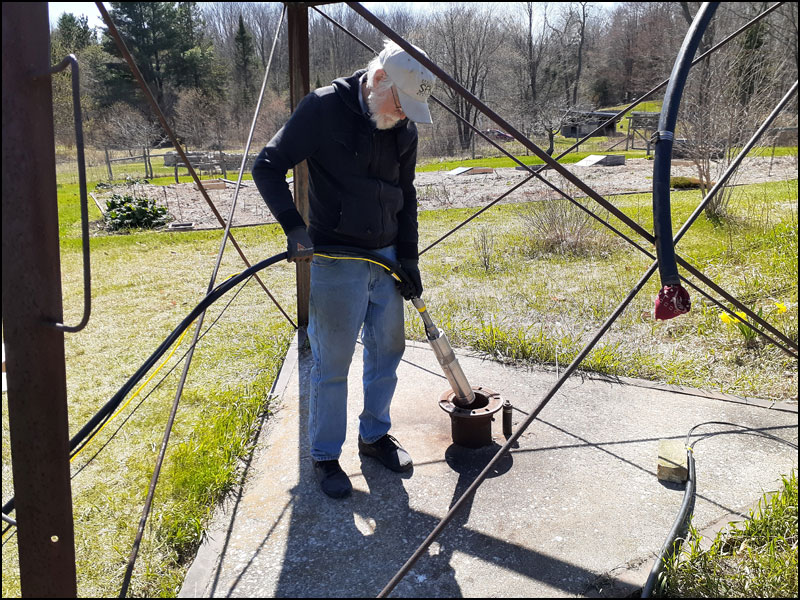
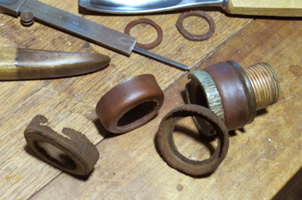
wrong, and what needed to be done. Leathers. Our pump is rather like an
oversized old fashioned
“pitcher pump” but a deep well version with leathers since our well is 105 ft deep.
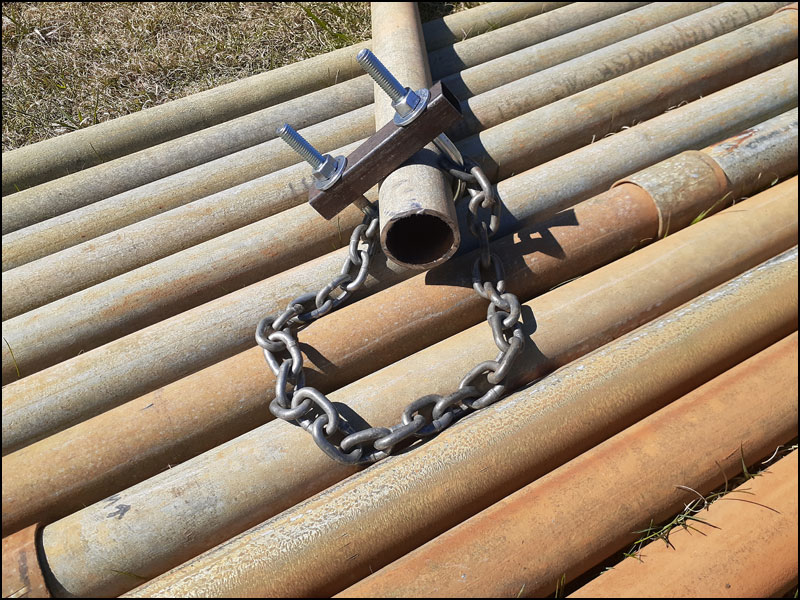
We can pump it by hand but we much prefer the windmill do that job. At the
bottom of the drop pipe is a brass cylinder, and inside that runs the
leathers assembly attached to about 95 feet of 3/8” stainless steel rod in
12 ft sections. It really works very well. But we have hard water, very
tasty but full of minerals that coat the rod and eventually trickle down to
lodge in the leathers. Which spreads them out, wears them out, and can jamb
up the whole business. In this case, the main leather had worn through and
the water was simply not being pumped up to go into our tank. We’d
been here before, many, many times over our 40 years here. We knew what was
wrong, and what needed to be done. Leathers. Our pump is rather like an
oversized old fashioned
“pitcher pump” but a deep well version with leathers since our well is 105 ft deep.
We can pump it by hand but we much prefer the windmill do that job. At the
bottom of the drop pipe is a brass cylinder, and inside that runs the
leathers assembly attached to about 95 feet of 3/8” stainless steel rod in
12 ft sections. It really works very well. But we have hard water, very
tasty but full of minerals that coat the rod and eventually trickle down to
lodge in the leathers. Which spreads them out, wears them out, and can jamb
up the whole business. In this case, the main leather had worn through and
the water was simply not being pumped up to go into our tank.
In our early years we had a regular steel drop rod which would corrode and
add its own supply of sediment. Back then we had to pull the rod and replace
the leathers many times a year. We got very good at it, and quite tired of
the job, especially when it happed in the winter. Eventually we installed
stainless steel drop rod, much heavier but much “cleaner”. And Steve figured
out the best configuration for the leathers. Now we’re down to pulling,
cleaning, changing leathers (and connectors which wear down against the well
pipe) about once every five years. It had been six years since the last
time. And it was obvious if we wanted to pump water now we had to pull the
rod. This is done by hand. Our hands. And we much prefer to do it in the
warmer months. We could moderate our water use and probably get by until
spring. Or we could do it now. And we had this two day window of relatively
warm weather to do it in.
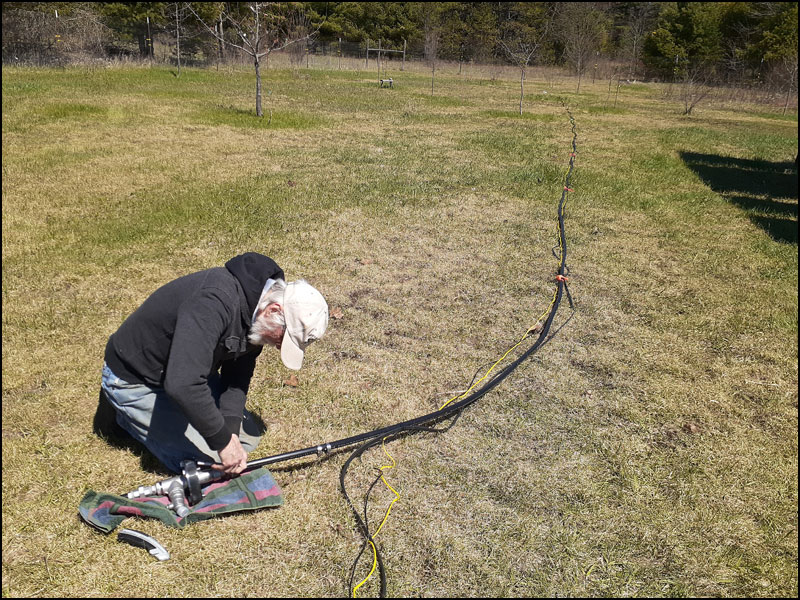
 We
wanted plenty of water; we didn’t want to have to stint. So...we pulled. And
we discovered that the stainless steel drop rod had not become any lighter
over the last six years. And getting the pieces apart wasn't any
easier. So as we pulled up and disassembled the rod, piece by piece, we
discussed that we really needed to find a way to make this job easier. But
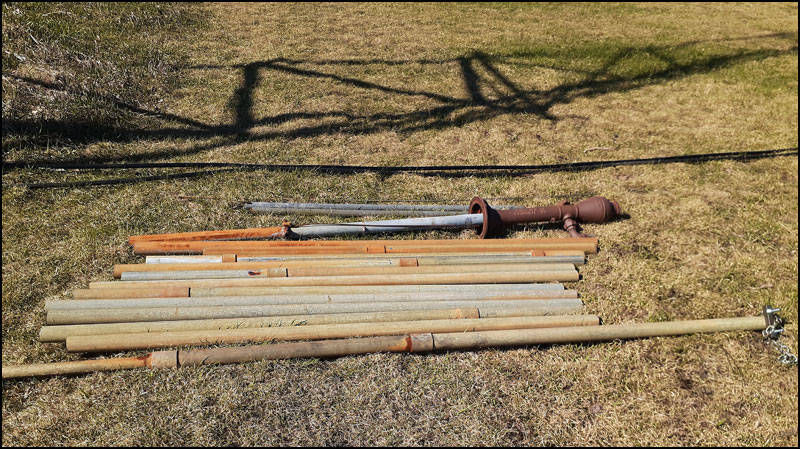
soon (relatively) it was done. The 95 feet of rod was piled up in 12 ft
pieces against the side of the windmill tower. We
wanted plenty of water; we didn’t want to have to stint. So...we pulled. And
we discovered that the stainless steel drop rod had not become any lighter
over the last six years. And getting the pieces apart wasn't any
easier. So as we pulled up and disassembled the rod, piece by piece, we
discussed that we really needed to find a way to make this job easier. But
soon (relatively) it was done. The 95 feet of rod was piled up in 12 ft
pieces against the side of the windmill tower.
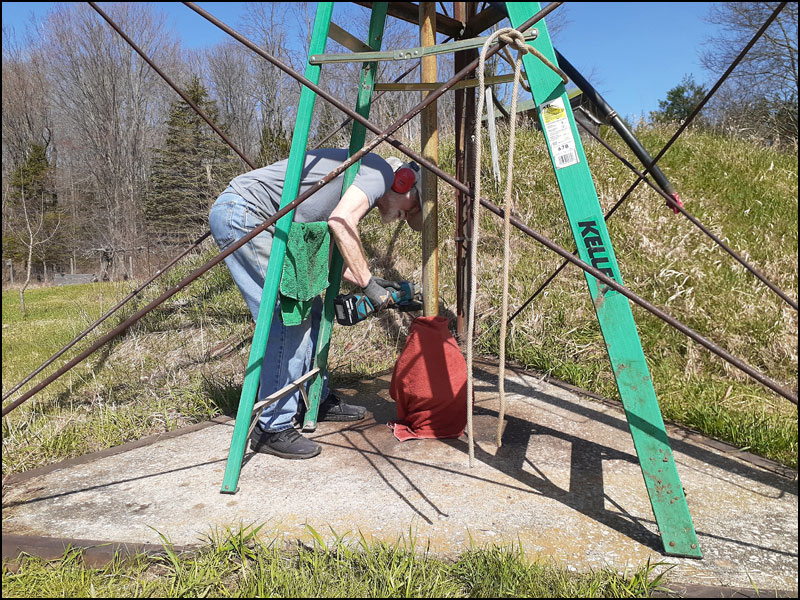
Now we had years earlier scrounged all the local supply of leathers and
finally ordered online some that were close in size. The best we could do.
So Steve modifies them to fit. That was fine; we had some on hand. When we
pulled the rod we discovered that the connectors were badly worn and had to
be replaced. Unfortunately, we didn’t have those on hand but we hoped to get
them locally
(Manistique), or at least in Escanaba. It was getting late but there was
still time to get in town so we
went inside and starting calling. First Hoholik’s in Manistique. They kindly
went and checked. Yes, they
had some in our size - hurray! -- 4 of them. Oh. We needed 8. No way around
it. So we called all around Escanaba. Nothing. Simple common rod end
connectors but not common in our size. One place said they might be able to
get an order in yet that day and they’d arrive the next day. Maybe. We would
simply have to
wait until the truck came in to see if they came in. We ordered.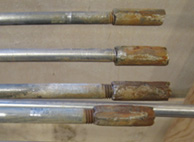
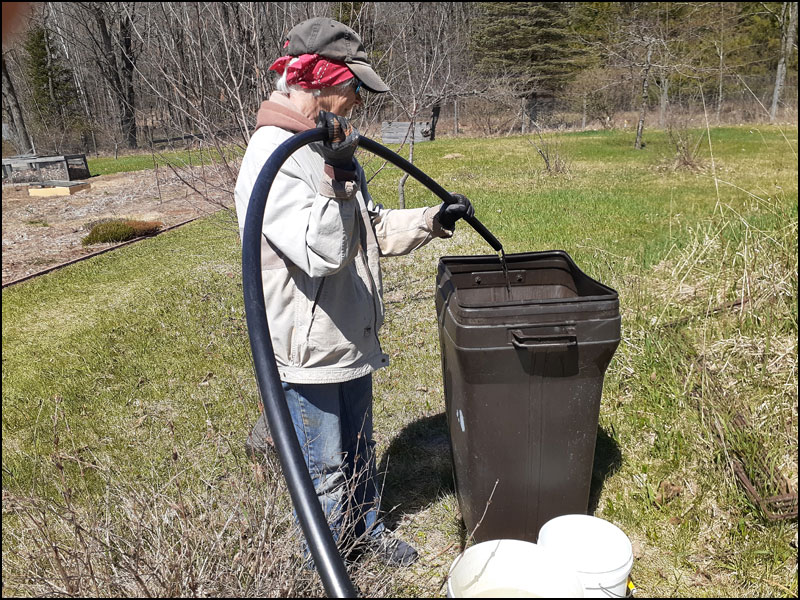
So the next day, a beautiful warm day, we simply had to wait. Well, not
exactly ‘just wait’. Steve went
to work on the leathers while I cleaned up the drop rod. The phone call did
finally come. The connectors were on the truck and we had just enough time
to get to Escanaba to pick them up . But not enough time to get home before
dark. The weather forecast was iffy for the following day but nothing to be
done but hope for at least above freezing temps for the hands that had to
hold that drop rod as it went back down the pipe, piece by piece, with the
fresh new connectors holding it all together.
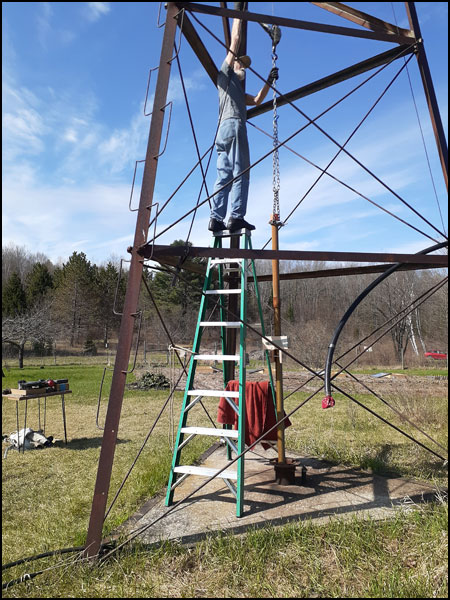
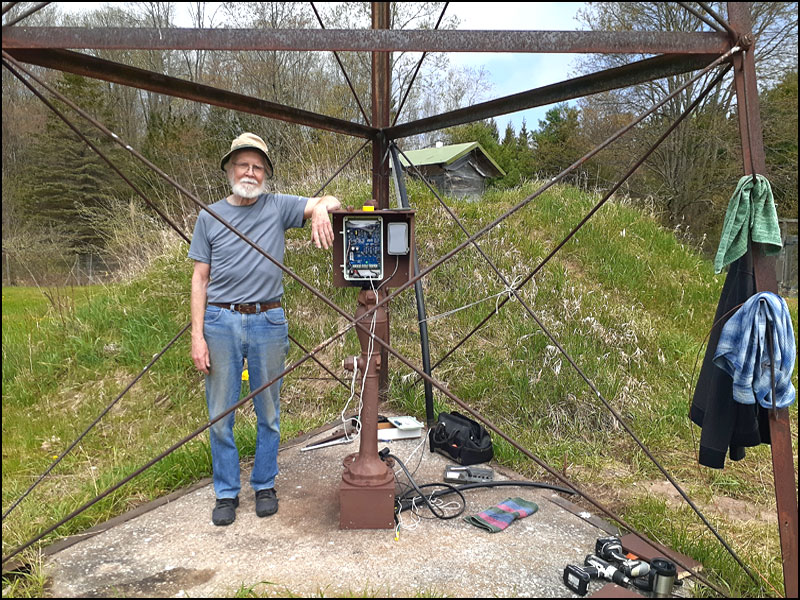
 And
it was indeed above freezing, and a simply beautiful day with the sun poking
through the clouds now and then to cheer us on. The gods do smile down on we
homesteaders more often than we remember sometimes! Steve arranged a block
and tackle up in the windmill tower to help us lower the last, heavy (since
you’re now holding the previous 60 feet of rod), pieces so it was
stress-free and quite pleasant. We enjoyed being outside, working together
on a homestead project that we’d done so many times before. We knew the
drill. And we were confident it would work. Well, fairly confident... And
it was indeed above freezing, and a simply beautiful day with the sun poking
through the clouds now and then to cheer us on. The gods do smile down on we
homesteaders more often than we remember sometimes! Steve arranged a block
and tackle up in the windmill tower to help us lower the last, heavy (since
you’re now holding the previous 60 feet of rod), pieces so it was
stress-free and quite pleasant. We enjoyed being outside, working together
on a homestead project that we’d done so many times before. We knew the
drill. And we were confident it would work. Well, fairly confident...
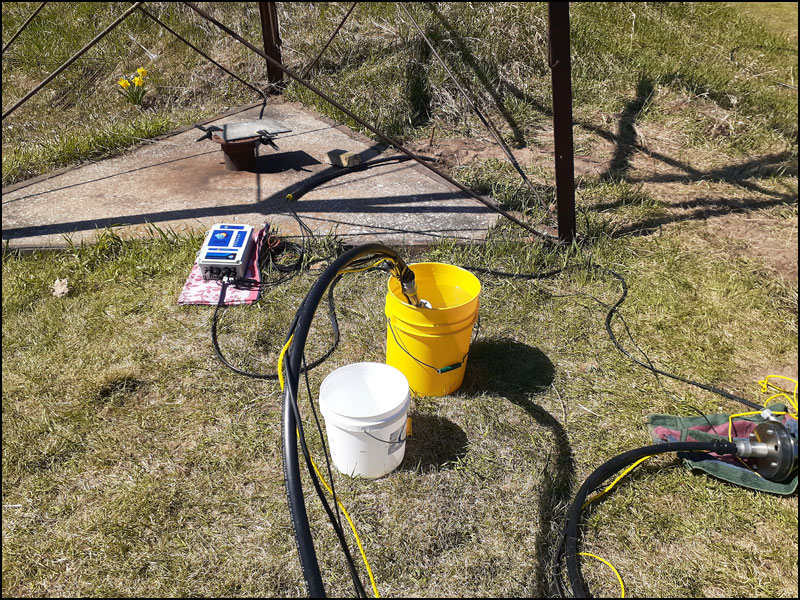
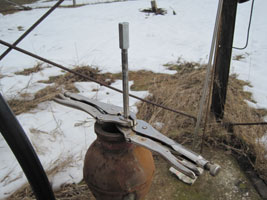
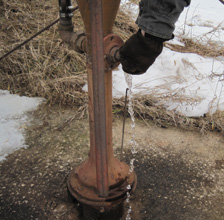 Everything
was together, the pump rod down, the pump back on, the tools gathered, the
windmill rod connected. There was a real nice breeze; it was still above
freezing. We let it pump. Steve opened the faucet on the side of the pump.
Water!! He closed it and I ran up to the top of the tank and put my ear to
the small opening we have into the tank (to measure the water level)......ker
splash, ker splash, ker splash. Ahhhhh, what a wonderful sound, water
splashing into the tank. It pumped all evening. And the next day. And I
measured almost 700 gals of water in the tank before the temperature and the
wind dropped. Life is good. We have water. And we are full of appreciation. Everything
was together, the pump rod down, the pump back on, the tools gathered, the
windmill rod connected. There was a real nice breeze; it was still above
freezing. We let it pump. Steve opened the faucet on the side of the pump.
Water!! He closed it and I ran up to the top of the tank and put my ear to
the small opening we have into the tank (to measure the water level)......ker
splash, ker splash, ker splash. Ahhhhh, what a wonderful sound, water
splashing into the tank. It pumped all evening. And the next day. And I
measured almost 700 gals of water in the tank before the temperature and the
wind dropped. Life is good. We have water. And we are full of appreciation.
|
|
March 31, 2019 -- Ending March with a Homestead Adventure
Our lives are overall quite calm and pleasant here on the homestead. But
there does come along those little things that makes you take a deep
breath, and stretch those muscles just a bit more. In this case I was
doing the 'hold your breath' and Steve was doing the muscle thing.
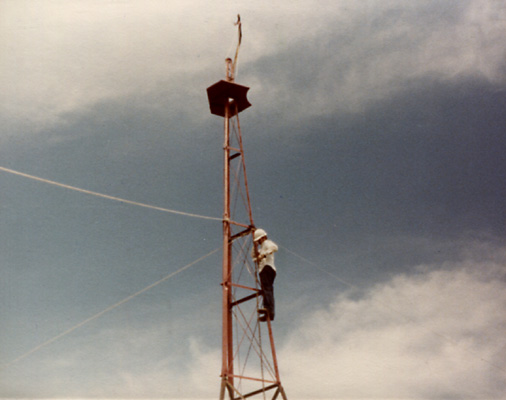
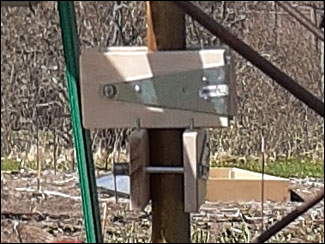
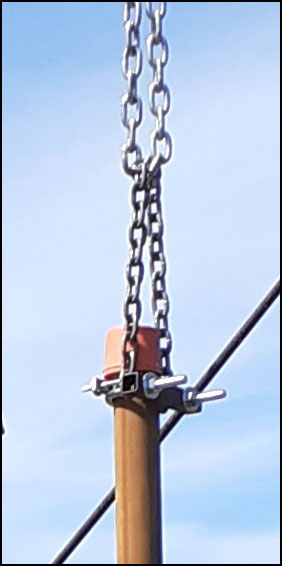
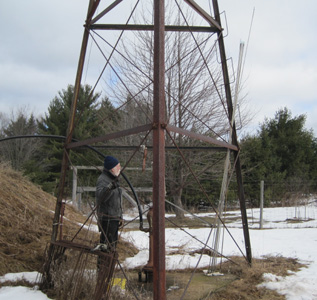
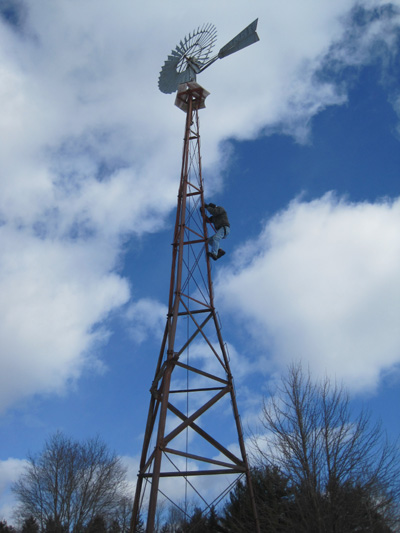
Yesterday, a pleasant but cool and very blustery day, Steve came in and
asked why I had turned our water pumping windmill 'out'. This means
lifting a steel tube arm at the base of the tower that is connected via
steel cable to the windmill at the top to make the tail of the windmill
open out from flat against the fan (not turning around and not pumping)
to right angle to the fan (turning and pumping). Surprised I said I
hadn't; it was too windy and gusty to have the windmill going. Oh. We
looked at each other. The possibilities going through our minds weren't
real exciting. Then again, maybe with the strong winds buffeting things
the arm had simply come out of its wire holder on its own letting the
tail out. Steve went up to check, and came back with the news - broken
cable. At the top (of course...). Well, it was too cold and too windy to
do anything about it. We just had to trust the windmill to handle it on
its own, which it does with a mechanism that automatically 'closes' the
tail to the fan when the wind is too strong, which it did many times
that day and night. It is designed to do that but there's also a reason
it's built to pull it out (off) by hand. It's safer and better for the
windmill, and we want this 40 yr old mill to keep working for many more
decades.
We didn't worry about it but there was the consideration of when to fix
it, which needed to be done and couldn't wait for nice spring/summer
weather. This really was Steve's decision. I've never even been to the
top of the tower, and there was that muscle thing. I encouraged waiting
several days when the forecast was for above freezing temps but he
decided to do it this morning. He'd figured out what needed to be done
(probably - one never knows for sure), and wanted to get it fixed. The
forecast was for continued wind. Gathering tools and hardware, and
putting on his climbing harness, off he went.
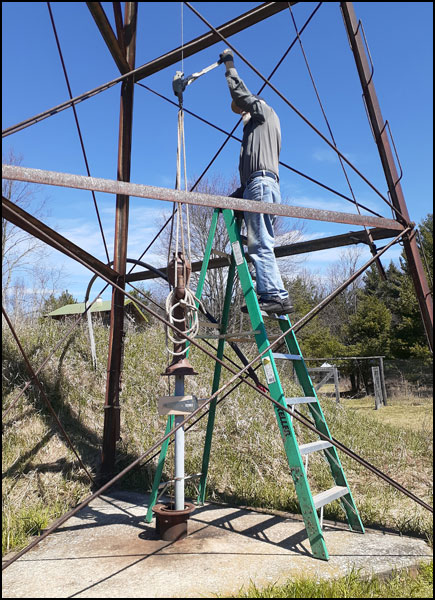
First was to undo the cable at the bottom. These bolts and nuts had been
together for... mmm, let's see, had they been apart since he put them on
40 yrs ago? Probably not. Oh well, muscle, vice grips and WD40 did the
job. He reconnected the cable to the pull-out arm giving more slack to
make up for the broken piece at the top. Then up he went, slowly and
carefully, to see what it really looked like at the top.
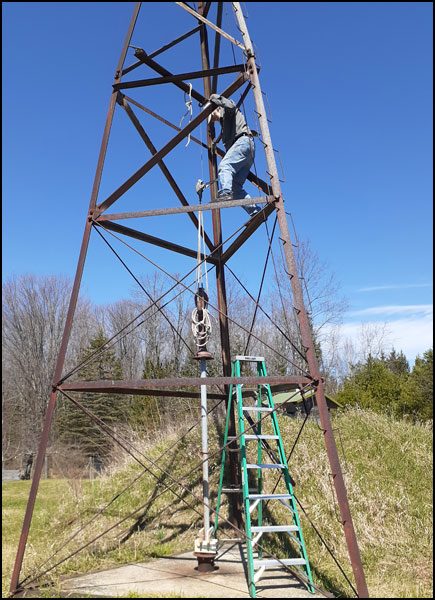
Thankfully,
that strong north wind had calmed somewhat, and it was partly sunny
which helped. The temperature was in the upper 20's. Not warm but not
bitterly cold either. Really quite a pleasant day - relatively speaking.
As he climbed the tower I wandered around the orchard (someone had to do
this part of the job) keeping an eye on him and thinking encouragement.
 It took awhile but finally he called down from above, "I need another
two inches". Well, I was happy to oblige but really, we're talking 1/4"
steel cable! I looked at the loops of cable connecting it to the pullout
arm, and squeezed them flat as best I could, hoping to gain enough
length, but I knew it wasn't 2". "Try that", I called, ever hopeful. I
knew he'd tightened those bolts as tight as he could and wasn't looking
forward to trying to get them off to give some more slack. Nor did I
want him to have to climb back down to do it (then back up again). I
waited while the cable tightened, then loosened. Try again. Tightened -
connected?? - loosened. Not yet. Again. Steve later said that the
impetus to pull just a little bit more to clip that cable on to what it
had to be clipped onto up there was the thought of going into town for a
banana split as a reward. Apparently that worked because the cable
tightened - and stayed. "Pull it out", came from above. I pulled the
pull-out arm down and it smoothly and nicely pulled the tail out, flat
to the fan, stopping the fan from turning in the (strengthening) wind.
Hooking the arm behind its holder I yelled back up, "It worked!". It was
just the right amount of cable. Sometimes things work out just fine.
Down came my homestead hero, slowly and carefully, step by step, cold
but satisfied, ready for his well earned banana split. It took awhile but finally he called down from above, "I need another
two inches". Well, I was happy to oblige but really, we're talking 1/4"
steel cable! I looked at the loops of cable connecting it to the pullout
arm, and squeezed them flat as best I could, hoping to gain enough
length, but I knew it wasn't 2". "Try that", I called, ever hopeful. I
knew he'd tightened those bolts as tight as he could and wasn't looking
forward to trying to get them off to give some more slack. Nor did I
want him to have to climb back down to do it (then back up again). I
waited while the cable tightened, then loosened. Try again. Tightened -
connected?? - loosened. Not yet. Again. Steve later said that the
impetus to pull just a little bit more to clip that cable on to what it
had to be clipped onto up there was the thought of going into town for a
banana split as a reward. Apparently that worked because the cable
tightened - and stayed. "Pull it out", came from above. I pulled the
pull-out arm down and it smoothly and nicely pulled the tail out, flat
to the fan, stopping the fan from turning in the (strengthening) wind.
Hooking the arm behind its holder I yelled back up, "It worked!". It was
just the right amount of cable. Sometimes things work out just fine.
Down came my homestead hero, slowly and carefully, step by step, cold
but satisfied, ready for his well earned banana split.
Well, the banana split didn't end up happening. Steve went to work on
his boat frames instead and just as he was finishing, the bandsaw blade
snapped. So he did get his trip to town but it was in the other
direction to buy a new sawblade. I went along to take him out to dinner
instead.
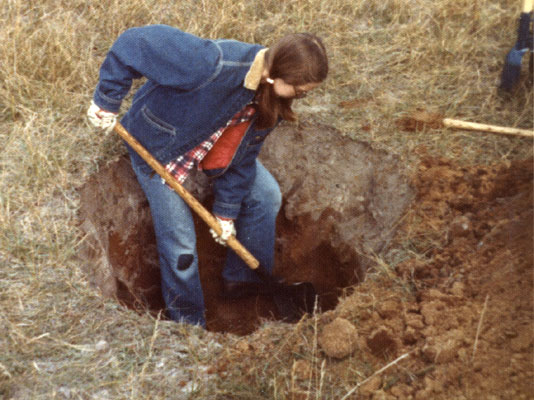
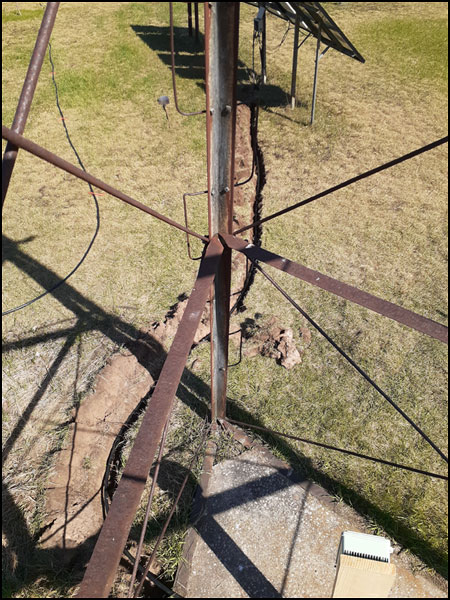
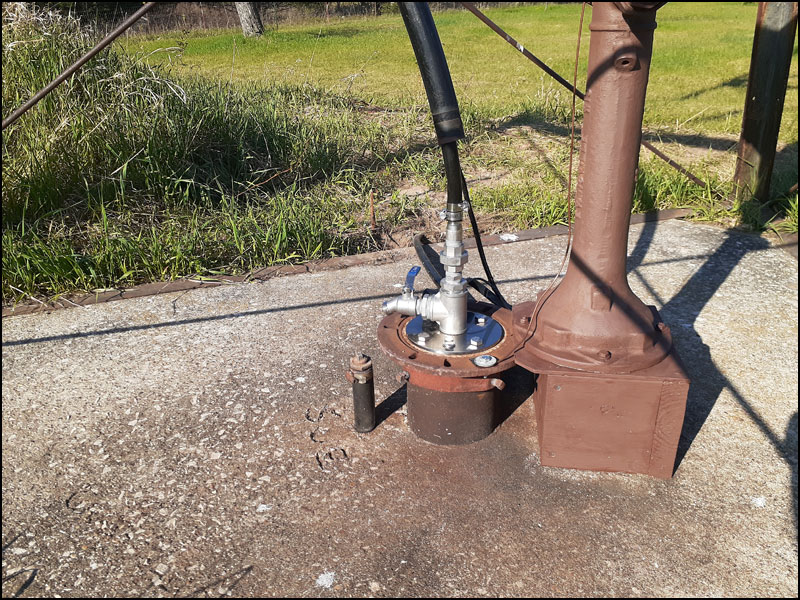
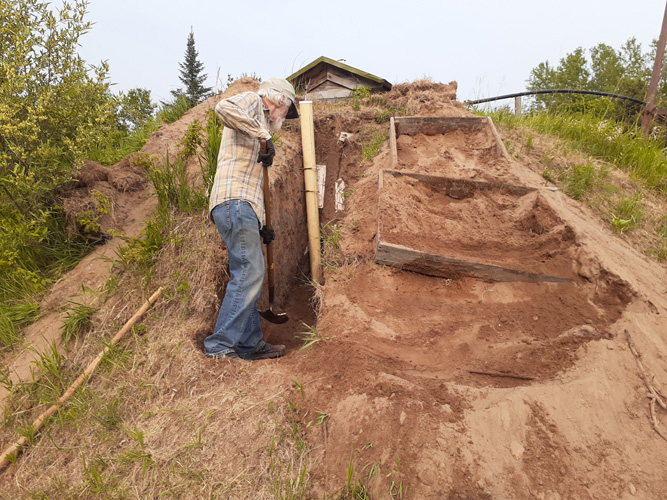
July 5, 2023 -- Just Keep Digging
The rain, or rather lack of rain, wasn't the only water
issue on the homestead. While I kept busy toting buckets of water to
garden and orchard Steve kept in shape digging. We are never lacking
in
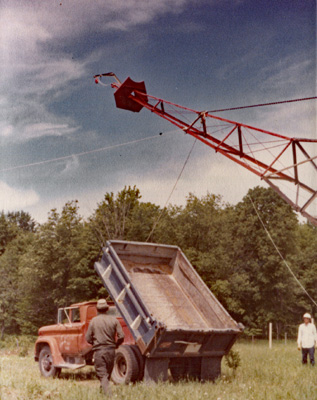
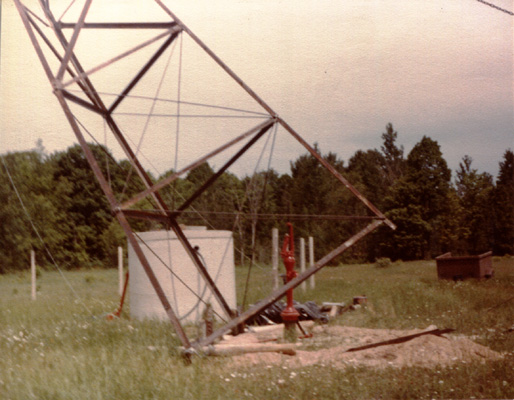
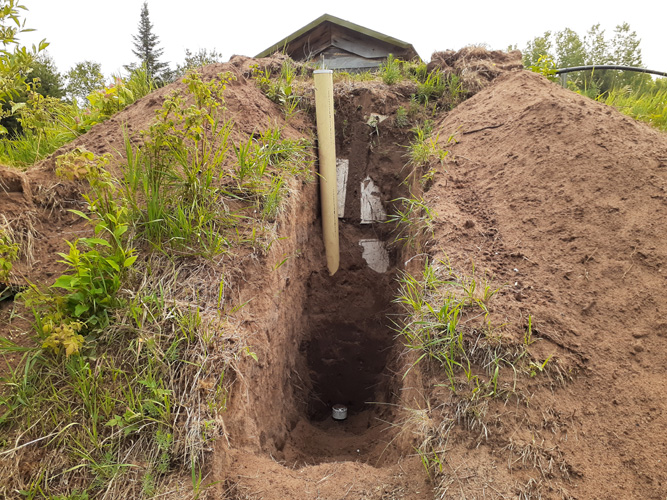
fun projects. Finally, he got to the bottom (of the tank). In the second photo the little light spot at the bottom of the trench is a cap covering the open/close valve of our water
system, which hadn't seen light of day in 45 years. Up a ways on the
page there is an old photo of the yet to be buried water tank, taken May 1978.
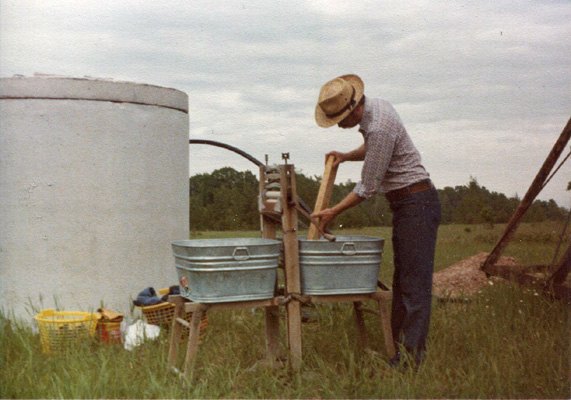
We were excited for the
wonderful water from our newly drilled well and (outside the photo)
the
fresh new red hand pump (before the tower and windmill were in
place). Doing laundry by hand (with hand pumped water) didn't last
long but it was just one of many adventures. What a ride it has
been. Life, and time, sure are interesting! As usual there is a bit
more to the current story (to come...)
|