MAST PARTNER:
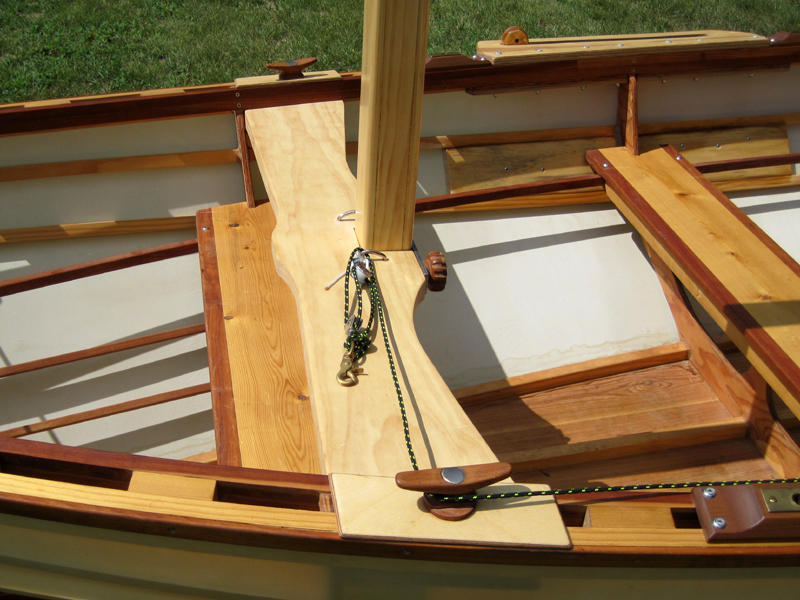
The mast partner was made from a 5/4" x 8" piece of clear NZ pine.
I shaped it a bit for esthetics and to lighten it a little. A piece of 3/4"
cherry runs across the under side for reinforcement at each end and there is a 3/8" brass
threaded insert in each reinforcement piece.

I made up a couple of 4" cherry cleats bored for 3/8" x 3" carriage bolts
which were slightly counter-bored then epoxied in place. The bolt heads were
pretty ugly so I ground them off flush with the tops of the cleats - they
look better and now don't interfere with the lines on the cleats.
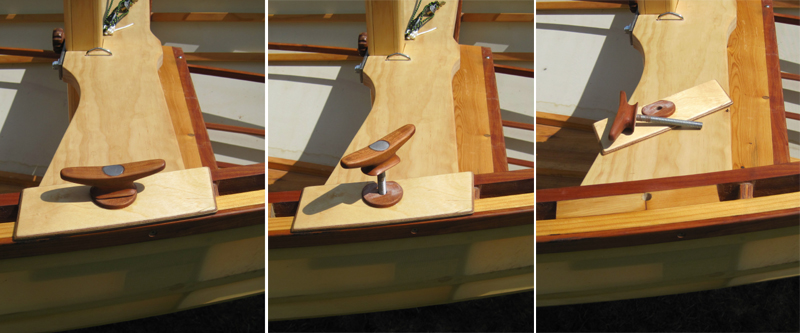 Partner securing system
The whole point of these things is to easily, with no tools, fasten the
partner securely to the gunwales. I made up a couple of bearing plates to
spread out the load and topped them off with a couple of tapered cherry
disks so the bottoms of the cleats don't bind when tightening them down. I
use the port cleat to guide the downhaul line back to another cherry cleat
bolted to the inside of the gunwale.
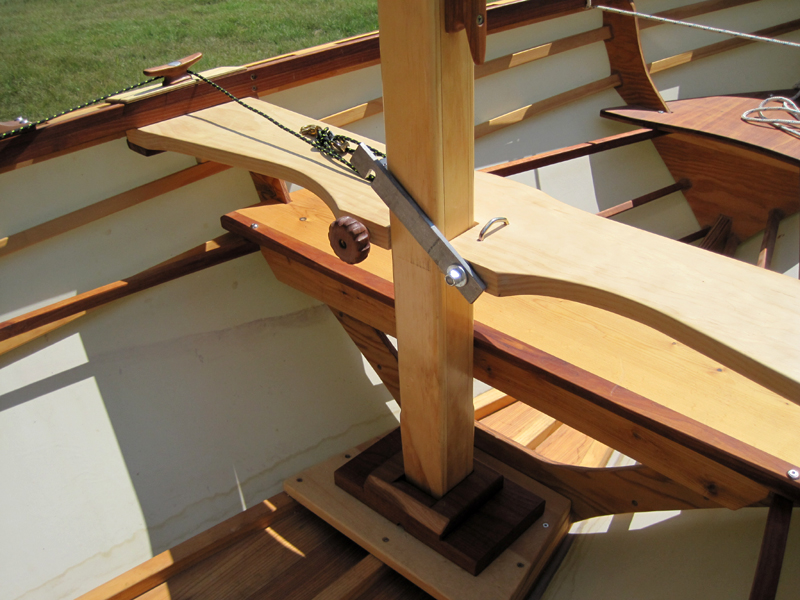
I used a 1-1/4" x 1/4" thick steel bar to hold the mast to the partner.
The starboard end is bored and pivots on a 3/8" embedded bolt; the other end is
notched so it can swing down and be held in place by a turned cherry knob
fitted with a brass threaded insert. Very snug and secure.

MAST STEP:
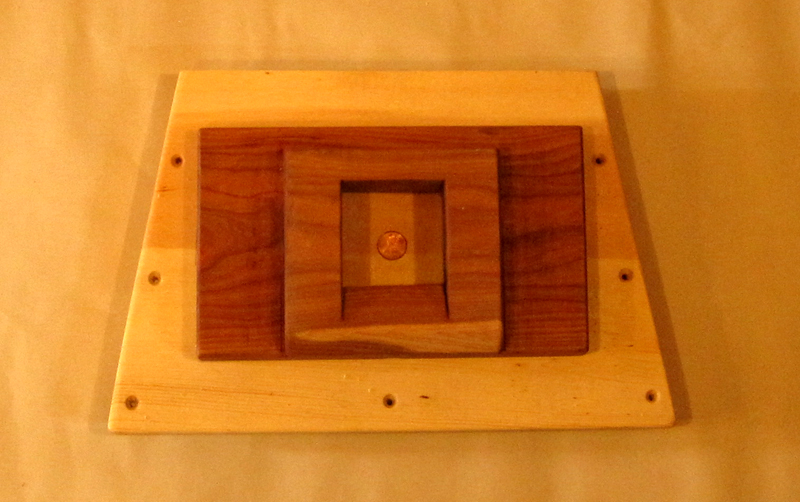
The base of the mast step is a pine 1 x 12 shaped to fit up against
the forward frame. There are cleats underneath that hold it securely in
position and it is screwed to the keel and floor stringers. The upper part
of the step was made from a 2-1/2" thick cherry block cut down and shaped to
lighten it up a little and make it somewhat less of a stumbling hazard.


SAIL & SPARS:
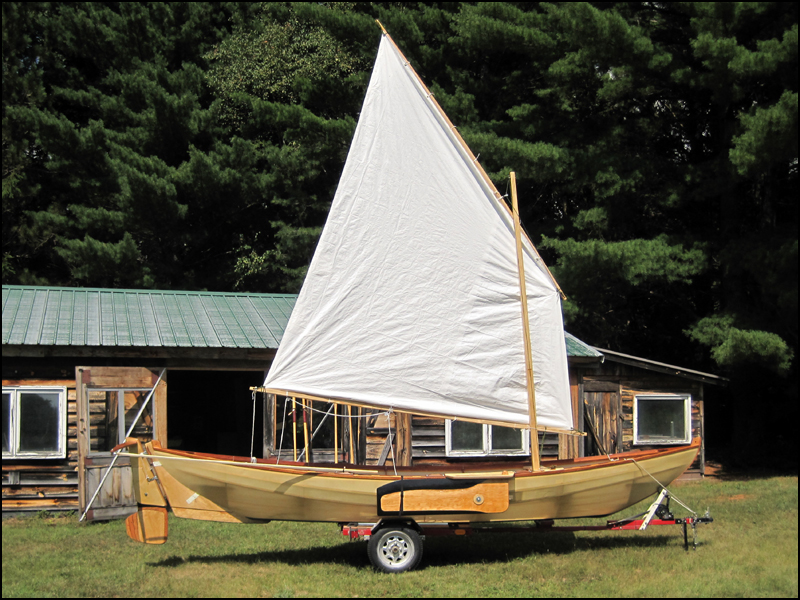
The sail was made from one of Dave Gray's PolySail kits; 'Medium
PolySail Essentials Only Kit' that included a 12' x 16' white tarp,
double-faced tape and rope for around the edges of the sail and a brass
grommet setting kit with 24 grommets ($100 delivered). The 76 sq. ft.
balanced lug sail design is by Jim Michalak as modified slightly by
Andrew
Linn.
 Sail shape & tarp seam
I liked his step-by-step presentation on how and why the sail is shaped
the way it is. We followed those instructions very closely. We moved a
little furniture in the living room and laid out the shape of the sail, cut
to the lines and taped it up then Sue went to work sewing it together. The
process took longer than expected but the sail looks OK and seems to work
well. I'm not crazy about that seam in the tarp but the sail seems to smooth
out once filled in a good wind.
The boom and yard are both 11' long and laminated from 3/4" clear NZ pine.
They started out at 1-1/2" square. In his OZ Racer plans Michael Storer has
very detailed diagrams on how the spars should be tapered for proper bending
while under sail. I spent a couple of hours converting his measurements from
metric and then scaling them to my spar lengths then when out in the shop
decided that in real life I'd be just as well off getting somewhat close to
his spar shapes. The boom is pretty stiff with just a little taper (in the
vertical plane) at the forward end and a bit more at the aft end. The yard
has significant tapering with the thickest area about 1/3 of the way back
from the forward end. Both spars were rounded with a 3/8" router bit and
there is a 1/2" hole in each end. I wrapped nylon cord around the ends to
ensure that the ends don't split and then epoxied over the cord and up about
a foot. A few coats of varnish and they were ready to go. The whole package
of spars and sail weighs about 14 lbs.

Notes:
As this is written, August 10, 2018, I have only had the boat out
sailing a few times so I'm still refining a few things but unless there is
some major structural failure I don't expect the components shown above to
be changed much though I am certainly open to suggestions for improvements!
It has been quite a while since my admittedly limited sailing experience
(owning a Hobie 16 forty-five years ago does not make one a sailor) so I'm
really relearning to sail as well as testing out the sailing rig.
The most recent outing was in a brisk breeze, 5 - 10 mph with higher gusts
according to NOAA. Finally got to get a feel of the boat moving through the
water. My overall impressions from this recent trip was that the boat is
more stable as a sailing boat than while rowing and that it is quite
forgiving of my learning mode experiments. I found out that: Tacks slowly
with rudder still pulled up (pilot error), better with rudder lowered but I
still need to refine my technique. When sailing towards the beach in
increasingly shallower water the leeboard pivots up smoothly and the boat
still sails pretty well - better than I thought it would.
More sailing reports later. Here in the Upper Peninsula of Michigan sane
sailing weather usually extends into the first few weeks of October.
Sometimes. I'm looking forward to many more trips out on the water!
Update - Fall of 2018:
We did manage a few more sailing adventures before the cold weather and fall
chores forced an end to the season. Overall I am happy with the boat just as
it is, that is, I'll probably not pursue adding a cabin to the boat right
now. The one modification still on my to do list is to add a smaller rudder
for use when rowing. My experience with the sailing rudder was that it was
very effective at keeping the boat on a track but I'm pretty sure I can make
a smaller, thinner rudder that will create less drag and still work. I'll
probably use rope steering to keep it simple.
Update - 3/1/2019:
I have made a sliding seat unit that can easily fit in the dory and I'm
looking forward to seeing how well it works with my existing 8' oars with
Gaco locks. The unit is designed to fit right over the thwarts and clip in
place with a couple of simple swivel latches. It was actually designed to be
used in my
new rowboat but can be easily be moved from one boat to the other - I
still seem to be limited to rowing one boat at a time, but I'm working on
it.
|


