Trail Mix
Easy-to-eat healthy
snacks are at the top of our hiking food list. And the first is probably the
simple "trail mix", sometimes known as GORP - good old raisins and peanuts -
though our mixes are made up of any number of, and often experimental
combinations of, ingredients that are easy to toss into one's mouth
while on the move. There is no one recipe; we each make our own and
probably the only constant for both of us is raisins. The other
ingredients depend on personal preference and a great deal on what is on
hand. Here is a typical mix:
Raisins, slivered almonds, chocolate chips,
a few peanuts, cheerios, cheddar bunnies or fish crackers, sesame
sticks (the skinny ones)
We both like a trail mix container that is
an easy hand size and, particularly in the winter, one that travels
comfortably in a jacket pocket. Many of the ingredients get hard to
eat when frozen so an inner pocket helps. It's also nice to have the
mix handy when stopping for a quick drink or layer change.
Homestead Hiking Cookie
I’d been making my basic Homestead Cookies for
over 40 years, the recipe that is in our "Homesteading Adventures" book,
and they served us well all those years. They were sturdy, hearty,
healthful (I think), and they suited. We liked them. But this past year
I decided I wanted a less firm cookie, easier to eat, a cookie with a
few more ingredients, one that would be good energy on the hiking t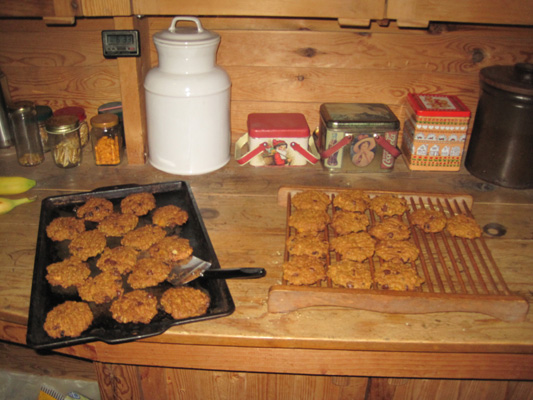 rail
even when cold (thus far successfully tested down to the low teens).
And, of course, be good eating every day on the homestead. This is what
I came up with. They appear to be quite popular based on how fast they
disappear. I’d like to blame this on LilliB but to be honest, I’ve never
seen her eat a cookie, though she’ll give it a try and thoroughly lick
one if it’s found un-attended, or the owner’s attention temporarily
averted. rail
even when cold (thus far successfully tested down to the low teens).
And, of course, be good eating every day on the homestead. This is what
I came up with. They appear to be quite popular based on how fast they
disappear. I’d like to blame this on LilliB but to be honest, I’ve never
seen her eat a cookie, though she’ll give it a try and thoroughly lick
one if it’s found un-attended, or the owner’s attention temporarily
averted.
This is a highly adaptable and variable recipe.
What I put in depends on what I have on hand and preferences at the
time. No eggs? Leave the eggs out. Have some shredded coconut? Put some
in. But this is my latest basic recipe:
LIQUID
1 egg
1/2 c vegetable oil or soft/melted butter or combination
1/2 c cooked winter squash or applesauce
1/2 c yoghurt (with squash) or fruit juice (with applesauce)
add water or other liquid to equal 2 cups
mix/stir/beat together
DRY
2-3 c whole grain flour
3/4 c rolled oats
1/4 - 1/2 c sweetening (I use stevia and Sucanet, sometimes honey mixed
with the liquid ingredients)
2 tsp cinnamon
1 tsp ginger
1/2 tsp baking soda
1/8 tsp salt
1/4 c chocolate chips
1/4 - 1/2 c raisins
1/4 c roasted sunflower seeds
1/4 c slivered almonds
Mix dry ingredients.
Then add liquid. It helps to let it set a bit
unless your flour is very fine (mine isn’t).
Adjust by adding water or flour for a moderately
soft & sticky but not too dry dough.
Put spoonfuls on cookie sheet. Flatten somewhat
with a wet fork, more if you want a firmer cookie, less if softer. Bake
till done.
Since I’m mostly using the wood cookstove I
don’t have a temperature or time. It takes longer if the fire isn’t too
hot, quick when it really gets going, and takes a really long time if
you let the fire go out.
Sometimes I use an electric "toaster" oven in
the summer, with a temperature of 350 - 400.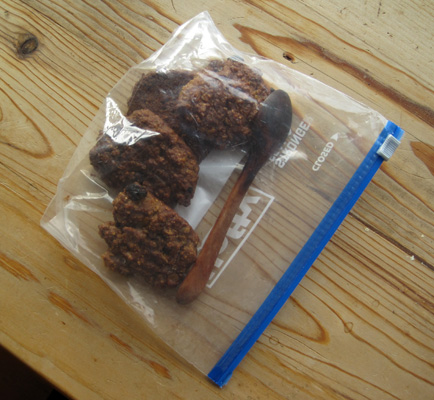
The "Hiking Cookie" has proven itself on the
trail, holding together quite well, unless they migrate to the bottom of
the pack and you’ve vigorously stuffed a jacket or something on top of
them. Leaving a little air in the ziplock bag they are in helps but
mostly they are on top within easy reach for a quick snack. They are
easy eating when it’s cold, especially appreciated when your trail mix
has turned into hard cold bullets. In the heat of summer you may want to
leave out the chocolate chips or substitute mm type candies. But overall
they are suited for and welcome in any weather and at any time.
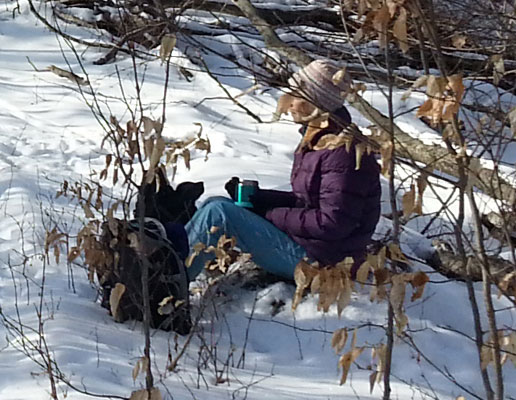
(note: the spoon in the photo is for lunch, not
for eating the cookies!)
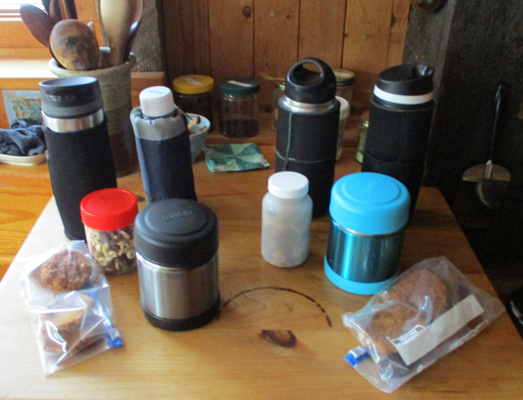
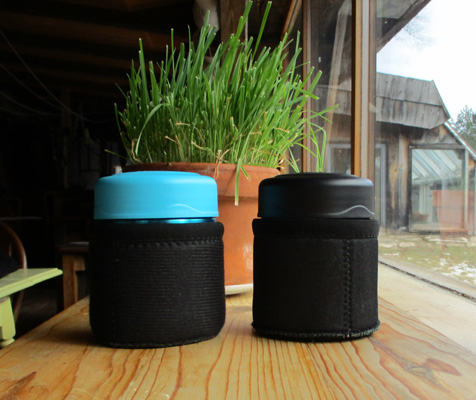
Hot (or at least Warm) Food for Lunch
 For
Christmas we bought ourselves small Thermous food containers - the 10 oz "Funtainer"
(though we passed on the many fancy graphics versions available and went for plain
silver/black (Steve) and teal (me). Last month we had taken warm food in a regular tupperware type container which was nice to have but it didn't stay warm
very long, even buried in our packs. We thought we'd try the insulated
option. This was our first trial [an early January hike] and they worked well with our simple
meal of rice and tuna. Though certainly heavier than a sandwich it was
real nice to have warm food on a cold day, and 10 oz was a good
size - eat half now on the trail (it being a bit cold to sit very long
to eat), then the rest later when back at the car, hungry but a ways
from home and supper. I like that the Thermous Funtainer is simple and
easy to clean. For
Christmas we bought ourselves small Thermous food containers - the 10 oz "Funtainer"
(though we passed on the many fancy graphics versions available and went for plain
silver/black (Steve) and teal (me). Last month we had taken warm food in a regular tupperware type container which was nice to have but it didn't stay warm
very long, even buried in our packs. We thought we'd try the insulated
option. This was our first trial [an early January hike] and they worked well with our simple
meal of rice and tuna. Though certainly heavier than a sandwich it was
real nice to have warm food on a cold day, and 10 oz was a good
size - eat half now on the trail (it being a bit cold to sit very long
to eat), then the rest later when back at the car, hungry but a ways
from home and supper. I like that the Thermous Funtainer is simple and
easy to clean.
 Based on our experience with our water bottles I plan to make
neoprene or foam kozies for them (see article below) which should keep the food even warmer,
especially in colder weather. I had put mine in a simple wool blanket
pouch and my food was a bit warmer than Steve's at lunch. It also helps
to pre-heat the containers with hot water before filling, and make sure
the meal is hot to begin with. How important that is depends on how cold
it is out on the trail. Neither of us are picky about having hot food
but having a warm lunch has turned out to be an appreciated treat. Based on our experience with our water bottles I plan to make
neoprene or foam kozies for them (see article below) which should keep the food even warmer,
especially in colder weather. I had put mine in a simple wool blanket
pouch and my food was a bit warmer than Steve's at lunch. It also helps
to pre-heat the containers with hot water before filling, and make sure
the meal is hot to begin with. How important that is depends on how cold
it is out on the trail. Neither of us are picky about having hot food
but having a warm lunch has turned out to be an appreciated treat.
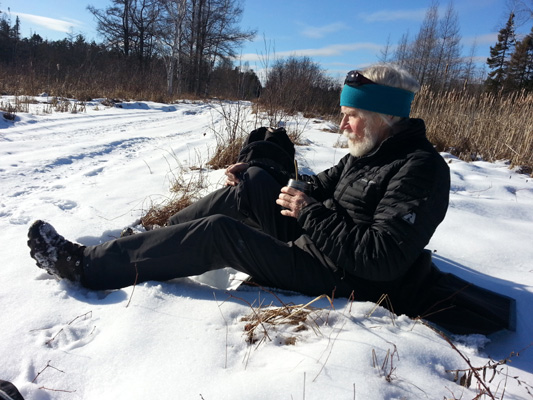
We take wooden spoons to eat with which are much more comfortable in mouth
and hand in the cold weather. For us it is our normal "silver"-ware (as
is wooden bowls and plates our every-day dishes) and they sure beat a
cold metal spoon.
Inexpensive DIY
Custom Drink and Food Container Kozies
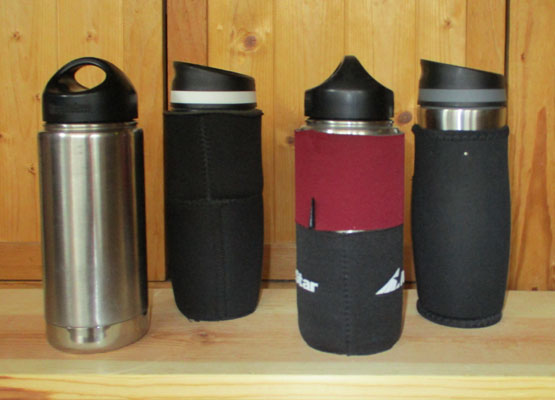
Steve has had a neoprene kozie on his
favorite insulated stainless steel coffee mug since soon after he
bought it. He happened to find a real nice tall one at a thrift
store that fit perfectly. It wasn’t for warmth that he wanted it,
this particular travel mug does a great job of keeping his coffee
hot, but mostly it was for a better fit in our car’s cup holder and
to keep it from rattling.
But when we began hiking regularly in the
cold weather it soon became obvious that his kozied mug was doing a
much better job of keeping his drink hot on the trail than my
insulated, but bare, Klean Kanteen water bottle. Up to now I hadn’t
been impressed or enticed by his "hot" coffee mug, since my
preference is for comfortably room temperature drinks (except for
maybe a bit of "quite warm" herb tea in the morning, or after a
particularly cold, windy outdoor gig). I decided I needed to up my
Kanteen’s insulating factor. Happily those common, inexpensive,
ubiquitous, logo’d foam kozies happen to conveniently fit easily our
every-day stainless steel Klean Kanteens (Steve has one and I have
two). So I soon gathered a supply at the thrift store, picking
through the pile for some that weren’t too obnoxious in color or
logo, to cozy up the KK’s. Steve’s KK is his secondary drink
container (carried inside his pack), while I used both of mine, one
in and one out.. When it is colder they both travel inside our
packs, being warm being more important than convenience.
 The
first Kozie conversion was simple -- slip one on the bottom, cut a
second to size and slip over the top to settle up against the first.
The fit was pretty good on the KK's. Steve wasn’t picky and didn’t
much care what color or logo. I fussed a bit about it until I
realized all I had to do was turn them inside out -- they were all
black on the inside. A couple were much nicer smooth fabric and were
made of better foam, but I never found many of those. So I used one
nicer smooth one, and one cheaper textured one. All I wanted it to
do was keep my drink warm in the cold and I figured that would do.
The seams being on the outside did bug me a little though. The
first Kozie conversion was simple -- slip one on the bottom, cut a
second to size and slip over the top to settle up against the first.
The fit was pretty good on the KK's. Steve wasn’t picky and didn’t
much care what color or logo. I fussed a bit about it until I
realized all I had to do was turn them inside out -- they were all
black on the inside. A couple were much nicer smooth fabric and were
made of better foam, but I never found many of those. So I used one
nicer smooth one, and one cheaper textured one. All I wanted it to
do was keep my drink warm in the cold and I figured that would do.
The seams being on the outside did bug me a little though.
The kozied bottle that traveled inside the
pack was fine. But I soon discovered a problem with the "current
use" one that went into my pack’s stretchy outside pocket. When I
shoved the bottle in, the top kozie slipped off, and when I pulled
the bottle out, the bottom one came off. This wasn’t an issue with
Steve’s tighter one piece cover on his coffee mug. Obviously I
needed to unite the top and bottom, and do it with a smooth
transition so there would be nothing to catch on the top of the
pocket. I thought about tape but didn't think it would work that
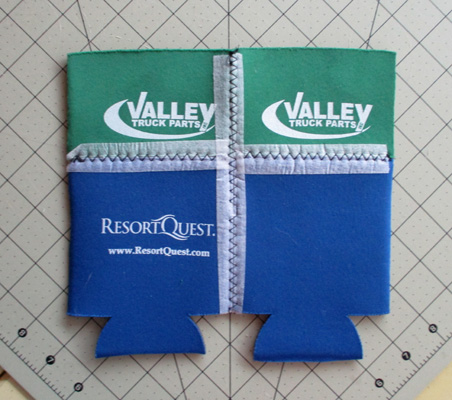
well. I decided to sew the pieces together.
My first try was a bit clumsy but it worked
-- by cutting the shorter top piece along one side I could zig-zag
stitch it onto the bottom piece. The clumsy part was trying to
manage these two fairly stiff pieces under the sewing machine’s
foot, but it did work. Then I zz stitched down the top’s cut edges
bringing them back together. I used a wide setting and a moderately
tight length stitch.
For the next one I came up with a much
easier way. These customized kozies can be for water bottles, travel
mugs, drink containers, insulated food containers, other bottles.
For convenience sake, I’ll refer to all of them as mugs or bottles
in the instructions below. I realize I could simply have purchased
some nice neoprene material and saved a bit of work. But we both
like being able to use what we find at the thrift stores; and
support their missions at the same time. It's more fun.
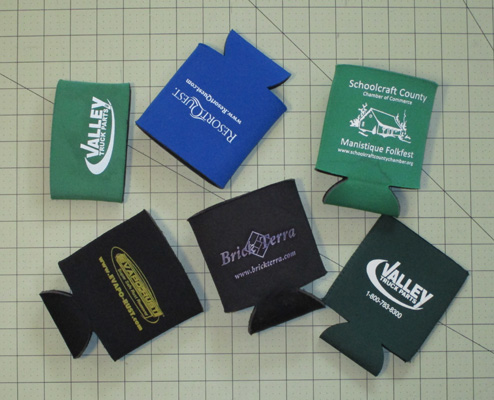 * First collect a supply of kozies. For most
mugs you’ll need two (one above the other); possibly four if your
mug is larger diameter. * First collect a supply of kozies. For most
mugs you’ll need two (one above the other); possibly four if your
mug is larger diameter.
* Check the fit of the original kozies
around your mug. They do vary in size so check the fit of both of
them.
* Measure how much of the top kozie you need
to cut off to come to just below the cap or screw area.
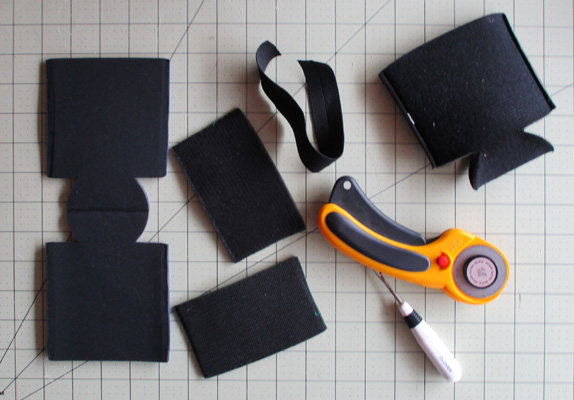
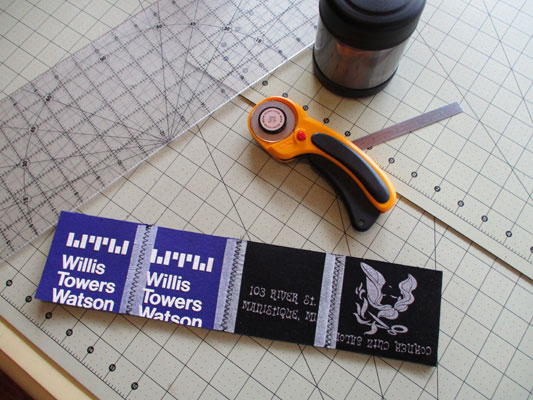
* A rotary cutter and cutting pad makes easy
work of cutting the foam pieces, but a sharp utility knife or
scissors work, too.
 *
If the kozies fit as is or are too big cut the seam off both sides
along the stitch lines. If they are tight and you only need a little
bit more material then take the stitching out and save the extra
seam allowance. If they are too small then cut apart another kozie
to seam onto the others to make enough width. *
If the kozies fit as is or are too big cut the seam off both sides
along the stitch lines. If they are tight and you only need a little
bit more material then take the stitching out and save the extra
seam allowance. If they are too small then cut apart another kozie
to seam onto the others to make enough width.
* Cut across the middle of the bottom,
flattening the kozies.
* Cut the top kozie (both pieces) to size.
* Trim the tops, bottoms, and edges straight
and square.
 *
Butt and tape (on what will be your inside) the top and bottom
pieces together. Paper tape works nicely -- it is thin, you can see
the edges to stitch along, and it doesn't gum up the sewing machine
needle. You can also sew without the tape, keeping the edges butted
close as you sew. I found it easier and I did a better job with the
pieces taped together. I didn't remove the tape. *
Butt and tape (on what will be your inside) the top and bottom
pieces together. Paper tape works nicely -- it is thin, you can see
the edges to stitch along, and it doesn't gum up the sewing machine
needle. You can also sew without the tape, keeping the edges butted
close as you sew. I found it easier and I did a better job with the
pieces taped together. I didn't remove the tape.
* Using a wide width and fairly narrow
length zigzag, sew the pieces together along the butted and taped
edges, making sure the zigzag stitches equally on both sides of the
seam. Test your zigzag stitch first on scraps and adjust length and
width of stitch if needed. There will be a fair amount of stress on
this joint.
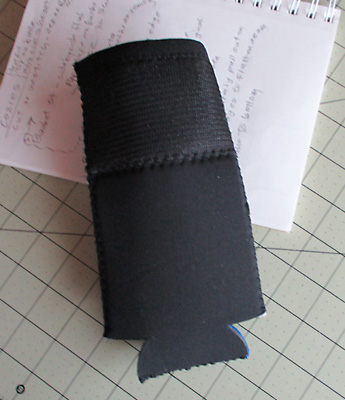
* Now butt the edges of your two pieces
together, tape and stitch the same way. See photo.
* Wrap and test fit the sewn-together piece
around your container. If too tight then stitch on another piece. If
too loose, trim off the extra. Maybe it will fit just right and you
won’t need to make any adjustment.
*** Possible top edge binding -- In use the
common foam kozie will eventually get a bit ratty at the top exposed
edge, with the fabric face pulling away from the foam. A simple
solution, before sewing the final seam, while the piece is flat, is
to run a zigzag stitch around the top edge. A neater solution is to
sew on a stretchy binding tape or fold-over elastic. Use a zigzag
stitch to maintain some stretchiness.
 *
Now fold the sewn piece together with inside edges facing. Pin or
clip (craft clips work well for this) in a few places to help hold
the edges in line. Slowly zigzag with a wide stitch along the edge
making sure that the right side of the zigzag stitch goes just off
the edge of the material. It might help to test on a scrap first;
you may need to loosen the thread tension a bit. When done, pull
firmly on both sides on down the seam, flattening the seam and
pulling the edges to butt against each other. *
Now fold the sewn piece together with inside edges facing. Pin or
clip (craft clips work well for this) in a few places to help hold
the edges in line. Slowly zigzag with a wide stitch along the edge
making sure that the right side of the zigzag stitch goes just off
the edge of the material. It might help to test on a scrap first;
you may need to loosen the thread tension a bit. When done, pull
firmly on both sides on down the seam, flattening the seam and
pulling the edges to butt against each other.
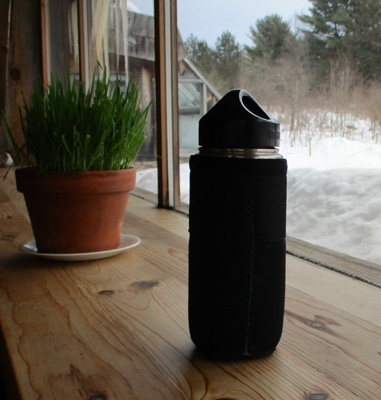
* Test fit on your bottle. If no adjustments
are needed then stitch the bottom seam back together as you did the
side. Slip your bottle in, fill with hot drink of your choice, and
enjoy that hot, liquid many hours later.
Food Containers and Larger Water Bottles
Larger container kozies are made
essentially the same way, it just takes another one or two to go
around. The one thing I did different for our 10 oz Funtainer
Thermouses was to sew on a solid bottom. This is a bit trickier but
do-able. You could make cut-outs and sew it just in three or four
places which would be easier. But I do like the solid bottom.
* Cut, trim, stitch pieces together as above. Measure around
container, cut to size, sew final seam.
* Put on container, set on another kozie piece and mark around,
straight down. Cut out circle.
* On both bottom piece and side piece -- Fold in half, mark opposite
points. Fold other way and do same.
* With outer side out (just as it goes on container), position
bottom circle inside (as it will go when finished.
* With bottom on top, and roughly "pressed in" pin first
quarter. Slowly ZZ stitch along edge.
* Then pin and stitch next quarter, etc. Or if it is going well for
you, go ahead and stitch all around just by holding the pieces
together (this didn't work very well for me).

We found the extra insulation of the kozie did keep food hotter
longer on cold weather hikes and was worth it. Now I have to get
some more kozies to make sleeves for our new 16 oz containers
(longer hikes need more food!).
Longer Hike, Colder Weather -- More Food
(and Drink)
Of course, it is just common sense when one
thinks about it. But these things can sneak up on you. After a
winter of two hour hikes due to cold, snow, ice, and/or snowshoes,
we suddenly found ourselves with bare ground, good muscles, milder
weather, and a longer hike, the first of the season. For us that was
ten or eleven miles and almost 5 hours. It was still cool (end of
March) but we could walk easier, enjoy sit-down breaks, go longer.
And ... eat and drink more. If we had brought more. So used to the
winter routine I didn't think beyond that. It wasn't a big deal, we
certainly didn't go hungry (there are always the trusty backup Panda
bars in our packs!; we had enough drink but no leftover, and when
done were only a short drive to the grocery store where we bought
cheese and bread and drove down by the Lake for a welcome pleasant
quick dinner. But when we got home we ordered 16 oz insulated
Thermous food containers for our post (and pre) winter hikes. The 10
oz were not quite enough now. It won't be long before weather will
be warm and sandwiches or the like will be great for trail food. But
while it's still hovering around freezing, or warmer with a cold
brisk wind, hot food and hot drink is the cat's pajamas on the hike.
* * * * * *
Copyright
© 2021 by Susan Robishaw and Stephen Schmeck
|