
|
|
|
|
|
|
Documenting our build of a Skin-on-Frame Kayak April - August, 2016 | |
|
In the spring of 2015 Sue and I built an 18' skin-on-frame dory
- rowing boat - to plans by
Dave Gentry. Yup,
that's our boat on his site! We spent a lot of time on the water over the summer
and into early fall and really have enjoyed the boat. While visiting friends who
summer on a small inland lake that is fed by a 'Wild & Scenic River', we had a
chance to try out a couple of recreational kayaks. The bug bit, as they say, and
we spent the winter planning for building a pair of skin-on-frame kayaks. Special note - (Nov. 2023): I have received many requests for frame drawings and other dimensioned drawings for this boat. Unfortunately all of those files were deleted from our server and are not available. I recently heard that Brian is considering drawing up plans for a frames/stringer version of the F1. April 23, 2016 | |
 |
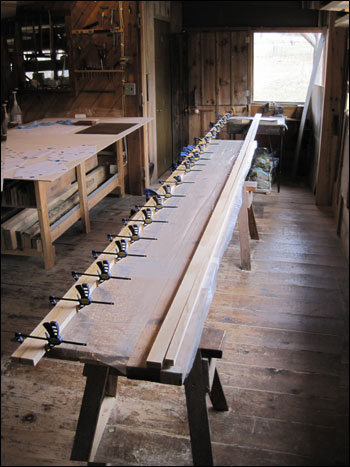 |
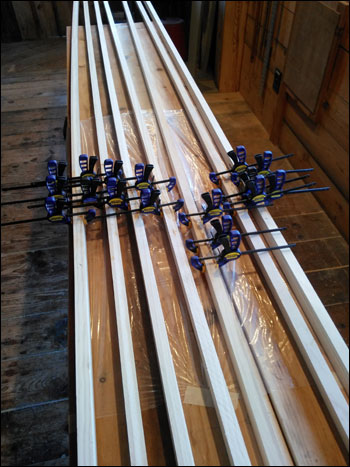
| Actual work on the boat began with ripping and scarfing 8' strips into longer pieces for the stringers and gunwales. The boats will be just over 14' long and our Prius can only carry 8' long boards. | An early design change meant that we needed gunwales wider than I cut them so we're laminating on another narrow strip. Final size after planing will be 2-1/4" x 5/8" thick. The wood is clear New Zealand pine. |
|
| |
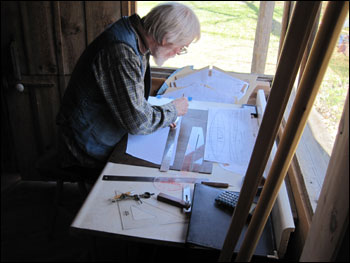
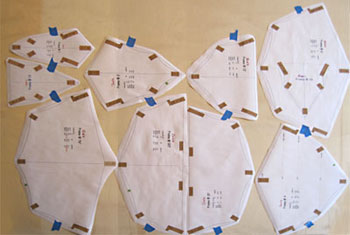 I took measurements from Harvey Golden's drawings on Brian Schulz's site and using the magic of Photoshop® created scale drawings of each of the proposed frames. I had these printed full size onto 24" x 36" sheets by a nearby printer; cost: $8.00 for two sets of patterns. The patterns above (taped down on a sheet of plywood) are for Sue's boat which is scaled down slightly since she weighs less and is smaller than I am. SS April 23, 2016 |
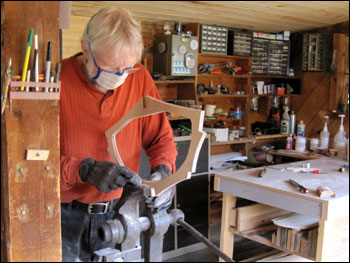
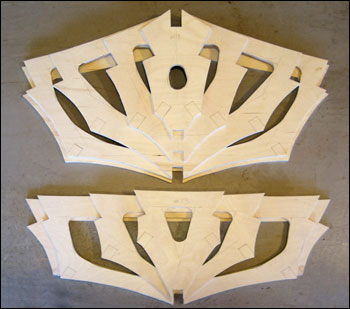 And here are the frames for Sue's Kayak cut out and stacked to show the shape of the hull. We're using 1/4" Baltic birch for the frames. This plywood has absolutely zero voids in the five (5) plies, and is made using phenolic resin waterproof glue. Minimum frame cross-section is 1-1/8" except for the frames in front of and behind the cockpit. These two frames have a 1" minimum cross-section and will be doubled and laminated to 1/2 thickness. April 27, 2016 |
|
|
|
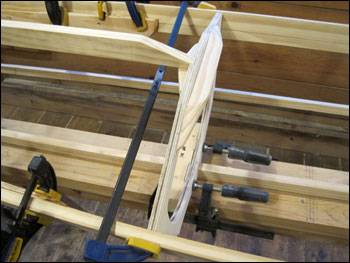
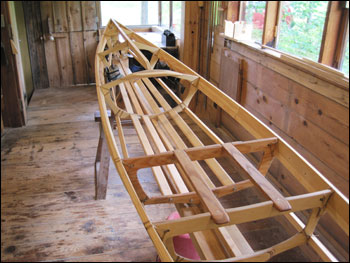
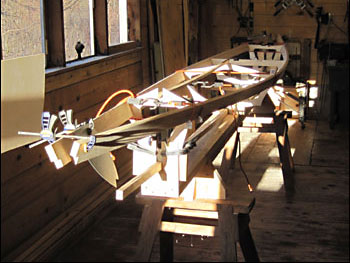 Today we set up the end frames on the strongback, bungee'd on the gunwales and inserted a few central frames to see how things lined up. Overall it looks good but as you can see above, the keel doesn't have quite the right shape. |
 Those blue things above are patterns for the bow and stern stem pieces. This fitting problem was not a big surprise since we had similar things to deal with when using this stiff New Zealand pine on the dory project. April 30, 2016 |
|
|
|
 |
 |
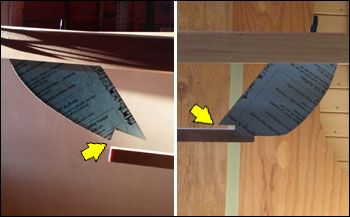
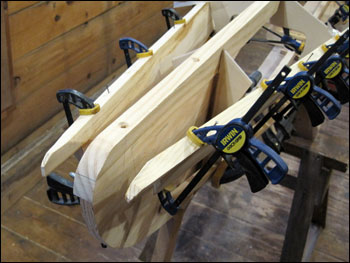
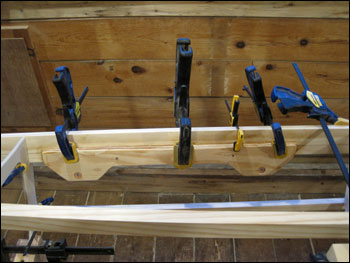
The solution we chose was to make a couple of rip cuts part way (about 6')
up the keel and then bend and epoxy the 'laminations'. I made the cuts with
a narrow blade on the band saw but next time I'd use my Rockwell Compact
Circular saw since it has an even thinner (3/64") kerf. |
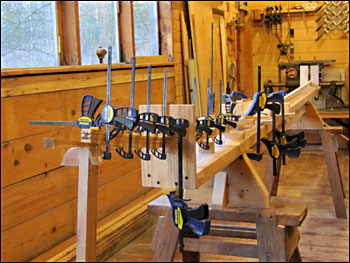
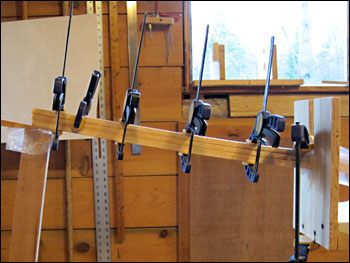
Above you can see the three laminations and a bit of the curve of the bow end of the keel. The stern end will easily pull up into position so doesn't need this done to it. When the epoxy cures the keel may spring back a little - I have over-bent it by about 1/4" to compensate for that possibility. The reason I didn't just try to pull the keel up to meet the bow stem is that it would have had a tendency to pull the gunwales down and change the shape of the boat. May 1, 2016 |
|
|
|
 |
 |
| Well! We set up the keel and frames to check out the run of the lower chine and discovered that I had drawn two of the frames incorrectly. The errors were obvious since there was no way that the chine could hit the notches in those two frames. And so, above, back to the drawing board. Since the kayaks are significantly shorter than the dory I had room to add a design/drawing table in the shop. | I redrew the frames using the measured drawings and think I got them right this time. I cut out the new frames and things look a lot better. Above you can see what I did most of the day today - cleaning up and sanding all of the frames. May 10, 2016 |
|
|
|
| I spent the last few days taking care of bunch of details and made up for being a bit lax in photo-documentation. | |
 Bow components fitted and ready to lash together. |
 This bracket was needed to position the adjustable footrests lower to fit Sue. |
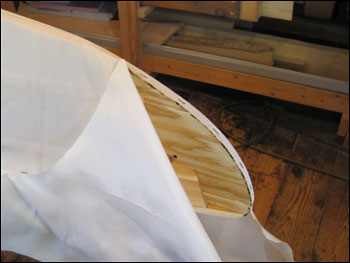
 Not the best picture but this is the frame just ahead of the cockpit; a complicated spot on the boat. The deck beam comes in from the left and the small 'shelf ' in the center will support the cockpit coaming. |
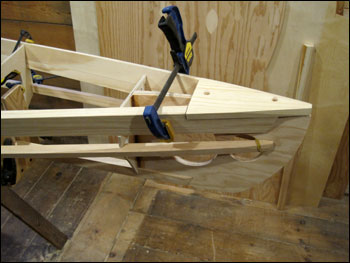 That triangular 'stern plate' ties all the stern pieces together and also give a nice shape to that end of the boat. The polyester fabric covering will hide all of this 'fine work' - too bad. |
 |
|
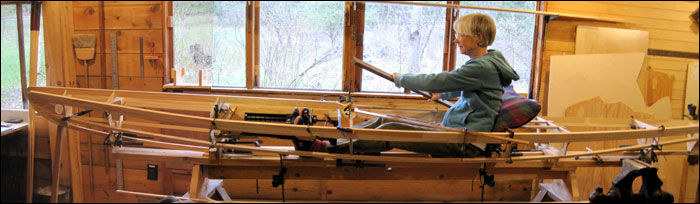
| Sue is simulating paddling to be sure the foot braces are in the right spot. Yes, I got to try it out too. All of the dimensions of her boat except the length are scaled down 3% so it is a little tight for my longer legs, but once in it is very comfortable - especially with that pillow for a backrest. | |
|
|
|
 The coaming will be laminated using thin strips of oak. The strips began as 1/4" x 1-3/4" oak trim from the lumber yard. I made the jig shown below to rip each piece in half yielding two pieces ~ 3/32" thick. 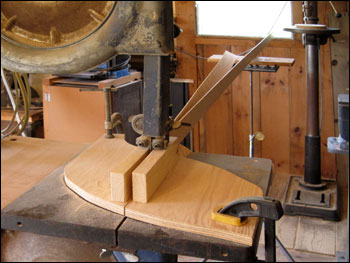 I got that old Craftsmen 12" bandsaw at an auction many years ago. It doesn't look too great but it works great for projects like this! |
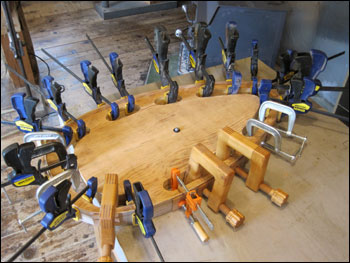 And here we are with a good percentage of our clamps holding the coaming strips to the form. We soaked the strips in water for a couple of days (in a section of old eve's trough) then gently wrapped them around the form using a heat gun just ahead of clamping.  This is a rough drawing of the cross section of the coaming - made up from a total of 7 laminations. |
|
|
|
 |
 |
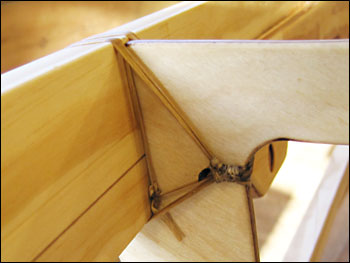
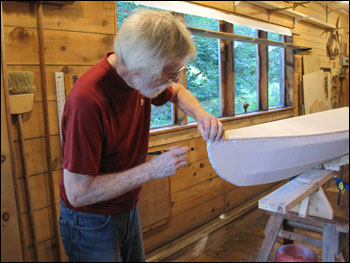
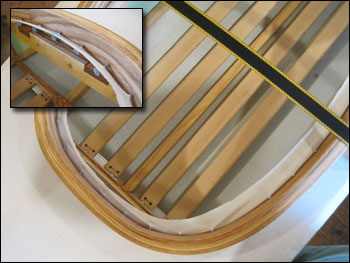
| This is one frame-to-gunwale connections. No glue, just eight wraps of artificial sinew stretched very tightly. Each of the joints on this boat is handled with this technique. Breaking strength of the joint should be over 500 lbs. (8 wraps x 70# sinew = 560 lbs.) |
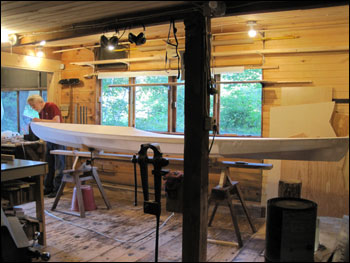
Here is the completely lashed frame. Actually, not all joints are lashed;
those two oak 'aft support stringers' are pegged to the frames. The floor
pieces are lashed to aluminum angle supports that are bolted to the frames. |
|
|
|
 |
An aside... You can buy one of these great looking kayaks right now! 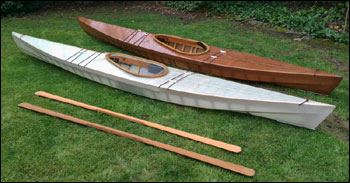 |
| We have had some down-time on the kayak project but are back at it now - July 10. I have added several cubic feet of closed-cell foam for flotation. We had planned on using float bags but the ones we ordered didn't fit because of the frames. We decided that we probably won't be going on any expeditions with the kayaks and that with the space at the bow and stern full of foam the boat will float pretty high if swamped. There is still lots of space for day-trip gear in the area beyond the foot braces and in the space behind the seat. Can't wait to get the boat skinned to hide all that pink foam! |
While Sue and I have been building her kayak Brian Schulz has been hard at
work too. As of mid July, 2016 the two kayaks in the photo above are for
sale on his web site:
capefalconkayaks.com.
Or, if you'd rather build an 'official' F1, Brian will soon be releasing plans
and an 8-hour instructional video. I may even go that route myself when I
build my kayak. Keep an eye on his site for the release. Now, back to the boat shop. |
|
|
|
 |
 |
|
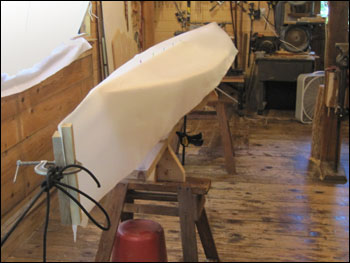
We are skinning the kayak with 10 oz. polyester (Dacron) fabric from George
Dyson. We cut the 64" wide material into two 16' long strips; 37" wide for
the hull and 27" wide for the deck. In the photo above you can see how we
stretched the material tightly lengthwise prior to stapeling it to the outer
edge of the gunwale. I have been using an adjustable-heat pyrographic (wood burning) tool as a hot knife and it works great. Here's what the tool's tip looks like: |
At the bow and stern we simply wrapped the material over the stem piece, stapled it in place and trimmed it as above with the hot knife. The other side was wrapped over, stapled every 1/2" or so and carefully trimmed also. Prior to covering I laminated 1/2' wide x 1/4" thick oak bow and stern rub strips. Once the painting is done they will be screwed over these lap joints to protect them from abrasion. |
 |
 |
| One of the cool things about the polyester fabric is that it can easily be 'heat welded' with a hot tool. For this operation I turned the heat on my wood burning tool down a bit and literally fused and sculpted the upper part of the fabric covering the bow. I first fused the open seams closed then melted on a second layer of material to reinforce the area. |
Here is what the kayak looks like with the skin stapled on. Tight as a drum
with just a few little wrinkles to be flattened out with an old household
iron. I'll get some better photos of the boat soon. Our goal was to get the
shape as close to Brian Schulz's F1 kayak as we could and it looks pretty
good to me. Comparing his current F1's (two photos up) to the version he
posted on his site a while ago, it appears that the bow and particularly the
stern shapes have changed a bit; maybe a little sharper. July 24, 2016 |
|
|
|
 |
 |
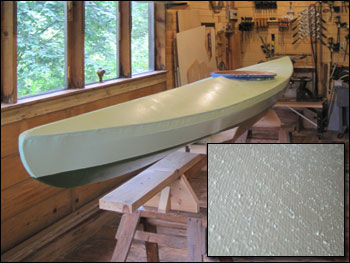
| You can get a better idea of the hull's shape from this angle. | Rolling on the first coat of 'Garden Gnome' a pale green oil-based porch & floor paint. Masking tape will stick to the painted surface; it will not stick to the bare polyester fabric. July 26, 2016 |
|
|
|
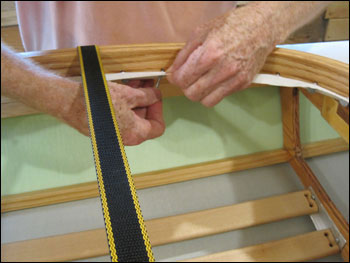  |
 On the left you can see how I inserted roofing nails into each hole in the coaming, gently stretching the surrounding fabric. Then. one hole at a time, I removed a nail and laced the coaming to the skin with a double-strand of nylon artificial sinew. In through the coaming and hole in the fabric, fold the fabric down twice, then over the fold and back out the same hole. On to the next, all the way around, tightening the lacing as I went. Above, I masked the coaming and rolled on the first coat of light green paint. I'm not crazy about this fabric because, as you can see in the inset, there is apparently a very fine knap that shows up as roughness in the finish. This surface has to be carefully sanded (not through the paint) before being the next coat of paint is applied. Aug. 13, 2016 |
|
|
|
 I'm having trouble getting the color correct in these photos - my camera has no setting for the color of the LED bulbs in the shop. Sue describes the color as a "light mint green". The coaming is sewn on, the deck shrunk to tighten the skin, and painted. |
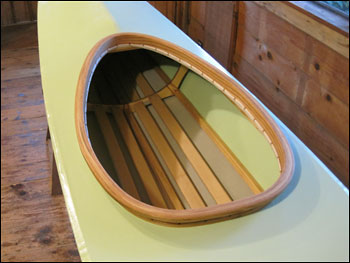
 I have test-fit the bow & stern rub strips. Above you can see, sort of, how the hull/deck seam looks after painting but before the oak rub strips are installed. All of the stapled seams appear very tight and the oil based paint has fully saturated the joints. I don't expect any leaks at those seams. Aug. 27, 2016 |
|
|
|
 Finally... September 9, 2016 we got the boat in the water for the first time. Initially it felt more tippy than our prior experiences in recreational kayaks but Sue quickly got used to the feel of the boat and was off into the blue. |
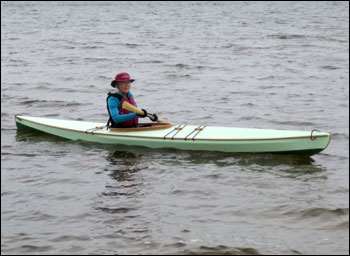 You can see that the kayak rides nicely. Sue also quickly adapted to her new Greenland-style paddle. The paddle is 80" long x 2-3/4" wide; sized to her reach and hand span. It is made from clear pine and weighs 30oz. |
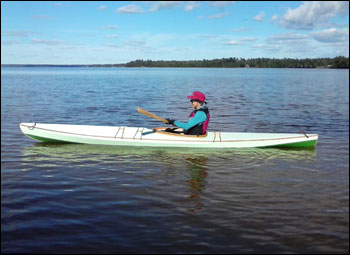 ... and one more photo - on a nicer day. |
|
|
----- |
|
|
Next step: Get out on the water before it gets hard! Sue bought me a used
Perception Swiftwater 10.5 plastic kayak for my 72nd birthday so we don't
have to wait for me to make my own skin-on-frame kayak. I actually like my
little kayak and have been enjoying it more than I thought I would. When we're done playing I'll get Sue's kayak back in the shop for another coat of varnish. So far we haven't found anything in need of change. Again, a special 'Thank you' to Brian Schulz at Cape Falcon Kayaks for making the drawings of his F1 available on line. |
|
|
|
|
| [ Top of Page ] - [ Last year's Dory Project ] - [ ManyTracks Home ] | |