
Documenting our build of a Skin-on-Frame Dory April - July, 2015
.
|
|
|
 Documenting our build of a Skin-on-Frame Dory April - July, 2015 . |
|
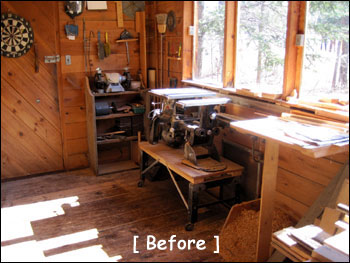
The project began with the purchase of plans and building guide for a "Chamberlain Gunning Dory" from Dave Gentry atGentry Custom Boatsbut on a practical level it really began with the expansion of our woodworking shop so it can handle an 18' 4" long boat. | |
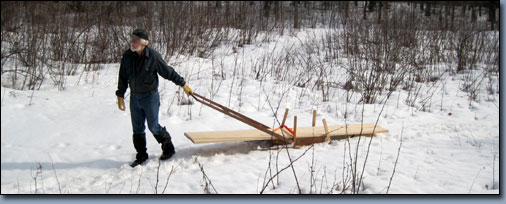 But first we needed to sled the stringer boards and plywood 1/2 mile from
the end of the county road to the shop - April 1st. | |
 |
 |
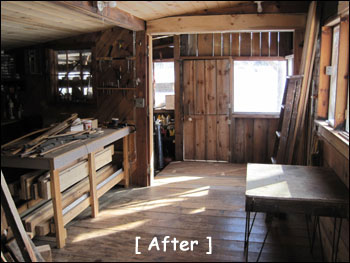 |
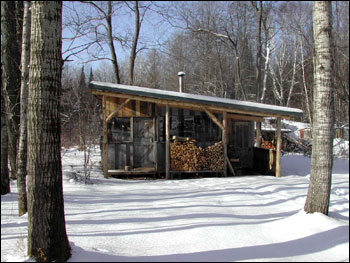
We lived in this 14' x 20'
building for seven years while building our house and it has served as our
'power tool' woodworking shop for the last 30 years. |
|
The Frames (April 3 - 14, 2015 ) |
|
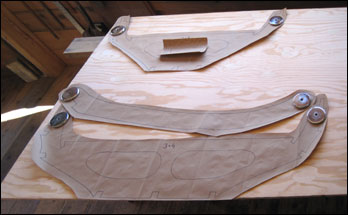 Laying the patterns out to avoid defects in the fir marine plywood - lots of repair 'eyes'. |
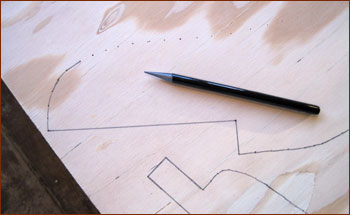 I used an awl to punch through the lines of the patterns then just connected the dots. The reason for doing it this way was so I could lay out all of the frames and stem pieces at once. |
|
|
|
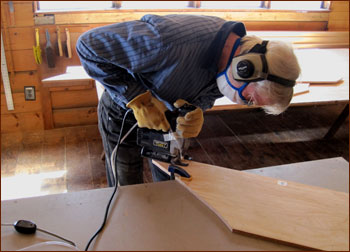 Cutting out the frames with my really old Craftsman scroll saw that I've modified by adding an oiled hardwood blade guide. You can also see the tubing from a small compressor used to blow the sawdust from the line. |
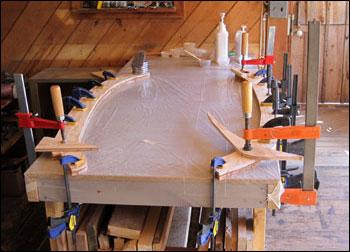 The four stem pieces are glued into pairs with epoxy. The glued surfaces were first 'primed' with unthickened epoxy then the rest of the batch was thickened to mustard consistency with MAS Cell-O-Fill for strength and wood flour for consistency and color. Moderate clamping pressure resulted in a little squeeze-out along the glue line. 4/11/2015 |
|
|
|
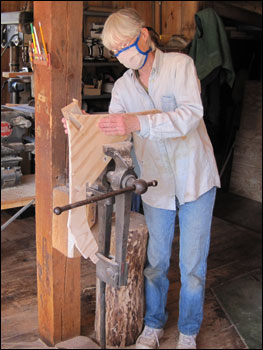
Sue sanding and sanding frames |
 Filling voids to help prevent water from getting into the edges of the plywood 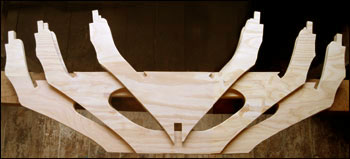 The six frame finished except for notching for keel and stringers 4/13/2015 |
|
Next... Milling and ripping the gunwales and stringers (April 14 - ...) | |
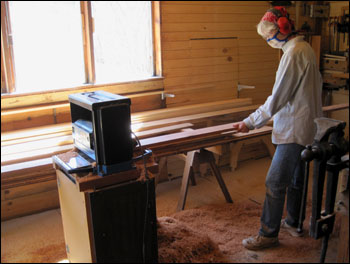 Planing cherry gunwale stock prior to being ripped into 3/4" x 3/4" strips. The strips will be scarfed into 19' lengths then laminated to form the gunwales. |
The boat officially went global today when I tracked down the source of the nice, clear 'Select Pine Boards' we are using for stringer stock. One would think that here in the heart of Michigan's Upper Peninsula - land of trees, that the lumber yard boards would be from nearby. Maybe Canada? Would you believe New Zealand? Oh well.
4/14/2015
|
|
|
|
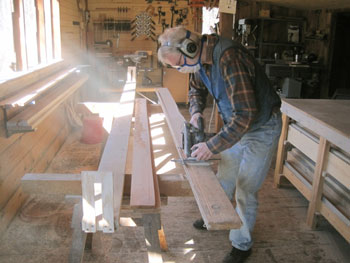 Here I'm ripping the first of the stringers. I used a Skillsaw and a nice new (sharp) thin-kerf blade. Very little waste because of the thin blade and the stringers are nearly planer smooth. |
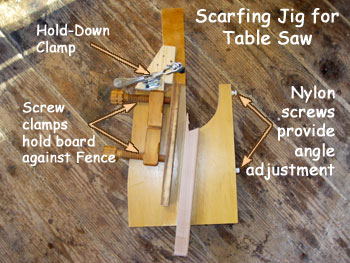 This is my version of a scarfing jig. It cranked out about 40 very good joints at two cuts per joint. The nylon (license plate screws & nuts) adjusters on the right ride smoothly along the table saw fence and allow the jig to cut from about 6:1 to 12:1 cuts. This setting produced approx. 9:1 scarfs. |
|
|
|
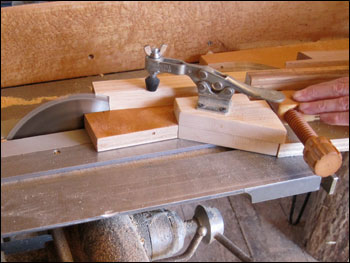 The jig in action. My hand isn't as close to that blade as it looks. A very stable and predictable device. I made a ton of sawdust today! |
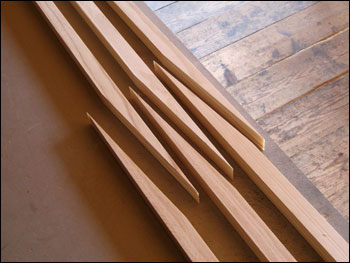 And here are three of the many scarfs awaiting glue-up. The epoxy/hardener that I'm using has over 1/2 hour of open time (shop temperature around 70) so I don't need to rush the job. The epoxy cures overnight and can be worked and handled but full strength probably takes another day or so. I'm using MAS resin with their blush-free slow hardener. 4/16/2015 |
|
|
|
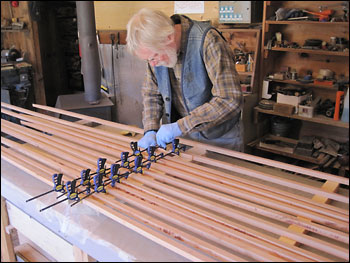 Clamping the 3/4" x 3/4" gunwale strip scarfs. I bought a bunch of these little clamps on sale for about $4 each a while ago and today they seemed like a particularly good deal. It is easy to apply just the right amount of clamping pressure with one hand - actually, two fingers. |
 Dave is now recommending that the gunwales, inwales and possibly the top
chines (stringers) be laminated in place on the frames. This is to reduce
the chance that these elements will force the bow and stern down (hogging)
causing the boat to lose its proper shape. Our gunwales will be made up as
shown above; the pieces fitted one at a time onto the frames and epoxied in
place. |
|
Looking a bit more like a boat. |
|
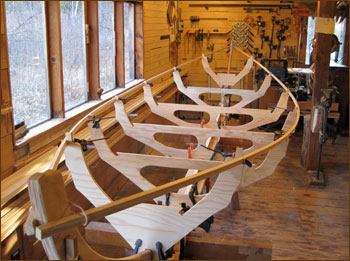 A busy day in the boat shop! The framework is coming together finally. You can begin to see the shape of the boat but the sweep of the sheer line has escaped the camera. I need to move that lumber from along the front wall to make more room to work. 4/25/2015 |
The cherry gunwale strips seemed like a neat idea but the quality of the
wood on many of the long pieces was not good enough for this project. The
first strip I bent onto the frames had a noticeable kink at a previously
ignored swirl in the grain. Further flexing and it cracked in that
spot. |
|
|
|
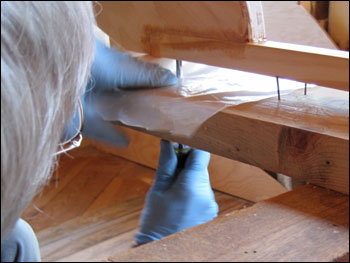 We got the end brackets, six frames & keel all set up where we wanted then
realized there was no handy way drill pilot holes and screw the keel to the
stems. The solution was to drill two 1/2" holes in the right spots through
the strongback plank. I brazed 3" extensions on two small drill bits so they
could drill to the correct depth. |
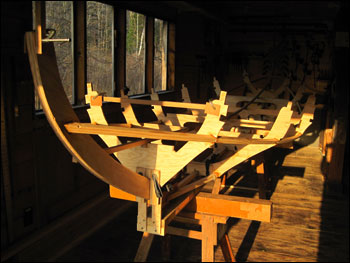 We're finally into assembly mode for real. The lower stringers are now screwed and glued into their permanent position at the stems and each frame. We ended up checking with the designer, Dave, and he OK'd reducing the dimensions of the stringers due to the stiffness of that New Zealand pine. Even the smaller dimension (~7/8" x 7/8") pieces required quite a bit of pressure to bend them into place but nothing broke and it does significantly stiffen up the boat. 5/6/2015 |
|
|
|
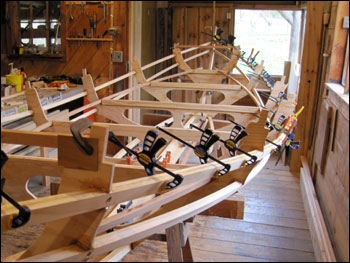 There is a saying among boat builders, "You can't have too many clamps". For this one simple operation, laminating a couple of stringers together, we used 26 clamps. Ideally, to ensure that the boat didn't twist, we'd have used another 26 on the other side. The saying has been validated. 5/10/2015 |
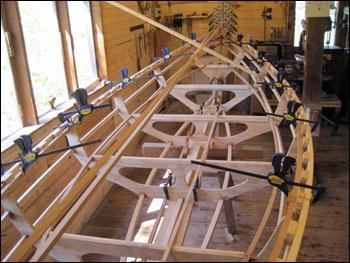 We have been working on the boat most days; Steve laying out and fitting while Sue works in the garden, then Sue comes in and we install the pieces using epoxy. Above you can see that we have completed installing the gunwales and blocking and are fitting the bottom of two inwale pieces. |
|
|
|
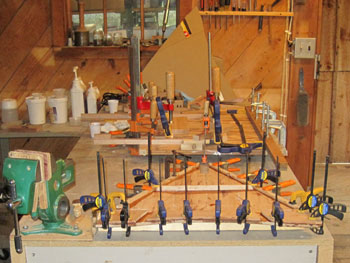 There is a small deck/seat at each end of the boat. The plans call for plywood for those parts and that would be the easiest way to go but I didn't want to buy a 4' x 8' sheet of 1/4" marine plywood for just those two small pieces. So, I ripped some 3/4" cherry boards in half, making a bunch of roughly 5/16" boards. In the photo above I'm edge-gluing and reinforcing the new deck panels. This added another day to the project but I think it will look nice and be strong enough. |
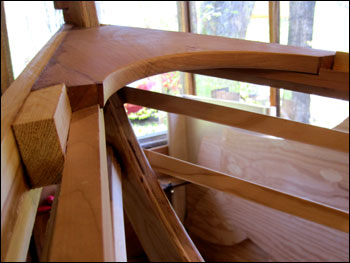 The breast hooks are now installed at each end. These are made from 3/4" solid cherry and are shaped to act as both reinforcement for the bow and stern and as comfortable handles for lifting the boat. Speaking of lifting, I think that Dave estimated the finished weight to be between 120 and 150 lbs. I suspect that this boat will be a little heavier because of the extra-dense pine and the solid wood we've chosen to use in place of thin plywood for the decks, seats and floor. 5/24/2015 |
|
|
|
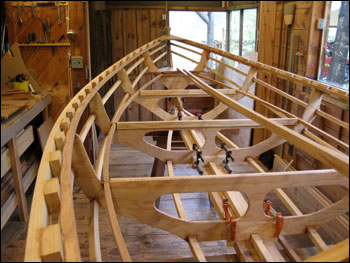 There are fifty (50 - yes I had to cut 10 more) of those little cedar blocks glued in place on the gunwales. The bottom of two inwale strips are also installed. I love the look of the boat at this stage. It reminds me of how our house frame looked at a similar stage back in the early eighties... 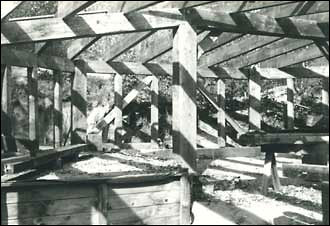 |
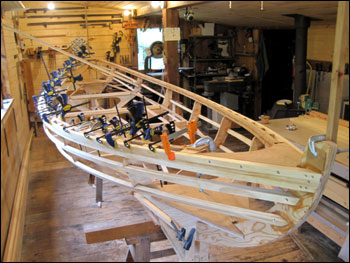 This is the last of the long framing pieces to be installed on the boat - the
starboard inwale. A new record for needing the most clamps was set; 42
clamps! By the way, if you decide to build a boat, find or make a place that
is a little wider than our shop. It works but a lot of operations would be
more comfortable if we had another foot of clear space on each side. The
boat is 4' 7" wide and the clear area in our shop (south wall to post) is a
bit under 7'. |
|
On to the details... |
|
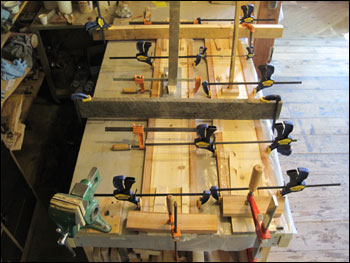 The four main seats are being made up of two cherry strips glued to a cedar center section. The cedar is about 5/8" thick and light but not strong. The cherry is 3/4" x 1-1/8" and is there to strengthen the seat and match the rest of the boat. The trick here is to get all of the pieces flat against the bench and apply even pressure to glue on the side strips - and not glue the whole thing to the bench, of course. There are two vertical props wedged against the ceiling to hold the centers down. |
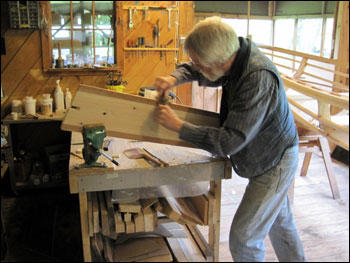 The underside of each of the seat boards gets a 45 deg. chamfer. This is to make a fashion statement mostly by making the seats look thinner. Sue took this photo to prove that not all of the work was done with power tools. I'm using the same spoke shave that I've used carving over 1200 wooden spoons. Although it has been sharpened a zillion times the spoke shave still has the original iron and works great. It looks as though the seats are going to take another day or so. 5/30/2015 |
|
|
|
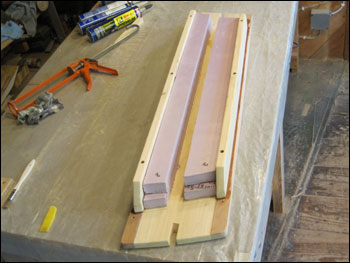 Today we assembled the seats with their lengthwise cleats and cut and glued foam to their undersides. There will be additional flotation under the triangular bow and stern seats. I'm trying to come up with a good way to protect the under-seat foam from abrasion. The rowing position with these four relatively close-spaced seats puts my toes right under the seat ahead of me. I might wait to see if we have any epoxy left when the boat is done and if so I could remove the seats and cover the bottom side of the foam with left over Dacron fabric embedded in a coat of epoxy. It has taken us two months to get this far on the build. 6/1/2015 |
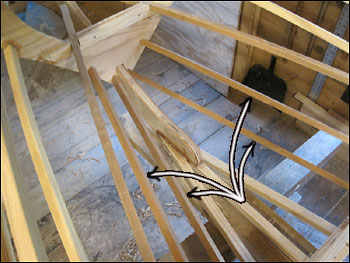 We have spent a couple of days sanding the entire boat frame in preparation for flipping it over and putting on the bottom. But before the turnover I decided to add some smaller stringers in the area between frames 1&2 and frames 5&6. The floor is not very wide in these areas so the 'mini-stringers' are there to keep stuff like back packs, picnic baskets and anchors from hitting the boat's skin. Kind of tired of having to wear a dust mask all day but the majority of the sanding is behind us and we're still having fun! 6/4/2015 |
|
|
|
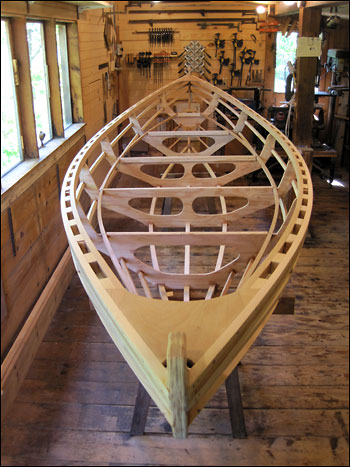 Well, here is the completed framework as it looked today after we took it off the strongback. I have to say that I am pleased with the project so far. The frame is true - has no twist and all those 'extra' steps of building up the stringers, gunwales and inwales by laminating thinner strips has paid off. The frame as you see it, without the seats, weighs 82½ lbs. The six seats weighed in at an additional 23½ lbs. The hull is light enough that Sue and I had no problem turning the whole thing over to work on the bottom. |
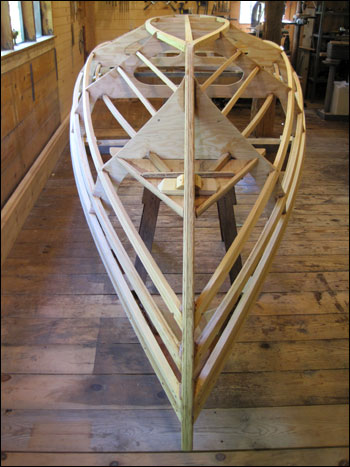 And here it is inverted and ready for final fastening of the keel to the framework and putting on the bottom. The main goal of all that framing laminating was to preserve the 'rocker', the built-in lengthwise arch, of the bottom. In this photo you can see that the keel is indeed arched as it should be. I checked with a long straight edge and there is an inch of rocker at each end. 6/6/2015 |
|
|
|
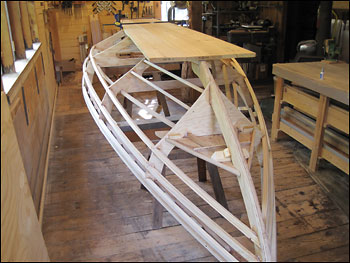
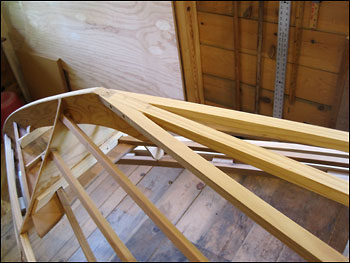 Today I glued and screwed the keel to the frames then reshaped the bottom
stringers to have them blend into the ends of the stems. I also spent some
time contouring the outside edges of the frames to ensure that they won't
touch the covering when it gets pressed in by the force of the water. |
 These three cedar boards are the last of the big pieces to be installed on the boat. In this photo I have them in position to align the grain and test for fit. The boards will be edge-glued with waterproof construction adhesive. The adhesive will keep the sand and stuff from working its way down between the floor and the covering fabric. It is supposed to remain flexible which should help the bond withstand intermittent swelling and shrinking as the bottom gets wet and then dries out again. 6/8/2015 |
|
|
|
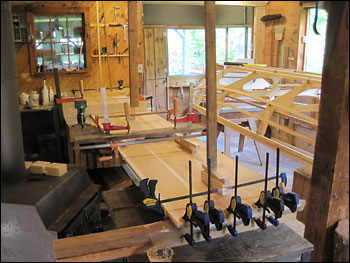 Sue has been spending a lot of time in the garden and helping out here in the boat shop when needed. The big project for today was joining and edge-gluing the 1 x 8 cedar boards for the bottom. I planed the edges until they fit well then routed a shallow 'V' groove down the center of each edge to be glued. This should strengthen the joint; the cured adhesive acting like a spline - at least that's my thought. 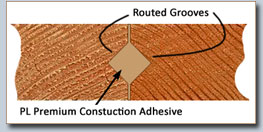 The adhesive I'm using is PL Premium Construction Adhesive. We'll also add a scrim coat of this stuff on the bottom fabric before painting it, as Dave recommends. |
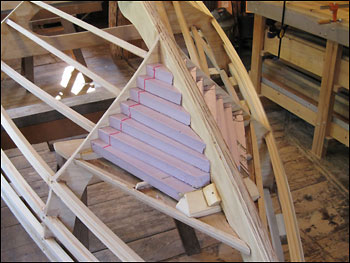 That stuff takes 24 hours to cure so I took advantage of the time to fill the areas below the bow and stern seats with foam for flotation. That little puzzle of pieces is glued to the stems and frames 1 & 6 but not to the seats themselves so we can remove them if we want to refinish or replace them in the future. There is not a whole lot of flotation in the boat; just these areas and under the four main seats. Especially in our cold waters one would like to be able to get into a swamped boat and bail it out quickly. Not a lot of places to hide more foam so we'll go with this and see how it does in a shallow water capsize test. 6/9/2015 |
|
|
|
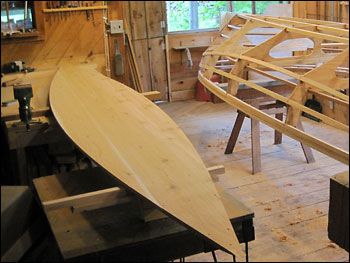 I made lots of sawdust today cleaning up, cutting out and fitting the boat's
floor. We positioned the floor panel on the boat frame and traced the
perimeter outline as well as the keel and frame locations onto the panel. I
cut it out with my trusty saber saw and then marked where the screw holes
needed to be drilled; from the inside out. Once the positioning holes were
drilled is was back on the boat to drill the pilot holes through the floor,
into the framework. |
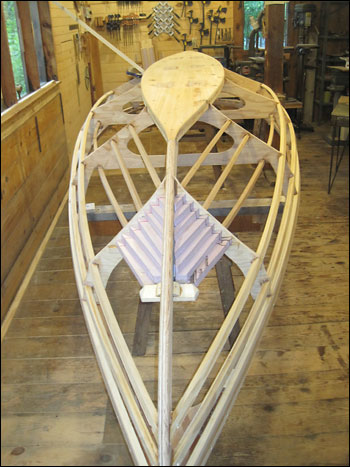 Yesterday I applied six 3" x 8" fiberglass reinforcement 'patches' to the floor joints, on the outside of the bottom, between the frames. The traditional way to reinforce those kinds of joints is to install cleats across them on the inside of the boat but the bottom of this boat is obstructed enough without all of those extra pieces. Harold Payson used this newer technique on many of his boats and they floated. The ugly patches will be covered by the covering fabric. Today I blended the stems into the bottom and routed a 3/8" wide shallow grove the length of the stems for the rolled seams there to be recessed in. We'll see how that works out when we skin the boat in a few days. 6/14/2015 |
|
|
|
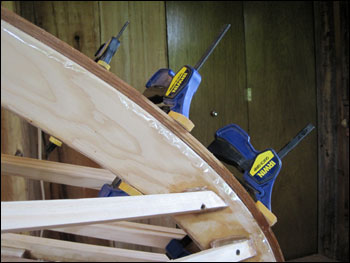 The covering fabric will be stitched along the curve of the stems and that seam will be finished with a kind of rolled seam. The bulk of that seam will fit, hopefully, into the grooves I made yesterday. Once the covering is varnished for waterproofing the rub strip you see being glued up, above, will cover the vulnerable seam area. Each rub strip was made up from three thin cherry pieces and glued together with thickened epoxy to make the strip about 1/2" thick by 3/4" wide. We used the stems themselves as forms and although the process was a bit nerve wracking all went well and we will be able to take them off the boat tomorrow. 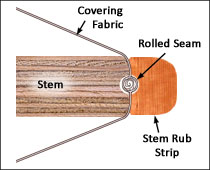 Stem Rub Strip Detail |
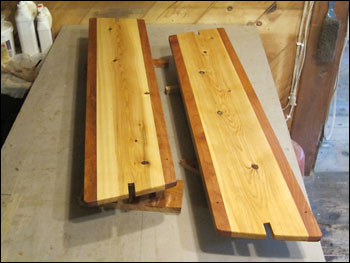 While waiting for the epoxy to cure on the stem rub strips I got started on oiling the seats. Finally we get to see how the cherry and cedar seats will look in the boat. We're using 100% pure tung oil. Nice stuff to work with 6/15/2015 |
|
|
|
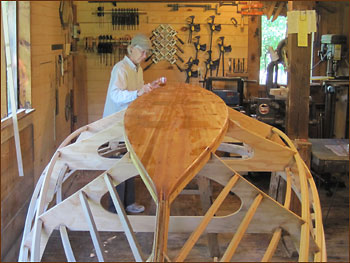 We oiled the whole frame today with tung oil thinned with a natural citrus solvent, D-Limonene. This required that we open up the shop to the fresh air - and mosquitoes. Quite an adventure balancing our time between swatting mosquitoes and oiling the boat - probably took twice as long as it could have. 6/16/2015 |
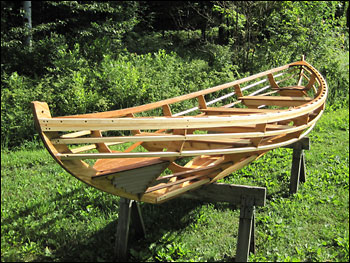 This is the last photo of the boat without its skin. We had a nice sunny morning and managed to move the frame out into the yard for what has become known in the boat building community as a 'Photo-op on the grass'. Then, back into the shop for skinning. |
|
|
|
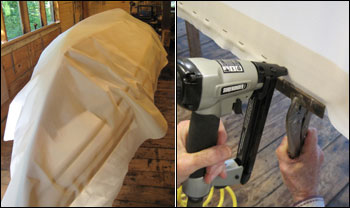 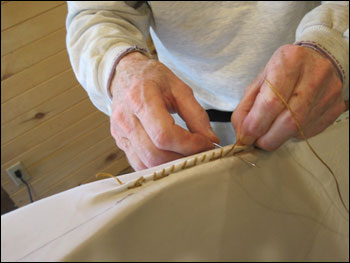 |
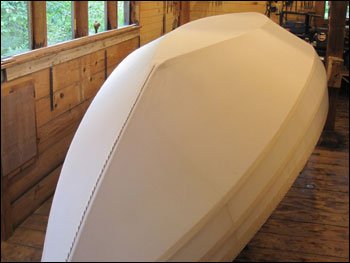 This step takes up a few lines in the builders guide but took us a couple of days. As you can see from the photos, we first draped the polyester fabric over the frame and then stretched and stapled it to the gunwales. I then stitched the material together on each end, first using a running stitch and following up with a simple whip stitch. After a few hours of pulling staples, re-stretching, and re-stapling, the covering was pretty tight and smooth. The remaining wrinkles were smoothed out - mostly - by ironing the material, actually shrinking it, with an old household iron. |
|
|
|
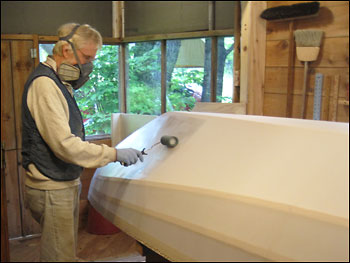 This evening I rolled on the first coat of marine spar varnish. I had planned on putting a special coating on the bottom but couldn't get any masking tape to stick to the bare polyester. Tomorrow the bottom finish! 6/20/2015 |
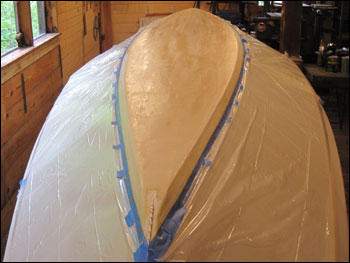 Are we tired of looking at the bottom of the boat yet? I masked off the area about 1" from the bottom; the masking tape does stick to the varnished fabric OK. That beige color is a scrim coat of PL Premium Construction Adhesive. It was applied with a caulking gun and then smoothed out with a 4" plastic spreader - very thin. We're waiting another day for the air to clear in the shop and for a rainy day to pass. Tomorrow is predicted to be sunny so we'll put on the first coat of bottom paint. 6/22/2015 |
|
|
|
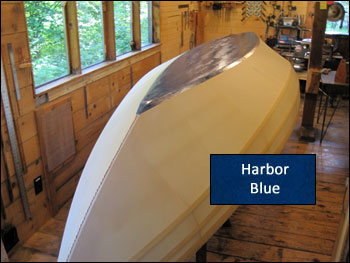 I painted the bottom with some blue oil based paint - it doesn't look very blue in the photo above so that's what the 'paint chip' is all about. It looks OK but was very slow to dry - probably because of the humid weather we've had for a few days. When it does finally dry we'll begin putting the next three or four coats of spar varnish on the whole covering. |
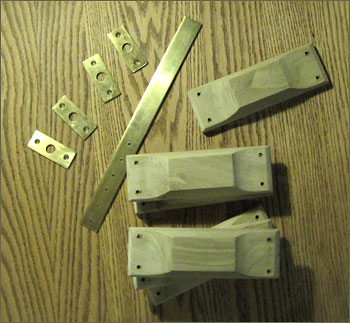 While waiting for the paint to dry I roughed out the six oar lock pad pieces, above. The brass plates will be screwed to the mystery-wood blocks and they will be screwed to the boat's gunwales. There are three rowing stations in this boat to accommodate a solo rower, two rowers, or one rower and a passenger. I say mystery-wood because it came from the front-piece of an old piano we dismantled many years ago and although it looks like mahogany, I'm not too sure..  6/25/2015 |
|
|
|
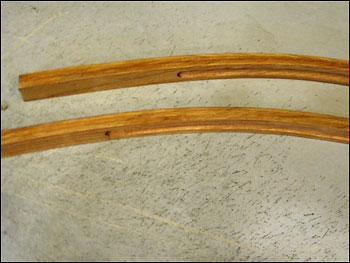 Pretty exciting photo, eh? I just finished rolling on the last coat of varnish; 4 coats on the whole boat and two coats of paint on the bottom with three coats of varnish over it. The painting process is kind of interesting. I'm using a 4" roller frame with half of a 9", 1/4"-nap roller cover. I roll a light, even coat of finish on a small area, then before it dries, lightly drag a 4" foam brush over the surface to make it even smoother and get rid of any bubbles the roller may have left. It works nicely though I'll admit to being glad the painting is done. |
Back to the photo on the left. If you look back up the page to the June 20th entry you can see the hand-sewn fabric at the stems of the boat. I want the stem rub strips to fit over that raised stitching and seat firmly against the stem. The picture shows the groves that I routed in the underside of the rub strips to make room for that stitching. I had hoped that the grooves I'd routed earlier in the stems themselves would do the job but the fabric tension won't allow the stitching to go into the groove much. The rub strips are sanded and oiled, ready to to be drilled and screwed in place, hopefully tomorrow. I also fitted and oiled the three bottom rub strips today. They will go on tomorrow too.
It has been almost exactly three months since we sledded the materials for the boat down to the shop. A fun project all the way! 6/28/2015 |
|
|
|
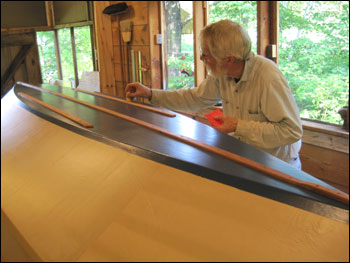 We got the bottom rub strips shaped, oiled and installed today. As you can see in the photo above, the final coats of varnish have given the boat a nice amber color and the bottom is very smooth. I've since refined the joints where the stem and bottom rub strips meet to make the transition a little smoother. |
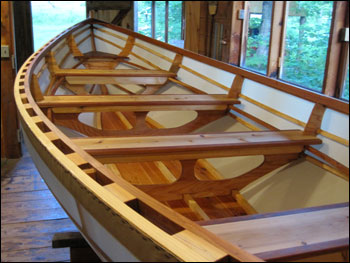 Almost done! Just need to install the gunwale rub strips and oar lock pads. Sue and I flipped the boat over but it was a bit harder without all those stringers to grab onto during the roll. We put the pine gunwale rub strips we'd planned on using on temporarily but didn't like the look of the light colored wood. The boat really needs a nice contrasting color to show off that wonderful swooping sheer line. I'll go out to our wood storage building and see if I can find one more really nice piece of cherry. This change may delay the project a day or so but now isn't the time to compromise on the looks of the boat - plus, a hardwood is more appropriate for the rub strips. 6/29/2015 |
|
|
|
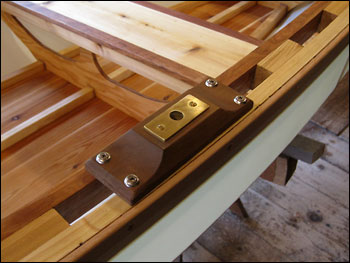 Here you can see how the oar lock pads and new cherry rub rail turned out. It was worth waiting for. I'm not crazy about the clash of hardware; stainless steel screws & washers vs. the brass plates but each material seems to fit its use here so we went with it. The rub rails are 5/16" thick and 1" high, tapering at each end to about 5/8". 7/3/2015 | |
|
Launch Day! |
|
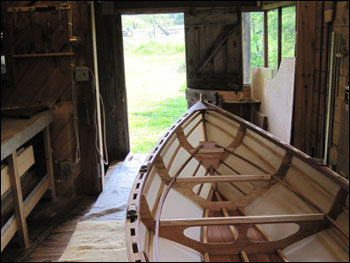 Ready to emerge into daylight... |
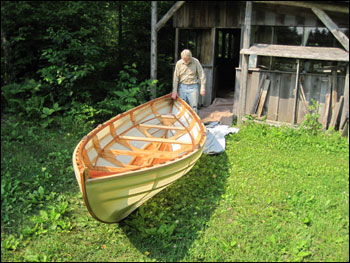 Emerged! Tipped on its side and gently dragged out the door on a blanket. |
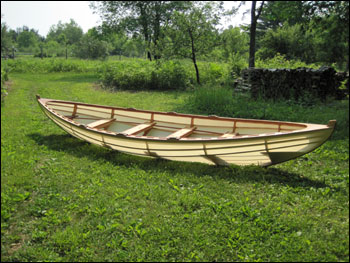 Awaiting a ride to the lake. |
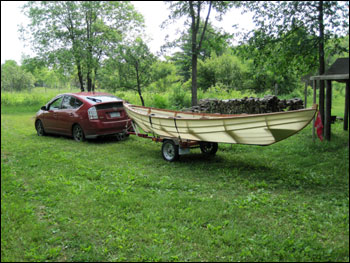 On the trailer, ready to travel. Actually the trailer needs to be lengthened but it is hard to buy the steel needed on the 4th of July so we loaded it up and drove carefully. It rode fine. |
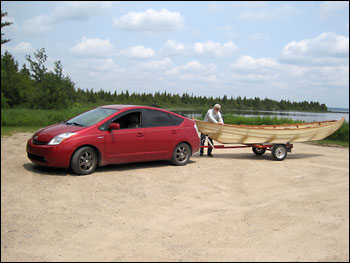 Arrived at the Indian Lake boat launch site about 10 miles from home. |
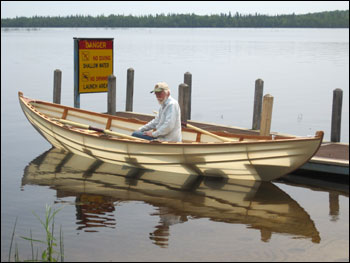 In the water, finally! We took turns rowing for an hour and a half and it
rows very nicely. With each stroke of the oars the boat glides at least a
boat length. It is so cool to be able to see the water/waves rippling by
through the boat's fabric. |
|
|
|
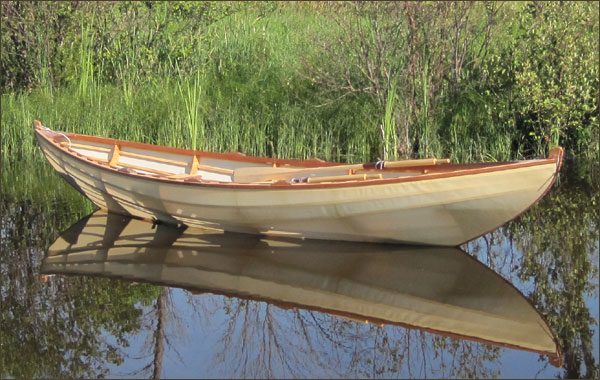 This was taken just before a nice four-hour row on Big Bay de Noc, one of the northernmost spots on Lake Michigan. The day began calm and we rowed about five miles down the western side of the bay. The wind picked up a bit midday and we had a nice fast trip back rowing downwind among the whitecaps. The boat handled well! We have established the practice of each rowing for a half hour then switching and it has worked out nicely. The crew not at the oars gives navigational directions to keep us on course. |
|