|
On our recent trips we have
been carrying a 15 lb 'Navy' anchor and a couple of one-gallon plastic jugs
full of water as ballast and even that relatively small weight addition has
helped in moderately windy conditions.
June
15, 2020 -
A Bit of Cool, a Lot of Sunshine
 And
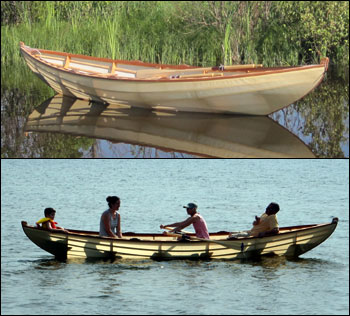
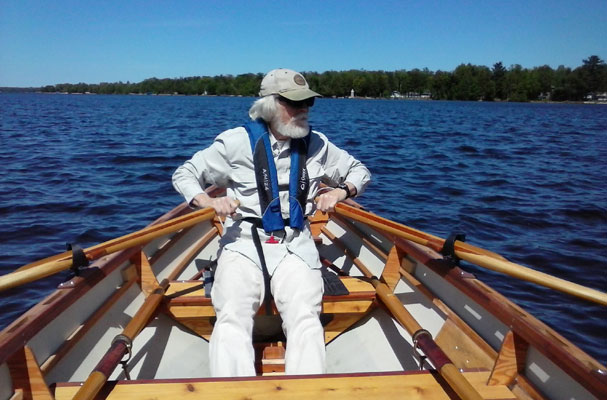
off for a ride we went - a mostly calmer one - in the dory. Yesterday
was such a beautiful day, sunny, in the upper 60's with just a moderate
wind we decided to head out to the lake. We had thought about going to
Lake Michigan but the wind was just a bit too brisk for comfort so back to Indian Lake. It was a great row, mostly
calm, except when it wasn't, depending on how close to shore or in or
out of the wind you were. We alternate rowing in 1/2 hr shifts. There
were some people on the beach, in the water, in kayaks, enjoying the day
and the sunshine. Wonderful to see. Many duck families, too! A very
pleasing outing, and likely the last in the "big" boat as the next time
out will probably be in the kayaks and/or the new
expedition rowboat. I think
summer is here! And
off for a ride we went - a mostly calmer one - in the dory. Yesterday
was such a beautiful day, sunny, in the upper 60's with just a moderate
wind we decided to head out to the lake. We had thought about going to
Lake Michigan but the wind was just a bit too brisk for comfort so back to Indian Lake. It was a great row, mostly
calm, except when it wasn't, depending on how close to shore or in or
out of the wind you were. We alternate rowing in 1/2 hr shifts. There
were some people on the beach, in the water, in kayaks, enjoying the day
and the sunshine. Wonderful to see. Many duck families, too! A very
pleasing outing, and likely the last in the "big" boat as the next time
out will probably be in the kayaks and/or the new
expedition rowboat. I think
summer is here!

New Oarlocks - and
an Adventure:
Some of our most interesting rowing adventures have been on the nearby
Manistique River. The lower end of the river, where we have been rowing, is
between 75 and 200 feet wide and there is a moderate current this time of
the year. Miles and miles of river with no signs of civilization - very
nice!
The other day we rowed a few miles upstream, had a picnic lunch, and began
rowing back to the launch site when BANG! the right oarlock snapped off. It
broke cleanly where the shaft meets the closed ring ...
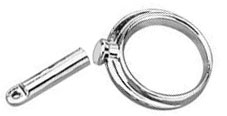
We managed to get back to
the launch site by having Sue row with the good oar and I paddled on the
opposite side with the casualty; slow but it worked. These oarlocks were
inexpensive Perko zinc alloy and not the best for this application.
I made up a set of Phil Bolger's steel oarlocks and I'll guarantee these
will not break. The only modifications I made were (does anyone just build
things the way they are designed?) I used 1" wide steel bar stock, because I
had it, and brazed on a couple of bronze bushings to eliminate the
steel-on-steel pivot areas. The steel parts were cleaned up and then blued,
polished and waxed.

These
oarlocks work more like captured tholepins since the 1/2" shaft does not
rotate in the oarlock pad. The 'D' shaped piece keeps the oar in position.
Some folks are using this type of oarlock 'backwards', that is, orienting
the lock so that the force is not against the pin, but against the ring.
UPDATE 11/3/2015 We took the boat out for one more ride
before the water hardens and the Bolger oar locks worked well. The one nice
thing about the old ones was that the lock was captive on the oar - trapped
between the blade and leather 'button'. With the old lock tethered to the
boat it would be pretty hard to lose an oar. Not so now. The new lock is
tethered but it is possible to slide the oar out past the button; it's
not a good idea to just let go of the oars when, for instance, we are
changing rowers. The solution; larger buttons or make the 'D' loops a bit
smaller. I'll probably make new loops. While I'm at it I'll also shape the
bottom of the loops so they have a softer, curved, bottom edge that the oar rests
against.

Additional Building
Notes:
I took some notes during construction of the dory and thought I'd
share some of them here. Sorry for the seemingly haphazard order of these
notes.

Epoxy quantity:
We used one complete MAS #4 Economy Kit from Chesapeake Light Craft. The kit
included ½ gallon resin, 1 quart non-blushing slow hardener, 1 quart wood
flour, 1 quart cell-o-fill thickener and 2 metered dispensing pumps. Cost:
$131 plus shipping. When we were done we had about 2 oz. of epoxy left and
had used nearly all of the wood flour and cell-o-fill. We had very little
waste after the first couple of small batches. You quickly learn how many
pumps it takes to do a particular job. I like this combination of products a
lot!

A
favorite tool:
I made up a 'sanding paddle' from a piece of heavy steel sheet and a dowel
for a handle. It has 50-grit belt sander abrasive glued to one side. The
corners are rounded so it won't damage adjacent parts.
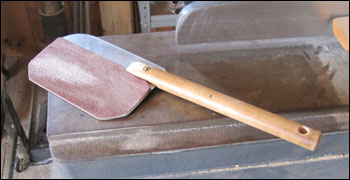
I found this tool especially useful when fine tuning the gunwale and
stringer joints at the stems. It also works great for flattening surfaces -
like a big, flat file.

A great saw for softwood:
I usually use a Japanese saw for hand cross-cuts but when sawing small
pieces of cedar or pine to length it left a pretty rough end. Bad enough
that every cut also had to be sanded too and often I'd mess up the
squareness of the piece even when using a firm, flat sanding block.
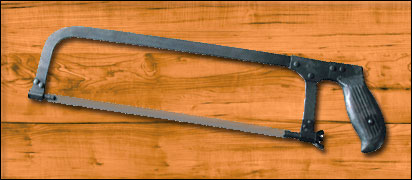
I found that I got much smoother and more predictable results using my 50+
year old hacksaw with a new, clean 24-tooth blade in it. I suppose one could
turn the blade around so the teeth face the handle and call it a 'pull saw'
but the tool is designed to be pushed and seems to work best that way. To
keep the cuts clean I don't use that blade for metal.

Under-seat Flotation:
We ended up covering the underside of the flotation foam with thin black
Dacron fabric. We brushed on a coat of slightly thickened epoxy and pressed
the fabric into it. When rowing I use the under-seat frame as a foot rest
and the toes of my size 10 shoes often hits the foam. So far the fabric has
held up OK and prevented damage to the foam.

Boat cover for storage:
We made up a quick and dirty cover for when the boat is stored inside our
large storage building (small airplane hangar - but that's another story). I
used a felt pen to mark the shape of the sheer on a couple of old sheets,
cut outside that line three inches and sewed up a wide tube-hem. I made up a
1/4" rope loop with a piece four foot long piece of bungee cord at each end
and fed it through the hem. It is easy to stretch the cover over the stem
tops and then pull down over the sides. The boat is staying a lot cleaner
now.

Second set of Oars:
All of our rowing so far has been done with a set of oars I carved when
building the boat. They are 7'-9" long, have a round, tapered profile and
have sewn-on leathers with leather buttons. Most of the time the rower sits
one seat towards the bow from amidships and with the oars fully extended to
the buttons there is a small hand overlap.
We have become used to this arrangement but have occasionally been out in
conditions where a second rower would be a good idea. This usually occurs
when the wind picks up while we are downwind of our put-in spot and as noted
above, it can be a challenge to make headway against the wind. This
issue has been dealt with for thousands of years by countless oarsmen but it
has special meaning when it is you at the oars. The obvious solution was to
carve another set of oars. The new oars are a bit longer at 8' - 4". They
are square in profile from the handles to the leathers, then oval (the long
dimension perpendicular to the blade) on down to where they blend into the
blade. The reason for the square shape is to move the center of balance of
the oar inboard which in turn makes the blade feel lighter. The trade-off is
that these oars weight a little more that the slim round-profiled ones. By
the way, the old oars balance fine because they each have a few ounces of
lead in the grips.
Here are couple of photos showing the two oar types side by side and sewing
on the leathers...

I'll update
here when we have a chance to try the new oars out; there is still 6-10" of
snow on the driveway so it may be a while.
(ss 4/9/2016)

Future Boat Building
Projects:
This winter (2015-16) we plan on each of us building a
skin-on-frame kayak. I have been studying the plans for Dave Gentry's
Mobjack Bay
Greenland-style kayak. I think it might be a nice design for Sue since it is
should fit her nicely. She has not committed to any particular design yet.
I'm now thinking of using a variation of Dave's building technique but
building my boat based upon Brian Schulz's F1 kayak. Brian has done
extensive design work and kindly published some measured drawings for his
F1on line. In compliance with his requests, I'll not call this boat an F1
since I won't be using his building techniques. I will be sending
him a donation for being willing to share the design. Check out this kayak
at CapeFalconKayak.com.
The F1 is a relatively short boat at just over 14'; it is 23" wide.
|


