|
|
|
|
|
|
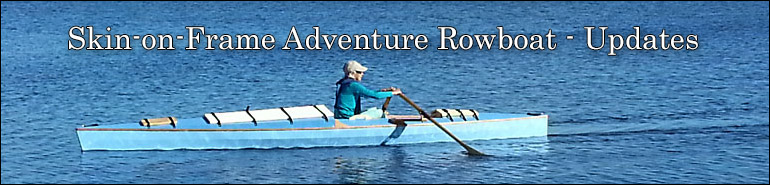
Documenting the updates to our Adventure Rowboat - 2020 | |
|
| |
|
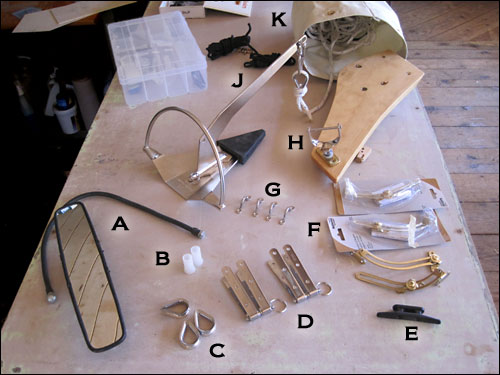
Parts & Plan: What Really Happened:
(B & H) - Oar Locks &
Bushings: I needed to ream out the nylon oar lock bushings a little
but not before discovering that the pins of my new stainless steel oar locks
were not machined the same size. I chucked the larger lock in the drill
press (slow speed), and used a file to 'machine' it down to the same
diameter as the other lock. Then, I reamed the bushings out to fit those
pins. They also fit my regular Gaco locks well which is good since I still
plan on being able to switch oar locks to fit the rowing conditions (and my
mood). |
|
|
(C, J & K) Anchoring Stuff:
The Anchoring system is all set to go. I added an anchor rigging system on
the port side that allows me to deploy the anchor from the cockpit and then
run the anchor rope attachment up to the bow to keep the boat pointed into
the wind and waves when anchored. The idea is that the anchor is carefully
dropped overboard, an appropriate amount of rope let out and tied to that
thimble shown in the right hand photo. Then the rigging line is uncleated,
the thimble is pulled forward to the bow and the line is tied to the cleat.
In the left photo you can see the copper guard I installed to protect the
fabric at the bow from being chafed by the pulley or line. 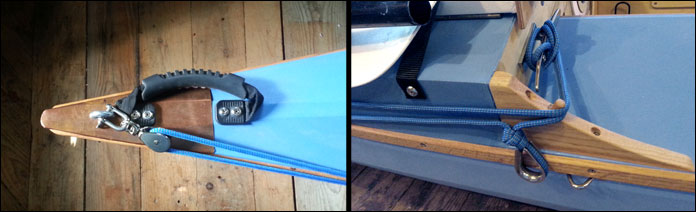 This has worked great! I love that little take-apart Mantus anchor. I added 6' of silky-smooth 1/4" diameter 316 Stainless Steel chain between the anchor and rode. This ensures that the anchor positions itself correctly and prevents any chafing of the nylon anchor line. I have used the anchor quite often - usually for on-water lunch breaks - and it has held very well.
|
|
|
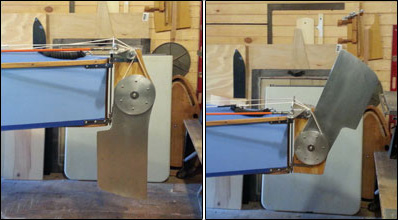
(D) The Rudder: I
got the idea for this rudder from an on-line
article by Larry Miller and all credit for the design goes to him. I
used a salvaged aluminum 'Curve Ahead'
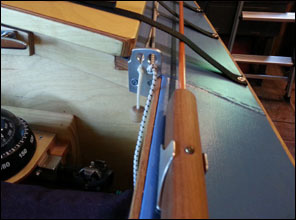
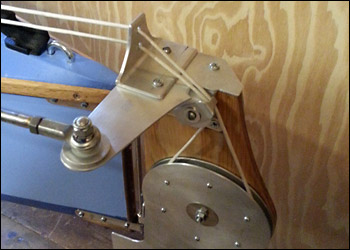
There are two lines running through that aluminum
plate in the middle of the left photo above; pull the left one to raise the
rudder manually, release it and pull the right hand line to pull the rudder
down. That striped hold-down line is mostly bungee material so the rudder
can safely kick up if it hits an obstruction. The rudder head is made from
some aluminum angle and a small piece of the 'curve' sign. The guide on top
is positioned directly over the pintle/pivot so the lift and hold-down
functions work well regardless of rudder angle. A small nylon pulley keeps
the raising and lowering action smooth. I used a stainless steel 5/16"
rod-end bearing on the end of the push pull shaft which was a repurposed
fiberglass driveway marker.
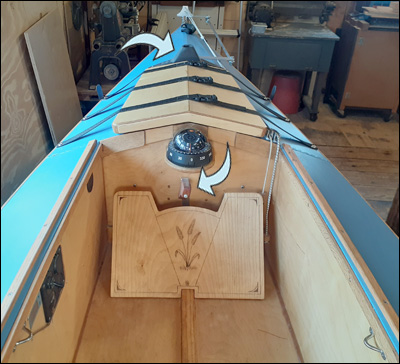
The new toe-operated system is more complex than
the simple push-pull idea but works much better for me. There is just enough
friction in the system that the rudder stays wherever I set it. The lower
arrow, under the compass, points to the pivoting toe-block. The upper arrow
indicates the 'forward-view' mirror's mount. |
|
|
(E) - Cleats:
I mounted a 5" stainless steel cleat on each side of the cabin/cockpit
bulkhead and one on the bulkhead that makes up the aft end of the cockpit.
These are 5" stainless steel cleats and are backed up by aluminum plates
using all stainless hardware. Stainless is non-magnetic and this was
particularly important for the aft cleat as it is mounted only inches above
the compass. As it turned out, I had to remove the cleat on the aft cabin
bulkhead. In order to have room for my toes to operated the new rudder
control I had to raise the compass. Something had to go; the compass stayed
and the cleat is out of there. I'll probably mount a pair of 4" nylon cleats
- one on each side of that bulkhead. |
|
|
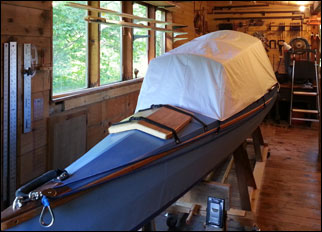
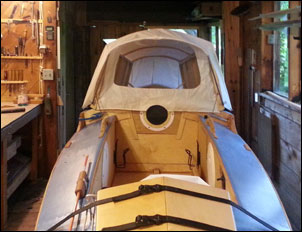
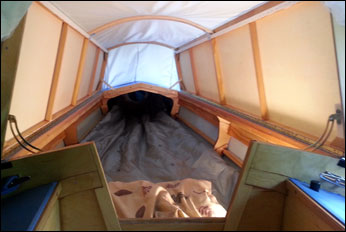
(F & G) Cabin Hatch
Supports: After a bit of fiddling the cabin hatch support hardware is
working as planned. I also added a couple of diagonal latches at the bow end
of the hatches to stabilize them so they could better support a cover for
the cabin. I mounted three of those little pad eyes just below the outer rub
rail along each side of the cabin. The cabin cover/tent is secured to them
with small custom bungees. And here's how the cabin tent turned out: 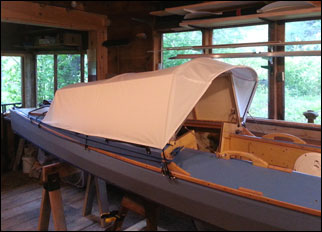
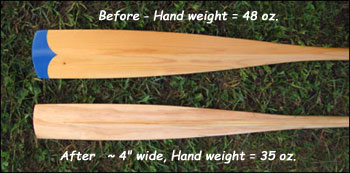
- Slim down and balance oars - Tablet mount: - Test long kayak paddle: - To-Do's yet to be Done (Prioritized): |
|
|
Contact: Steve Schmeck steve@manytracks.com www.ManyTracks.com |
|
|
|
|
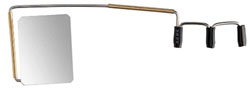 bike mirror that fastens to your helmet or glasses a try but I found that
the boat's motion and my movements while rowing made it too much work to
keep the forward view steady. I ended up repurposing one leg of a
camera tripod and making up a support bracket to mount that large convex
mirror. Other than the slight hassle of removing it for trailering and
slipping it back into its mount at the launch site it has been great! I
still turn around to see the big picture once in a while but the mirror's
image is pretty wide and is very stable. It is so nice to be able to see
where I'm going!
bike mirror that fastens to your helmet or glasses a try but I found that
the boat's motion and my movements while rowing made it too much work to
keep the forward view steady. I ended up repurposing one leg of a
camera tripod and making up a support bracket to mount that large convex
mirror. Other than the slight hassle of removing it for trailering and
slipping it back into its mount at the launch site it has been great! I
still turn around to see the big picture once in a while but the mirror's
image is pretty wide and is very stable. It is so nice to be able to see
where I'm going!