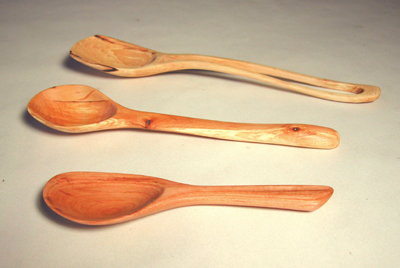
Whether that old wooden spoon you use is a mass market cheapie
or a one-of-a-kind hand crafted item, an heirloom from your
great-grandfather or a future antique you carved yourself, it
probably could use some attention. How much depends on its
original condition, its use (or abuse) since then, and the type
of wood it is made of. You can't change the type of wood but you
can change some of its character if need be. And a little bit of
time and work can do wonders for even the most neglected wooden
item in your kitchen.
The harder the wood, the smoother the possible finish. You
can't get the sheen of maple from poplar. But you can get
them both smooth enough to be pleasant to use. It's not a trade
secret, it's called sandpaper. And patience. Its use, or lack of
use, on your spoon makes the world of difference to the finished
product.
So, step one is to get several grades of good sandpaper. Not
flint paper. Obtain garnet or aluminum oxide for the courser
grits. If you can't find it at your local hardware store check
with a woodworker. For the finer grit papers the black colored
wet/dry sandpaper is easier to find, if not at the hardware then
at an automotive store. You will want a sheet each of
approximately 100, 220, 320, and 400 grit sandpapers. The larger
the number the finer the sandpaper. If your woodenware was well
made to begin with, and is still fairly smooth, just the finer
320 and 400 grits will do.
If your spoon (or other woodenware) is quite "fuzzy"
it probably was not sanded well to begin with, as is the case
with most factory made spoons. Rip or cut the large sheet of paper in quarters
or smaller. Folding the paper in thirds, or in half and using double stick tape
or adhesive of some kind so the paper doesn't "slip" when sanding
helps. Sand your item starting with the coarsest
paper necessary, going with the grain of the wood. If it is quite
rough you might start with 100 paper, if just somewhat fuzzy try
starting with 220. If you seem to be sanding a lot and not
getting very far fast, change to a coarser grit paper. Sand until the piece is
even all over with that grit paper.
Then wet the spoon which will raise the grain. When it is dry sand it again with the next finer paper, 220
if you started with 100, 320 if you started with 220. Remember to
sand with the grain and work until you have sanded out any
scratches put in by the previous sandpaper. Then wet the utensil
once more, let it dry, and go to the next finer grit paper. And so
on until you are to the 400 grit paper.
When you are ready to sand with the 400 sandpaper, wet the
spoon and the paper and sand away. Wet your paper often to keep a
slippery surface on the wood. With the fine paper it is not
critical to sand with the grain so it is a bit easier. If your
spoon is made of a softer wood this step may not do a lot. If it
is of a very hard wood you may want to let the spoon dry then
repeat the step, possibly with 600 paper. This is especially
important for an eating spoon since an even slightly fuzzy spoon
is no fun against your lips. But a well sanded hardwood eating
spoon has it all over a cold metal one!
When the utensil is dry you will want to finish it with an
edible oil. Your usual salad oil will work OK. We used RAW
linseed oil for many years on the hardwood spoons we made and it
worked fine. Now we use a nontoxic resin and oil sold by LIVOS called Meldos *[see
note below].
It is faster drying, an asset when oiling a half dozen or a dozen
spoons at a time, is non-yellowing (which was a problem with the
raw linseed oil on new, light colored spoons), and doesn't bleed
out in the heat of the sun (not a concern in your kitchen but it
was a problem for us at outdoor art fairs). With any oil make
sure first of all that it is edible.
Rub the oil in well then let the utensil set for maybe twenty
minutes or so. The time varies with the type of oil and the
temperature. You want to give it plenty of time to soak in, yet
catch it before it gets sticky. After that time wipe off any
excess oil with a cloth rag. If you don't get the excess oil off
it will turn sticky and gummy and can be a hair-tearing
experience trying to get it off (I say this from experience). If
this should happen you can try pure turpentine or citrus based
solvent on a rag to rub it off. How successful you are depends on
how much too long you waited.
Let the spoon or utensil set for for several days to
"cure". If the
first coat soaked in well put on another, thin coat. Again, let
it set a short time then wipe off all excess. Let it "cure" for
another several days. A third and possibly a fourth light coat may
be needed. The harder the wood the less oiling is required. When
you find yourself wiping off all the oil you put on then you are
done. I put cure in quotes because some oils don't really cure, or do so only
after quite some time. Just rub off the oil and leave your piece until it feels
"dry" before re-oiling.
Previously finished utensils will probably need only a few
coats. Our well used spoons take only one oiling when refinishing,
and only need a light 400 grit sanding to bring them to
freshness, mainly in those areas where they've become worn from
use. A freshly made cherry wood spoon takes three or four applications of oil; a new maple
or ironwood might just need two.
When you are done, enjoy using your "new" spoon or
utensil. You can reach for it often knowing that when it once
again needs a bit of rejuvenation, you can easily do it yourself. And it
probably won't take as much work the next time.
I admit we are both partial to wooden spoons, plates, and
bowls for cooking and eating. Stirring your tea or coffee with a
metal spoon becomes a jarring experience to one used to the
gentle thunk, thunk of a wooden spoon. If there aren't enough
wooden utensils in your kitchen then think about making your own.
Most woods will make a serviceable spoon or stirrer. Though most
of our work is done in hardwoods we use spoons that we have made
out of basswood and poplar, too, and a half dozen other woods. For an
eating spoon, however, I recommend a good hard wood such as apple
or maple. A good source for instructions on how to make your own
spoons can be found in the book "Country Woodcraft" by Drew Langsner. It isn't a fast project but it can be a very satisfying
one. Both in the making and in the using. Hand carved wooden
spoons make great and welcomed gifts, too. 1997
* * * * *
FINISHES UPDATE - 2009. We did use the Livos' Meldos product for some years. It
was especially nice on bowls and boxes. But then I discovered that Meldos also
had un-named "driers" in it which we decided we didn't want to use on
something people (including us) would be eating with. So we switched to Tried and
True polymerized linseed oil. It's rather thick and though it says to NOT thin,
I did because I didn't care for the thick viscosity of the oil. Steve used it straight. It was OK,
curing better than raw linseed oil but still wasn't just what we wanted. Plus we
couldn't get it locally so had to mail order it from a hardware in
Wisconsin.
We tried walnut oil and while it was OK it didn't
"cure" very well. But our biggest problem was that our two cats were very
attracted to it and wanted to lick any oiled spoons or rags laying around.
Since both they and the spoons in varying stages of oiling were all over the
shop, this didn't work very well. So we quickly abandoned that. Interesting
that they haven't bothered any other finish.
Then an article on finishes in Woodwork magazine led us to
pure Tung oil. I'm not carving much these days but Steve's been using it for
quite a
few years now, sometimes thinned about 2:1 oil to turpentine, and he really likes it. It
dries/cures faster than linseed, is not so yellow, and puts a better shine on
(which is quite important for his bowls). It soaks in well and takes multiple
coats well. AND, it's available at locally (Svillands in Escanaba, for those in
the U.P.). There are a lot of finishes which say Tung Oil but they aren't (I
don't know why they're labeled as such) so read the label and make sure it's
100% pure Tung Oil. We got Old Masters brand. You can also use it not thinned of
course. It doesn't have much of an odor either. This is our favored finish now,
which is nice since raw linseed oil seems to have disappeared from the
shelves.
* * * * *
Copyright
1997 - 2009 by Susan Robishaw