|
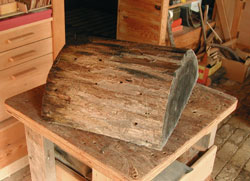
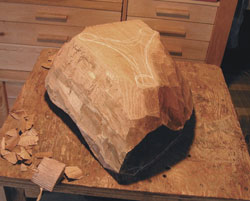
Above: I received this
half-log section of Red Oak a year or so ago and it has been stored on
end out in the weather to age. You can see signs of minor bug
infestation but they apparently were only interested in the outer inch
or so. This piece weighed in at just under 50 lbs. 12/1/2006.
|
|
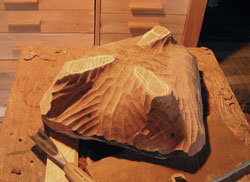
I sawed and chipped off one
corner to give the bowl a roughly triangular shape. Here you can see
that I have laid out the locations for the bottoms of the three feet. To
give you an idea of the size of this piece, the top of my carving bench
is about 24" on a side.
|
|
The general shape is
beginning to emerge. I've left the feet kind of oversized to allow for
adjustment in case I run into any surprises, like knots or cracks. No surprises
this time so now I can decide on the shape of the feet and get on with
shaping. I'd like this bowl to appear quite rounded and deep so will
shape the sides so they are more or less vertical as they approach the
rim. 12/5/2006 |
|
I just finished shaping the outside of the bowl and revised the rim
shape. Here I'm starting to hollow out the inside with one of my
favorite gouges, a 35mm wide #7 sweep bent gouge. Most of the gouges I
am using now are Pfeil "Swiss Made". They are strong enough
for this kind of use and hold an edge well, especially considering that
they spend a lot of time cutting across the grain of this hard
oak.
|
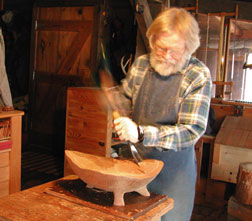
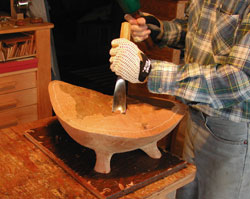
Just a quick shot to show that I really do chop away at the bowl at this
point in its emergence. It is securely fastened to my heavy carving
bench and at this stage I'm taking off potato-chip-sized pieces.
|
|
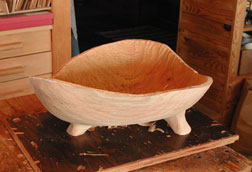
The sides are 1/2" to 3/4" thick now. Overnight or any time
I'm not actively carving I cover the bow to keep it from drying out too
fast and cracking. So far so good though I'm a little concerned
about potential weakness of that end grain section facing you on
the left of the picture above.
|
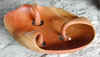
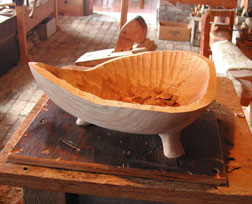
Whew! Carved down to about 3/8" now and time to switch over to the
old goose-neck scraper to remove all the gouge marks and that the bowl
down to its final inside surface. That end-grain thing I was concerned
about above may prevent me from following through with the plan of
carving multiple holes along the rim. That one end flexes quite a bit
and I'd rather be flexible with the design than create a bowl that won't
hold up under normal use. I'll wait to see how it feels after a couple
of days of controlled drying. 1/10/07
|
|
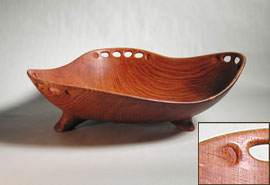
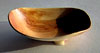
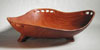
Well, this bowl firmed up quite a bit as it dried so I decided to
try a modified 'lace' effect in the non-end-grain sections. Each
corner has 3, 4 or 5 carved holes with a psuedo-hole (inset above)
carved into the rim on each side of the set. Bowl thickness is, I feel,
appropriate for this open-grained wood, at around 1/4". It finished
up very nicely with multiple coated of oil and a final, buffed coat of
wax. It has a pleasant soft sheen and the distinctive grain and
character of the wood is both visible and can be felt tacitly when handling
the bowl.
|