|
| ||
|
Bathing Suit
|
ManyTracks Sewing and Knitting
|
Socks
|
|
Design & Sew Your Own
Easy
Pants & Shorts
How-to ~ Ideas
~ Inspiration |
||
|
Synthetic pants for kayaking - mosquito-proof pants for hiking
- shorts for summer work - pants for town - pants
for leisure - pants for any and all situations and lifestyles. But most of all,
pants that fit, that suited me, geared toward my specific activities.
The best way I knew to do that was to DIY - make my own. |
||
|
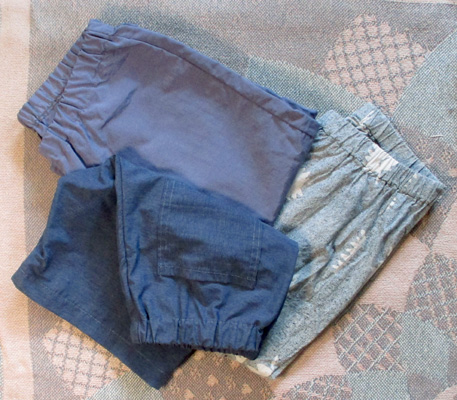
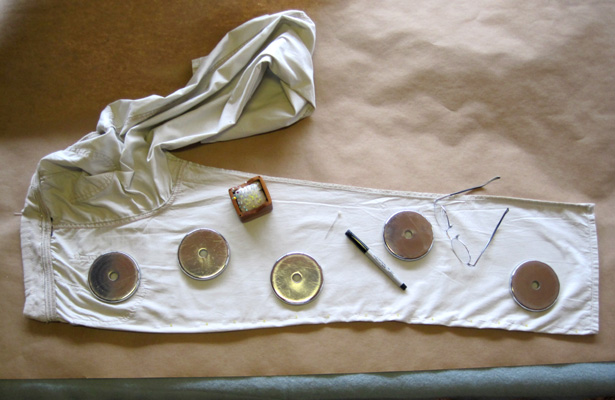
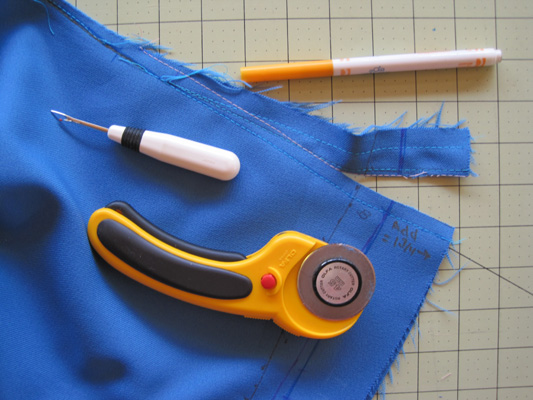
I started with a pair of elastic waist pants that fit me the best, though the waist area was different and they were looser than what I wanted. The pants I planned to make would be of stiffer synthetic material for kayaking and hiking but I figured these softer cotton pants would do for a starting point. I ironed the pants, laid out double a wool blanket on my table, then a generous piece of brown kraft paper, smoothing the fabric and using weights to hold the pants in place. Then I began poking "pattern" holes along the seams using a large hat pin, using a method learned from an older book "Patterns from Finished Clothes" by Tracy Doyle. I don't think it's still in print but used copies are available. It's worth getting. Your finished pattern will be as good as your method and attention to the details! I did the best I could. If you plan to make many patterns I'd recommend you also get a large roll of sturdy brown paper - it's amazing how much you can go through unless you're very skilled (and lucky?) and get it "right" the first time. I go through a lot of paper. You can also start with a commercial pattern. This part just plain takes a lot of time and patience. Connecting the dots, adding seams (half inch), figuring out the waist band. But eventually I came up with a starting pattern and cut it out. A rolling cutter and mat makes this easier but do have a cutter than is designated specifically and only for paper and other coarse materials - not your good fabric cutter. I don't think I've read a sewing book that didn't recommend plain cotton muslin for your trial pattern piece - which is likely why this piece is called a "muslin". It is good advice. I didn't follow it. In my experience, it is very good advice and highly recommended. But I, in my ever practical style, decided to simply pick up some synthetic material from the bin at the thrift store and make pants from that. And if they turned out OK I'd have useable pants to wear. Pretty good reasoning I thought, so subsequently picked up what I could find - a very light weight navy with thin red stripes, a fairly heavy light blue poly, and some nice chambray/denim colored shirt weight not-cotton. I didn't know the fabric content of any of them but they weren't cotton. Actually, this wasn't my first attempt at pants. When I started my pants adventure I found a pants pattern I had made some time ago. Long enough that I couldn't remember what it was from, and there were no notes, just the pattern cut out of brown paper, but I figured it had to be close (I haven't changed size since I was in my teens). As I was in a bit of a hurry (always a warning sign!) I laid out the fabric I'd bought, smoothed out the paper pattern on it, secured it with weights and proceeded to cut. This was a real nice, sturdy recycled polyester fabric with DWR finish. Perfect for cool weather hiking. Now, if I'd had any of my wits about me I would have noticed that the pieces seemed a little small. But no, I just went ahead and stitched it up. Pants are fairly simple to sew. Then I tried them on ... ... ... Yes, well, it seems this pattern that I had made from some pair of pants I had was the base, no seams added (and no notes), pattern. And from a fairly tight fitting pair of pants. Not a design that would fit this fairly stiff fabric, or the intended use. Momentarily bummed I folded it all up and put it away. [see below for my revisit to these pants]. I then went back to square one (and the start of this article) where I should have started to begin with. Well, sort of where I should have started. My first trial pair was of the ultra light some-kind-of-synthetic, and very hard to work with. The edges were happy to ravel just by looking at them. Simply not the material to use when fussing with adjustments. But I did end up with a useable pair of pants, rather dressy and nice for hot summer days in public when I didn't want to wear shorts or skirt. And I made what adjustments I could to the pattern.
Number three (or is that four?). I had some 3 ply nylon for lighter hiking pants. It was getting warmer out and I wanted something between shorts and jeans. I figured my pattern was pretty good. Well, 3 ply nylon is not the same as flexible double knit. Thankfully the pattern was close enough, and seams generous enough, for many alterations. I spent an awful lot of time trying on, twisting this way and that on a chair in front of the bathroom mirror, trying to figure out how to get that rear end area to be (1) comfortable, and (2) drape nicely so it looked decent. The side seams weren't quite as difficult but they entered into the whole thing. I searched online, getting an idea here or there, but I had trouble putting what I read or saw into practical adjustments. So I mainly just kept fiddling, and this fabric wasn't the best for that. But I did come out with a reasonably fitting and quite wearable pair of hiking pants which went right into use.
So that ended my trial-by-pants sewing project for that winter. The sewing table turned back into a kitchen table and the sewing machine uncovered only for immediate necessary repairs, until the next winter. *** TIPS
*** "Sewing Outdoor Gear" by Rochelle Harper, published by Taunton Press (the "Threads" magazine folks). Highly Recommended!! The whole book is full of information, tips, ideas, techniques. But if the only thing you get out of it (which isn't likely) is the two pages on "Altering a Pattern's Crotch Length or Point" it will be well worth the money. I managed to come close to what they recommend on my own clunky and frustrating way, but it would have been a lot easier - and more fun - if I'd read that part of the book first. Even more frustrating, the book was on my book shelf the whole time, I just didn't know about those important two pages. I have since read the whole book, when not working on any particular project, just so I'll - hopefully - remember to look for that part in the book when I need it. I will for sure make use of their instructions and tips on my next pair of pants. January 2021 - Finally, that first pair I started on are now Finished - Successfully!!
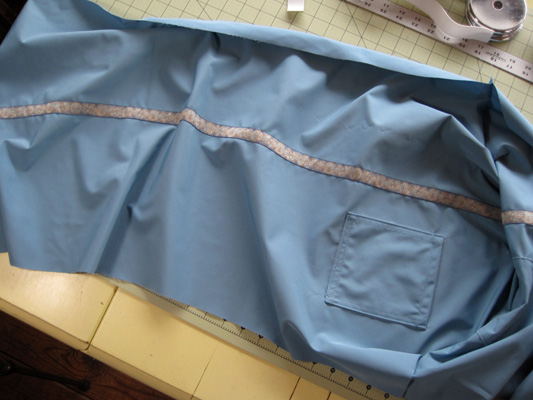
In my earlier efforts I had made a lot of likely not removable lines and marks with Prismacolor pencils (great for marking on sturdy fabric that washable pens will rub off of, but only if safely on the inside). Many marks and lines were on what I had thought was the out side. But in looking again at the fabric I decided it should go the other way out anyway so it ended up with only a few light colored lines on the finished outside near the yoke. They aren't noticeable and will hopefully wear off in time. I measured and figured and laid out the fabric pieces and my pattern this way and that until I came up with a plan. The front seam couldn't quite go down the center but it was close. There was enough fabric to piece together the upper part. I couldn't bring that crotch point farther forward like I wanted (next pair I will!) but I thought this would work. I seamed together the various pieces and top stitched them flat, which surprisingly made them look more "on purpose" and part of the design. Laying the pattern on top, careful to line it up correctly, I cut out my salvaged pieces, pinned and started sewing. This fabric was so nice to work with. It didn't stretch or skew or fray or slip. I had high hopes. This part didn't take long - I love sewing up pants for this reason. There was some adjustments to be made at the waist and the cuffs since the fit of sturdy fabric is different than more flexible material. Plus for the intended use I wanted a slightly higher waist and longer length. The first to ease the bulk at the waist when wearing several underlayers; the second to help keep snow out of my shoes and boots in the winter. These would be my winter hiking pants. And a success they did turn out to be! They've kept me warm and comfortable through our many fall and winter hikes this year and I expect they will continue. Sometimes things do indeed work out in the end.
Elastic Waist Pants - sewing instructions 1-22-2021 by Sue Robishaw* 3/8" seams * hem pockets - mark & sew on * sew front and back seams, end 3/8" from end at crotch * top stitch seams flat down to start of curve (if wanted) * sew inner leg seams starting at crotch, 3/8" from edge * mark "fold to" lines @ 3/4" and 3 1/8", and waist line @ 1 3/4" (if 1" elastic) * sew outer seams - if not sure of fit use easy to see thread color & longer stitch, in case have to remove * test fit - use same width elastic piece to hold up top, fold material over elastic at waist line * make adjustments if needed - final stitch outer seams w/ regular color thread, just inside of baste stitch * clip curves at crotch * zz edges * double stitch crotch seams using narrow stitch * zz all raw seams edges * fold in and sew elastic pocket * put in elastic - test fit & pin - stitch ends together - sew rest of pocket * try on with shoes most likely to wear * mark cuff hem length (leave generously long) * fold and sew cuff hem * after worn / washed several times, zz stitch elastic along top edge to keep from twisting in pocket
Copyright by Susan Robishaw |
 March
2020 - The Pants Adventure Begins ... Making the Pattern
March
2020 - The Pants Adventure Begins ... Making the Pattern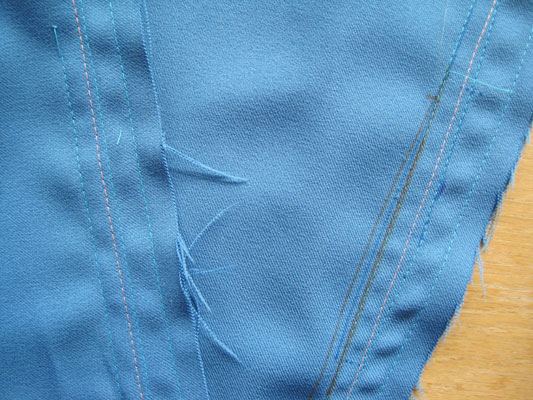 On
to the next fabric, a blue poly double knit. Sturdy I figured,
it should do. Very different from the light weight navy above
but challenging in its own right. Certainly heavier but it also
loved to stretch on the bias. It was quite accommodating even
when I didn't want it to, making it challenging to figure out
what adjustments would be needed for a non-stretchy fabric. More
fitting, more adjustments, on the pants and the pattern. And I
again came out with an acceptable pair of pants, though the fit
just wasn't yet quite there. I realized this fabric wasn't
something that suited me anyway. I didn't need "office" pants; I
wanted hiking or homestead pants. These went to the thrift
store.
On
to the next fabric, a blue poly double knit. Sturdy I figured,
it should do. Very different from the light weight navy above
but challenging in its own right. Certainly heavier but it also
loved to stretch on the bias. It was quite accommodating even
when I didn't want it to, making it challenging to figure out
what adjustments would be needed for a non-stretchy fabric. More
fitting, more adjustments, on the pants and the pattern. And I
again came out with an acceptable pair of pants, though the fit
just wasn't yet quite there. I realized this fabric wasn't
something that suited me anyway. I didn't need "office" pants; I
wanted hiking or homestead pants. These went to the thrift
store.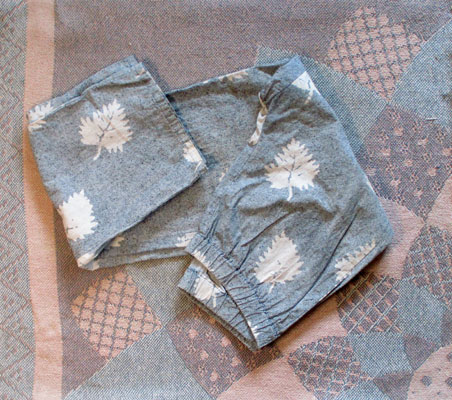 I finally - and this is
where you should come in - did what I REALLY should have done
way back when. I came across some cheap made, but nice pattern
stamped on, cotton fabric - in my fabric drawer. Then I remembered -
I'd picked that up at the thrift store some time ago to use to
make a muslin pattern for pants. Oh. I washed the material,
ironed it, cut out with my latest pattern with generous seams
and proceeded to fit and fiddle, taking in here, letting out
there. After all the other fabrics I'd put myself through this
plain cotton was a dream. And my pattern had gotten closer with
each make so it wasn't too far off. I managed to come up with
decent pants, and a good pattern. Whew, what I don't put my self
through sometimes. And even better, these inexpensive cotton
fabric pants turned out to be great light-weight work pants. And
were they ever appreciated last summer, the hottest on record,
when working on our house roof (underground house = a lot of
moving dirt) when I needed to wear long pants but it was
definitely shorts weather.
I finally - and this is
where you should come in - did what I REALLY should have done
way back when. I came across some cheap made, but nice pattern
stamped on, cotton fabric - in my fabric drawer. Then I remembered -
I'd picked that up at the thrift store some time ago to use to
make a muslin pattern for pants. Oh. I washed the material,
ironed it, cut out with my latest pattern with generous seams
and proceeded to fit and fiddle, taking in here, letting out
there. After all the other fabrics I'd put myself through this
plain cotton was a dream. And my pattern had gotten closer with
each make so it wasn't too far off. I managed to come up with
decent pants, and a good pattern. Whew, what I don't put my self
through sometimes. And even better, these inexpensive cotton
fabric pants turned out to be great light-weight work pants. And
were they ever appreciated last summer, the hottest on record,
when working on our house roof (underground house = a lot of
moving dirt) when I needed to wear long pants but it was
definitely shorts weather. 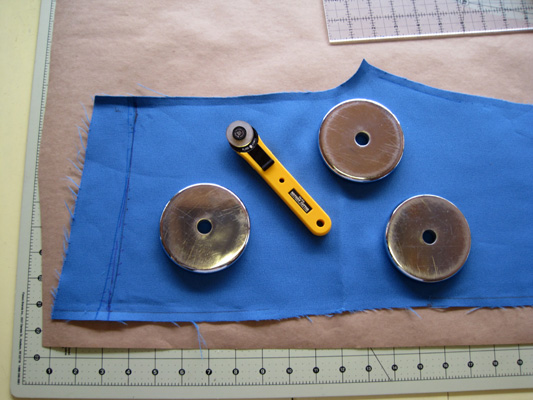
 ***
***
 ***
If you are sure of your pattern (and aren't likely to need to
adjust the outer seams) sew a contrasting ribbon along just
inside the outer seam allowance before sewing that seam. OR sew
the outer seam first and put the ribbon over, or beside, the
stitching. Then sew the inner leg and front/back seams. It makes
a nice touch on plain fabric.
***
If you are sure of your pattern (and aren't likely to need to
adjust the outer seams) sew a contrasting ribbon along just
inside the outer seam allowance before sewing that seam. OR sew
the outer seam first and put the ribbon over, or beside, the
stitching. Then sew the inner leg and front/back seams. It makes
a nice touch on plain fabric.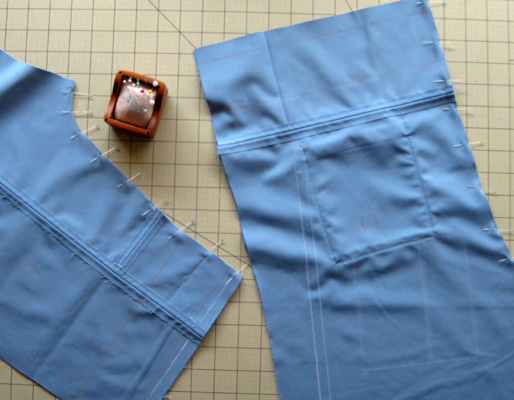 A
new winter and a new perspective, I took another look at that nice
recycled polyester fabric and aborted pants project and realized there
was enough material left that I could probably piece it together to
still get a pair of pants out of it. It was no longer available where I
had purchased it (The Rain Shed, outdoor/active fabric shore). With my
earlier disappointment and irritation with myself past I brought it out
and looked it over with my new, successfully tested, pattern in hand.
Sure enough, with a new "seam" down the front and "yoke" pieces added to
the top I figured I could make it work.
A
new winter and a new perspective, I took another look at that nice
recycled polyester fabric and aborted pants project and realized there
was enough material left that I could probably piece it together to
still get a pair of pants out of it. It was no longer available where I
had purchased it (The Rain Shed, outdoor/active fabric shore). With my
earlier disappointment and irritation with myself past I brought it out
and looked it over with my new, successfully tested, pattern in hand.
Sure enough, with a new "seam" down the front and "yoke" pieces added to
the top I figured I could make it work.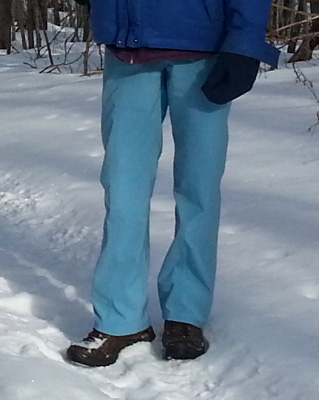
|
Back to top |
|
|
|
|
* Should you want to use all or part of one of our articles in a non-profit publication, website or blog we simply ask that you give proper credit and link (such as "article by Sue Robishaw/Steve Schmeck from www.ManyTracks.com"), and we'd enjoy knowing where it is used. Thanks! We always appreciate links to our site www.ManyTracks.com from appropriate sites, and we thank you for recommending us! |
|
|
Have you read "Frost Dancing - Tips from a Northern Gardener"? A fun short read. or "Homesteading Adventures" Creating our backwoods homestead--the first 20 years.
and
"Growing
Berries for Food and Fun"
A journey you can use in your own garden. |