|
Bathing Suit / Skivvies
 What
better time to think about summer swimming than the middle of winter! At least
it’s a good time to sew for that coming season. I bought fabric last spring to
make a new bathing suit but the warm months definitely aren’t the time for me
for anything other than quick emergency sewing or mending projects. The plans
(and piles) for winter sewing/mending/altering are larger than days available so
I simply pick out what most interests me, or is highest in my focus at the time.
And thinking of kayaking made me think of the bathing suit that I don’t yet
have. Actually, I seldom go swimming but kayaking is high on our list of “do
more of” this summer and it is most certainly a water sport (as in ‘wet’). Though
I hope to get my paddling technique down this summer so less of the river water
ends up in my lap, appropriate clothing makes kayaking more fun. That includes
being ready to slip out into the water for a swim. What
better time to think about summer swimming than the middle of winter! At least
it’s a good time to sew for that coming season. I bought fabric last spring to
make a new bathing suit but the warm months definitely aren’t the time for me
for anything other than quick emergency sewing or mending projects. The plans
(and piles) for winter sewing/mending/altering are larger than days available so
I simply pick out what most interests me, or is highest in my focus at the time.
And thinking of kayaking made me think of the bathing suit that I don’t yet
have. Actually, I seldom go swimming but kayaking is high on our list of “do
more of” this summer and it is most certainly a water sport (as in ‘wet’). Though
I hope to get my paddling technique down this summer so less of the river water
ends up in my lap, appropriate clothing makes kayaking more fun. That includes
being ready to slip out into the water for a swim.
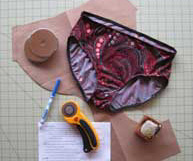
Bathing suit bottom or underwear -- there’s little difference and both are
quite easy and fast to make (relatively speaking). I’ve been making my
skivvies for some time, after realizing it would be faster to make them than
alter factory made ones to fit and feel the way I like them. The most time
consuming part is coming up with and fine-tuning your pattern. You can buy a
pattern or find one online, then go from there to get your just-for-you fit.
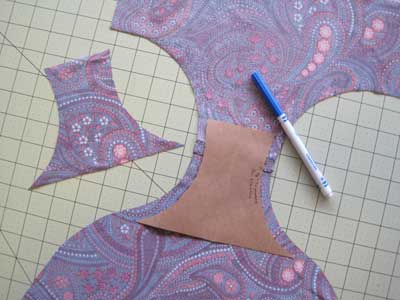
Or simply cut apart an old bathing suit bottom or underwear that already
fits and trace out your pattern from that. That’s what I did. I like to use
brown kraft paper for patterns. It’s sturdy and holds up well to repeated
use, and adjusting.
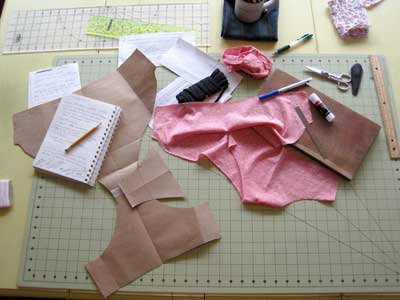
Draw your pattern, make notes of
seam allowances and anything else you find helpful right on the
pattern. When it comes time to adjust your initial pattern tape
extra paper wherever needed. Make your new pair, adjust some
more, etc. When I'm to the "fairly confident this is the one
(hah!!)" then I cut out a new pattern. If you do a lot of
pattern making, a roll of brown paper is handy. Gather your
materials and sew away.
Fabric is whatever suits you; but it’s easier to get a nice fit with
stretchy fabric--cotton or cotton blend knits, or lycra or similar material
of whatever weight you like. For a bathing suit you’ll likely go for a
non-cotton lycra or blend, lined or not depending on the weight of the
fabric. My favorite, and most often used, source for fabric is thrift
stores. I’m of a size that I can easily get a skivvy for me out of a large
sized knit shirt (and an extra large shirt of an appropriate pattern might
get Steve a new pair of undershorts!). I end up with more variety of prints than I’d likely
choose at a fabric store. It makes it more fun. And at a few dollars you can
fill your drawer and make however many you need to while you are fine-tuning
your pattern to get that perfect fit. It can get a bit addictive, however,
it’s such an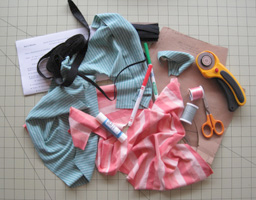 easy and fun sewing project!
The popularity of sewing underwear can be attested to by a quick search
online--no lack of encouragement there. And there as many ways to make them
as people who do so, though the
techniques are generally similar. I came up with my own
instructions by doing; making additional notes or changes every
time I make a pair. Here is how I make mine, and some tips I've
learned. I like my skivvies/bathing suit bottoms to be
reversible when possible so I take that into consideration when
choosing fabric and elastic and when sewing.
Cotton or cotton-blend knits fit differently than lycra,
and there is quite a difference in stretchiness of different fabrics. After
awhile you’ll get a feel for it simply by stretching the fabric and feeling
how much elasticity there is. Make skivvies out of several different types
of fabric then make notes. Mostly I add a half or full inch to the side
seams for cotton/cotton blend knits (my main pattern cutout is for thin
stretchy fabrics since it’s easy to add to the pattern when cutting the
pieces; harder to subtract). Or visa versa (subtract some at the
side seams for thinner, stretchier fabrics if your pattern is geared toward
heavier). If no stretch at all you might want to try adding to the center
instead of just at the seams.
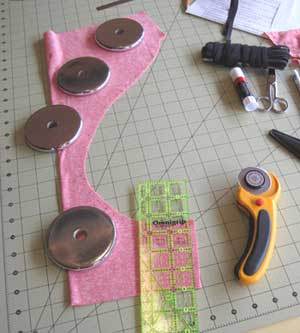
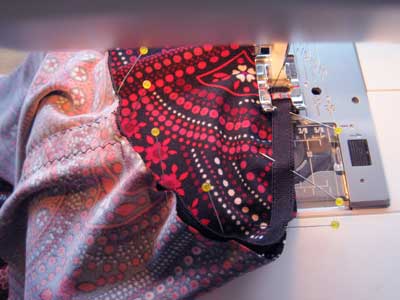
A rotary cutter and weights makes cutting stretchy fabric a lot
easier and for me, more accurate. Though the photo shows the
rotary cutter "open" I NEVER set it down this way (except for
this picture apparently!). The cutter is always closed and
locked first. Do it consciously enough times and it becomes a
habit you won't have to think about, but your skin will thank
you.
 Crotch
-- It's nice if you can cut your pattern out of one piece of
fabric. But if because of the size/shape of your fabric simple
seam it at the crotch. This often happens when using a knit
shirt and you have to get half from the back and half from the
front. For comfort I overlap and stitch this seam (as I do the
side seams), instead of the usual basic 'fronts together' seams.
You can put this seam wherever you need to to fit your fabric. Crotch
-- It's nice if you can cut your pattern out of one piece of
fabric. But if because of the size/shape of your fabric simple
seam it at the crotch. This often happens when using a knit
shirt and you have to get half from the back and half from the
front. For comfort I overlap and stitch this seam (as I do the
side seams), instead of the usual basic 'fronts together' seams.
You can put this seam wherever you need to to fit your fabric.
Overlap 1/2" and either pin or
use a glue stick (my preference - see Side Seams) and top
stitch.
 Crotch
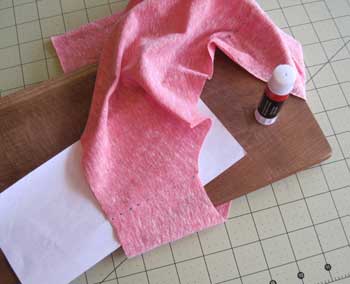
Lining -- This can be whatever fabric you like. I
use self fabric when my fabric is same in or out so the 'inside'
of the skivvy can be 'outside', and vice versa. On a bathing
suit you may make a full lining. On heavier fabric no lining is
needed, unless you need to cover a seam for comfort. Crotch
Lining -- This can be whatever fabric you like. I
use self fabric when my fabric is same in or out so the 'inside'
of the skivvy can be 'outside', and vice versa. On a bathing
suit you may make a full lining. On heavier fabric no lining is
needed, unless you need to cover a seam for comfort.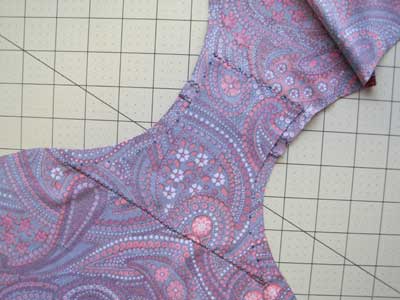
* Cut lining piece width of main
pattern minus width of elastic. This helps keep bulk down in
this area.
* Pin or glue stick ends and sides.
* Top stitch ends. Sides will be held in place when stitching
leg elastic.
 Side
Seams -- Oh, how irritating they can be, and uncomfortable. But they
certainly don’t have to be! My easy solution is to overlap and
top-stitch--sides, crotch (if there is a seam), lining. So much more
comfortable. And the humble but so appreciated glue stick makes the easy
even easier. It helps me do a better, cleaner job of sewing. I use a 1/2”
overlap. Let the glue dry before sewing; a quick press with the iron helps. ZZ stitch down one side of the overlap, turn over and do the other side. For
this and for attaching the elastic I use a length and width of 2, loosen
needle tension one number, and loosen the pressure foot tension. A
ballpoint/jersey needle for knits and a stretch needle for lycra makes it
all go smoother. Side
Seams -- Oh, how irritating they can be, and uncomfortable. But they
certainly don’t have to be! My easy solution is to overlap and
top-stitch--sides, crotch (if there is a seam), lining. So much more
comfortable. And the humble but so appreciated glue stick makes the easy
even easier. It helps me do a better, cleaner job of sewing. I use a 1/2”
overlap. Let the glue dry before sewing; a quick press with the iron helps. ZZ stitch down one side of the overlap, turn over and do the other side. For
this and for attaching the elastic I use a length and width of 2, loosen
needle tension one number, and loosen the pressure foot tension. A
ballpoint/jersey needle for knits and a stretch needle for lycra makes it
all go smoother.

Elastic -- As with fabric so with elastic, as far as differences in stretch.
I have a strong preference for comfort and found some soft-on-one-side
elastic that I like. It was the uncomfortable skritchy seams and elastics
that got me into making my own to begin with. Our local stores haven’t much
of a selection so I bought a lot of different types from Sew
 Sassy Fabrics (www.sewsassy.com)
online. Plenty of choices there, so it’s easy to experiment and find what
you like best. The last few pairs I made I tried out a wider, softer,
elastic for the tops. While I do like the feel and fit of the elastic I
neglected to take into account that it had less stretch than what I had been
using. So back to the sewing room (actually, the kitchen table) - cut out
the side seams, piece in an extension. This works but it would have been
much easier to simply add an inch to the elastic to begin with. This elastic
also turned out to not be very durable unfortunately. Sassy Fabrics (www.sewsassy.com)
online. Plenty of choices there, so it’s easy to experiment and find what
you like best. The last few pairs I made I tried out a wider, softer,
elastic for the tops. While I do like the feel and fit of the elastic I
neglected to take into account that it had less stretch than what I had been
using. So back to the sewing room (actually, the kitchen table) - cut out
the side seams, piece in an extension. This works but it would have been
much easier to simply add an inch to the elastic to begin with. This elastic
also turned out to not be very durable unfortunately.
Finding and fitting just the
right lengths of elastic can be a bit of trial and error (make
notes!). Using an already-fits item helps in the initial guess.
Use plenty of pins. Here are my notes for sewing on the elastic.
 *
Reduce pressure foot to 1 // Loosen needle tension to 3 //
Stretch and stitch slowly *
Reduce pressure foot to 1 // Loosen needle tension to 3 //
Stretch and stitch slowly
* Butt and handstitch ends together if sturdy. Overlap half inch
and stitch if not.
* TOP: Mark four spots evenly spaced on both fabric and elastic.
Match, pin and stitch.
* LEGS: No stretch when pinning front, some stretch crotch, more
on back, most of widest area.
* Pin back side of elastic down onto right side of fabric, even
with outer edge, picots down.
* Stitch along bottom edge (or near picots)
* TOP: Trim back any fabric showing over elastic.
* Fold in and stitch along/over bottom of elastic. [Or fold in
twice for fabric covered]
* Elastic relaxes back to shape after washing. Wait till after a
few wearings/washings to make decision on pattern adjustments.
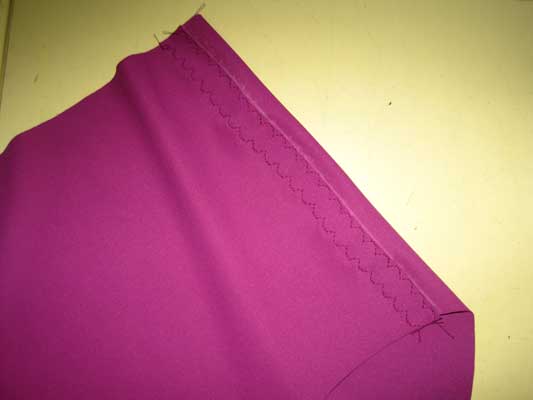 Any
of the stitching can add a little flair by using a more
decorative stitch. Experiment with your fabric and different
combinations. My favorite is a simple 3-step-zigzag. Any
of the stitching can add a little flair by using a more
decorative stitch. Experiment with your fabric and different
combinations. My favorite is a simple 3-step-zigzag.
Make your skivvy, wash it, wear it, adjust
your pattern, find some more material, make another pair, wash it, wear
it... There’s no end to this instruction! Do wash before making altering
decisions as the fabric and elastic will relax back to shape in the washing
and be more a more accurate fit.
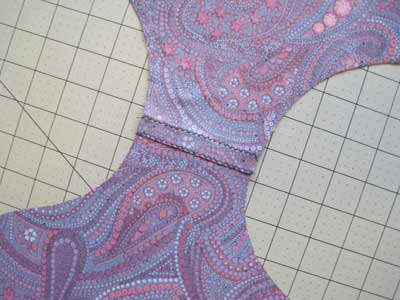
So that takes care of the bathing suit bottom test piece (the first photo)
and now I have to come up with the top. I still have that fabric I bought
last spring and hopefully I’ll get to sewing up that final bathing suit
before the snow goes. BTW, much of the above pertains to men’s knit undershorts (bathing suit/biking short/running shorts...), too. They are a
bit more complicated to sew up but not overly so. So next time you’re in the
local thrift store, check out the larger sized knit shirts for your next
sewing project, for him or her.
Copyright by Susan Robishaw
|
